A developer notices an extra tag in their site's markup that nobody on the team added. They remove it, tighten access, rotate the credentials that could have let it in, and the immediate fire is out. Then comes the harder question: how do you know it does not come back, quietly, on a Tuesday, on a page you do not look at every day? Server logs will not show it, because the change lives in the page a visitor's browser renders, not in a file on your origin. A firewall will not show it, because nothing malicious ever hits your server. The only place the change is visible is the page as it actually loads.
That is the gap this guide closes. You put security controls in place, and now you want to be told quickly when any of them slips: a script you did not add appears on a page, a security header quietly disappears, or your SSL certificate drifts toward expiry or gets replaced. Below is how to set that monitoring up on your own site, what each check catches and misses, how to keep it quiet enough that your team keeps reading the alerts, and how the notifications reach you.
If your specific worry is card-skimming code on a payment page, read our deeper explainer on Magecart and client-side skimming first, then come back here for the hands-on setup. If this is being driven by a compliance requirement, the PCI DSS 4.0 client-side script monitoring guide maps the same controls to requirements 6.4.3 and 11.6.1, which are published by the PCI Security Standards Council.
How do you monitor a website for injected scripts?
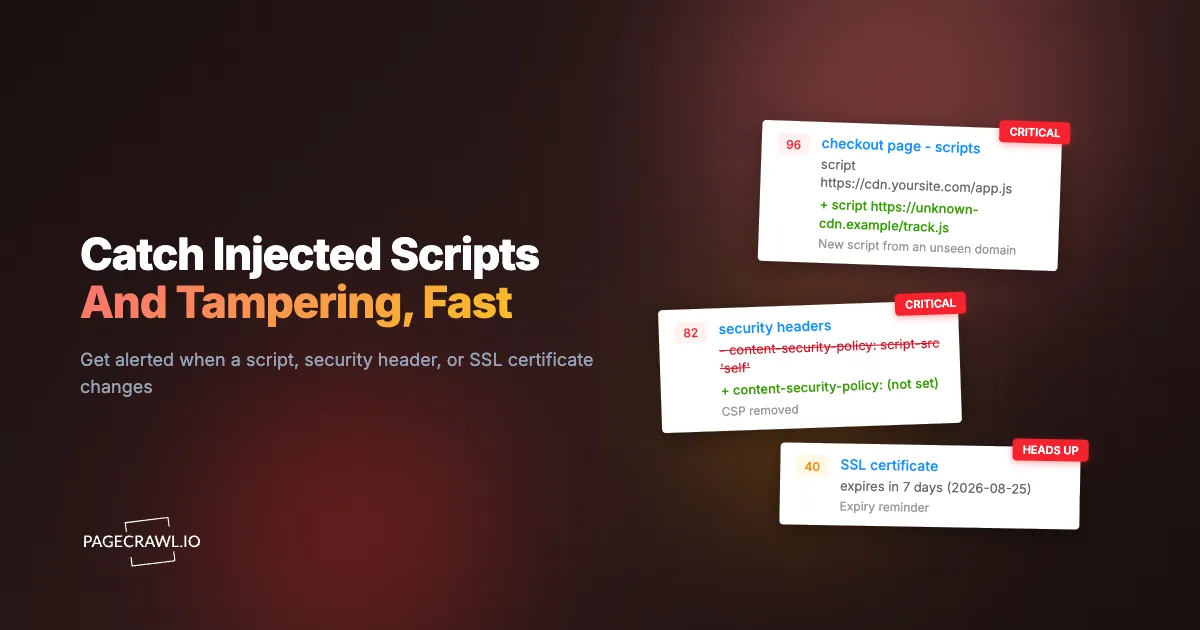
Add a Page Resources element to a monitor for the page you want to watch. It records every script the page loads, from external URLs and inline code alike, and alerts you when that set changes. A script that appears from a domain the page has never used before is flagged as the most serious kind of change, because an unexpected new script domain is the typical signature of an injected tag or a compromised dependency.
The reason this works where simpler approaches fail is where the check runs. Because the page is loaded the way a real browser loads it, the check sees scripts that are added at runtime by other scripts, by a tag manager, or by an injected loader, not only the ones written into the page source. A plain source-code diff of the HTML misses every one of those, which is exactly the class of tampering that matters.
Scripts from a URL versus inline scripts
Injected code arrives in two shapes, and a monitor has to catch both. The first is a <script src="..."> that pulls code from somewhere else; the injection tell is a new or unexpected source domain. The second is an inline script written straight into the page, which issues no network request at all and so is invisible to anything watching only network traffic. Page Resources captures both: external scripts by their URL, inline scripts by a stable fingerprint of their contents, so a newly added inline block shows up as a change even though it never touched the network.
Choosing what to watch: scripts or third-party domains
The element has three modes. Scripts tracks every script on the page and is the most sensitive. Third-party domains only tracks the distinct external domains the page contacts, which is quieter and survives the single most common source of false positives: hashed asset filenames that change on every deploy. Scripts and domains does both. If your build stamps a content hash into bundle names (app.a1b2c3.js becoming app.d4e5f6.js each release), start with third-party domains so a routine deploy does not read as a change, then add script-level watching on a page whose script set is stable.
What is the fastest way to add security monitoring?
Use the Security Bundle. When you add a tracked element, open "Show more types" and pick Security Bundle from the Security category. It adds three elements in one action, injected-script detection, security-header monitoring, and SSL certificate monitoring, each with sensible defaults. You can remove any you do not need.
This is the recommended starting point because it covers the three most common tampering and posture signals at once, without you having to know how each element is configured. It is the difference between a five-minute setup and a decision tree. From there you can tune the individual elements, adjust the Page Resources mode, or point the same set at additional pages. The help centre walkthrough on watching your site for injected scripts, weakened headers, and expiring certificates covers every option in the bundle screen by screen.
When to split the bundle across pages
One monitor covers one URL, and different pages carry different risk. A checkout or login page earns the full bundle at a tight check interval. A marketing page might only need certificate and header monitoring. The bundle is a fast way to lay down full coverage on your highest-value page first; once that is running, clone the approach onto the next page down your risk list rather than trying to cover everything at once.
How do you get alerted when a security header changes?
Add a Security Headers element. It tracks the response headers that define your page's security posture, including Content-Security-Policy, Strict-Transport-Security, X-Frame-Options, X-Content-Type-Options, Referrer-Policy, Permissions-Policy, and the Cross-Origin policies, and alerts you when one is removed or weakened. A Content-Security-Policy that starts allowing inline scripts, for example, is reported as a serious change, because loosening the policy is frequently the first move in an injection campaign.
Catching a weakened header early can mean catching an attack before the payload is even live. An attacker who wants to inject an inline skimmer often has to relax the Content-Security-Policy first, so the header change is an earlier and cleaner signal than the script that follows it.
Why rotating values do not create noise
Some headers legitimately change on every response. A Content-Security-Policy commonly carries a fresh per-request nonce, and directive order is not meaningful. If a monitor compared the raw header text, every single check would report a change and the alerts would be worthless within a day. Security Headers normalizes those values, collapsing a rotating nonce and sorting directives, so only a real policy change is reported. Losing a header entirely is shown as an explicit "(not set)" line rather than a line that quietly disappears, so a regression from a bad deploy is easy to spot in the diff instead of easy to miss.
How do you get an alert before an SSL certificate expires?
Add an SSL Certificate element. Beyond tracking the issuer, serial number, expiry date, and the domain names the certificate covers, it sends two expiry reminders before the certificate lapses: an early heads-up at 14 days and a last-chance warning at 3 days. The host is taken from the monitor URL automatically, so there is nothing to configure. An expired certificate throws browser security warnings and can break the site outright, and it remains one of the most common self-inflicted outages precisely because the failure is silent right up until the deadline.
A routine renewal that simply pushes the expiry date further out is treated as unremarkable, so an auto-renewing certificate does not generate a false alarm every cycle. What does get flagged is a change of issuer or subject, which can point to a replaced or misconfigured certificate rather than a normal renewal, and is reported as an important change.
Turning the expiry reminder off
Some teams add certificate monitoring only to catch replacement, not to be reminded about expiry they already track elsewhere. Clear the "Alert me before this certificate expires" checkbox on the element and you keep the change detection (issuer, subject, covered domains) without the countdown. For teams that want to go a step further on certificate-based attacks, pairing this with certificate transparency log monitoring catches attacker-issued certificates for lookalike domains that a skimmer might exfiltrate to.
Which channels do the alerts use?
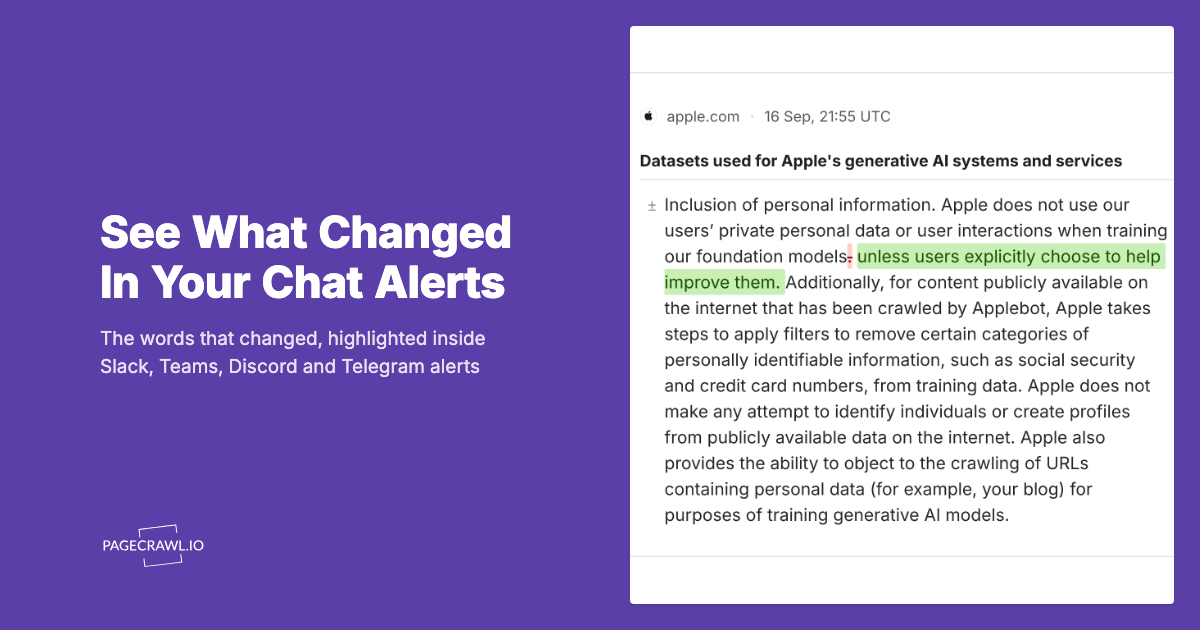
Security alerts use your monitor's normal notification settings, so they reach whichever channels you have already set up: email, Telegram, Slack, Discord, Microsoft Teams, and webhooks. SSL expiry reminders go through the same channels, so a team that lives in Slack is told there rather than only by email, and there is no separate configuration to maintain for security alerts.
Alerts arrive when the next check detects the change. Checks run as often as every 2 minutes depending on your plan, so for a high-value page like a checkout or login screen, a short interval gives you the earliest possible notice. Route the routine review to email, push fast team visibility to Slack or Teams, and send a webhook into your incident platform or SIEM so an unexpected script opens a ticket and pages on-call rather than waiting for someone to read an inbox.
How do you keep the alerts from becoming noise?
You keep the signal clean by scoping what you watch and by building a verify-against-deployment habit. A team that learns to ignore alerts is worse off than a team with no monitoring at all, so tuning out legitimate churn is part of the control, not a distraction from it. Three habits do most of the work.
First, choose the right Page Resources mode for how your site ships, using third-party domains where hashed filenames would otherwise flood you. Second, announce security-relevant deploys to the same channel that receives the alerts, so the next notification is expected rather than alarming, and use per-page notification conditions and filters to hold back anything that does not meet your threshold. Third, when an alert fires, compare what changed against the deployment you shipped and your known-good inventory of allowed scripts and domains; matches get acknowledged, and anything that does not map to a deployment goes straight to investigation. For pages where you need to exclude specific dynamic regions, a focused CSS selector approach narrows the diff to the parts that matter.
Setting it up step by step
- Inventory your highest-risk pages. List the pages where a compromise hurts most: checkout, login, account and billing pages, and any form that collects sensitive input. Each becomes a monitor. Start with the single most important one rather than trying to cover the whole site on day one.
- Add the Security Bundle. On that monitor, add a tracked element, open "Show more types", and choose Security Bundle from the Security category. That lays down script, header, and certificate monitoring in one action.
- Pick the Page Resources mode that fits your deploys. Leave it on Scripts for the most sensitivity, or switch to third-party domains if your asset filenames change every release.
- Set a risk-based check frequency. Match the interval to the value of the page. High-value pages deserve the tightest frequency your plan allows; lower-value pages can check less often.
- Confirm your notification channels. Make sure the monitor routes to the channels your team actually watches, so an alert lands where someone will see it.
- Build the verify habit for two weeks. Announce deploys, check each alert against what you shipped, and acknowledge the expected ones so a real injection stands out against noise you have already tuned away.
- Expand across templates. An injection often lands on a single page type rather than the whole site, so clone the setup onto the next page down your risk list.
What can this catch, and what can it miss?
It catches the changes that signal tampering and posture drift: a new or swapped script, a new inline script, a page reaching out to a domain it never used before, a weakened or removed security header, and a certificate that is expiring or has been replaced. Because the page is rendered the way a browser renders it, runtime-injected scripts are visible, which is the whole point.
The honest limitation applies to any external monitor: it sees only what its own checks see. An injection that is served only to certain regions, devices, or logged-in users can hide from an outside check that does not match those conditions. If you know an attack was conditional in that way, you can run the checks from a residential IP in the matching country or region so they see what the targeted visitors see. It is also worth pairing page-level monitoring with domain and brand fraud monitoring for the lookalike domains that exfiltration relies on, and with a website archiving workflow so you keep a timestamped record of each page state for incident review.
Choosing your PageCrawl plan
Every security element described here, including the Security Bundle and SSL expiry reminders, is available on every plan, including Free. The Free plan is enough to validate the approach on your most critical page before you scale, and most teams move to a paid tier once they see the value and want tighter check intervals across more pages.
| Plan | Price | Pages | Frequency |
|---|---|---|---|
| Standard | $8/mo or $80/yr | 100 | every 15 min |
| Enterprise | $30/mo or $300/yr | 500 | every 5 min |
| Ultimate | $99/mo or $999/yr | 1,000 | every 2 min |
Annual billing saves two months across every paid tier. The economics favor monitoring heavily: an injection that runs undetected for weeks can turn into a breach disclosure, forced credential rotation, and lost customer trust, while monitoring costs a few dollars a month. Standard covers most single-site teams with fifteen-minute checks; Enterprise and Ultimate suit multi-brand operations and agencies that need five- or two-minute checks across hundreds of pages.
Getting Started
Take your single most important page, the one where a compromise would hurt most, and add the Security Bundle to a monitor for it right now. Set the check frequency as tight as your plan allows, confirm the alert channels your team watches, and let it run. Spend two weeks building the verify-against-deployment habit so a real injection would stand out against noise you have already tuned away, then expand to the rest of your high-value pages.
The next time an extra tag appears on a page nobody was looking at, you want to hear about it on the next check, not from a customer. Monitor the page your visitors actually receive, and you see the change they never would.