This guide covers the identity provider (IdP) side of SSO setup with step-by-step instructions for Azure AD, Google Workspace, Okta, OneLogin, and custom SAML providers. For PageCrawl-side settings (enabling SSO, enforcement, JIT provisioning), see the SSO Configuration Guide.
Before you begin, ensure you have:
- Access to your identity provider's admin console
- PageCrawl Enterprise or Ultimate plan with SSO enabled
- Team owner's verified corporate email address
Get Your Service Provider Information
IMPORTANT: Complete this step first before configuring your Identity Provider
- Navigate to Settings → Team → Auth & SSO in PageCrawl
- Copy the Metadata URL shown in the blue Service Provider information box
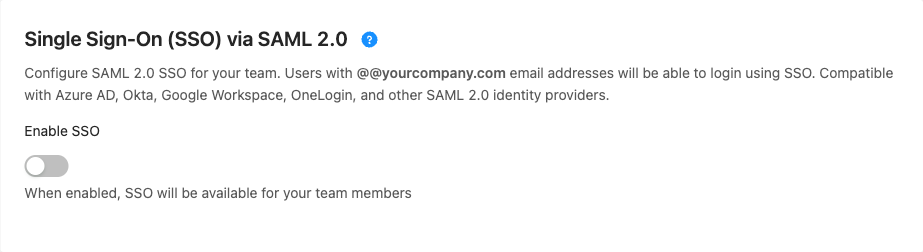
- Keep this URL handy - most Identity Providers can automatically import all configuration from this metadata URL
Note: If your IdP doesn't support metadata import, copy the individual URLs from PageCrawl (they will also be shown in the same box):
- Reply URL (Assertion Consumer Service URL)
- Sign on URL
- Logout URL
Additional information for reference:
- NameID Format: Email Address (
urn:oasis:names:tc:SAML:1.1:nameid-format:emailAddress) - Binding: HTTP-POST for ACS, HTTP-Redirect for Single Sign-On
- App logo: If your identity provider lets you upload an app logo or icon, you can download the PageCrawl logo.

Step 1: Create Enterprise Application
- Sign in to the Azure Portal
- Navigate to Azure Active Directory → Enterprise Applications
- Click New application
- Click Create your own application
- Name it "PageCrawl" and select Integrate any other application you don't find in the gallery (Non-gallery)
- Click Create
Step 2: Configure SAML
- In your PageCrawl application, click Single sign-on in the left menu
- Select SAML as the single sign-on method
- In section 1. Basic SAML Configuration, click Edit and enter:
- Identifier (Entity ID): Paste your Entity ID from PageCrawl (e.g.,
https://pagecrawl.io/sso/saml/abc-123.../metadata) - Reply URL (ACS URL): Paste your Reply URL from PageCrawl (e.g.,
https://pagecrawl.io/sso/saml/abc-123.../acs)
- Identifier (Entity ID): Paste your Entity ID from PageCrawl (e.g.,
- Click Save
Step 3: Configure Attributes & Claims
The default Name ID (user.mail) is sufficient. No additional changes needed.
Step 4: Download Metadata
- In section 3. SAML Signing Certificate, copy the App Federation Metadata Url
- In PageCrawl SSO settings, paste this URL in the Metadata URL field
- Click Parse Metadata from URL
Step 5: Assign Users
- Navigate to Users and groups
- Click Add user/group
- Select users or groups who should have access to PageCrawl
- Click Assign

Step 1: Create Custom SAML Application
- Sign in to your Google Admin Console
- Go to Apps → Web and mobile apps
- Click Add app → Add custom SAML app
- Enter "PageCrawl" as the app name
- Click Continue
Step 2: Download Google IdP Metadata
- On the Google Identity Provider details page, click Download Metadata
- Save the XML file
- Click Continue
Step 3: Configure Service Provider Details
- Enter the following values:
- ACS URL: Paste your Reply URL from PageCrawl (e.g.,
https://pagecrawl.io/sso/saml/abc-123.../acs) - Entity ID: Paste your Entity ID from PageCrawl (e.g.,
https://pagecrawl.io/sso/saml/abc-123.../metadata) - Start URL: Leave empty
- Name ID format: EMAIL
- Name ID: Basic Information > Primary email
- Signed response: Leave unchecked (PageCrawl requires signed assertions, which is the industry standard default)
- ACS URL: Paste your Reply URL from PageCrawl (e.g.,
- Click Continue
- Click Finish (skip attribute mapping)
Step 4: Import Metadata to PageCrawl
- Open the downloaded metadata XML file
- In PageCrawl SSO settings, paste the content into Metadata XML field
- Click Parse Metadata XML
Step 5: Turn On the App
- In Google Admin, click on your PageCrawl app
- Click User access
- Select ON for everyone or specific organizational units
- Click Save

Step 1: Add Application
- Sign in to your Okta Admin Console
- Go to Applications → Applications
- Click Create App Integration
- Select SAML 2.0 and click Next
Step 2: General Settings
- Enter "PageCrawl" as the App name
- (Optional) Upload a logo. You can download the PageCrawl logo to use here.
- Click Next
Step 3: Configure SAML
- In the SAML Settings section, enter:
- Single sign-on URL: Paste your Reply URL from PageCrawl (e.g.,
https://pagecrawl.io/sso/saml/abc-123.../acs) - Audience URI (SP Entity ID): Paste your Entity ID from PageCrawl (e.g.,
https://pagecrawl.io/sso/saml/abc-123.../metadata) - Name ID format: EmailAddress
- Application username: Email
- Single sign-on URL: Paste your Reply URL from PageCrawl (e.g.,
- Leave other settings as default
- Click Next
Step 4: Feedback
- Select I'm an Okta customer adding an internal app
- Click Finish
Step 5: Get Metadata URL
- On the Sign On tab, scroll to SAML Signing Certificates
- Click Actions next to the active certificate
- Click View IdP metadata
- Copy the URL from your browser's address bar
- In PageCrawl SSO settings, paste this URL in the Metadata URL field
- Click Parse Metadata from URL
Step 6: Assign Users
- Go to the Assignments tab
- Click Assign and select Assign to People or Assign to Groups
- Assign users who should have access to PageCrawl
- Click Done

Step 1: Add Application
- Sign in to your OneLogin Admin Console
- Go to Applications → Applications
- Click Add App
- Search for "SAML Test Connector (Advanced)" and select it
Step 2: Configure Application
- Enter "PageCrawl" as the Display Name
- Click Save
Step 3: Configure SAML Settings
- Go to the Configuration tab
- Enter the following:
- Audience (Entity ID): Paste your Entity ID from PageCrawl (e.g.,
https://pagecrawl.io/sso/saml/abc-123.../metadata) - Recipient: Paste your Reply URL from PageCrawl (e.g.,
https://pagecrawl.io/sso/saml/abc-123.../acs) - ACS (Consumer) URL Validator: Use regex pattern
https://pagecrawl\.io/sso/saml/[^/]+/acs - ACS (Consumer) URL: Paste your Reply URL from PageCrawl (e.g.,
https://pagecrawl.io/sso/saml/abc-123.../acs)
- Audience (Entity ID): Paste your Entity ID from PageCrawl (e.g.,
- Click Save
Step 4: Get Metadata URL
- Go to the More Actions menu
- Select SAML Metadata
- Copy the metadata URL
- In PageCrawl SSO settings, paste this URL in the Metadata URL field
- Click Parse Metadata from URL
Step 5: Assign Users
- Go to the Users tab
- Select users who should have access
- Click Save
Custom SAML 2.0 Provider
If your identity provider isn't listed above but supports SAML 2.0, you can configure it manually:
Step 1: Configure Your Identity Provider
In your IdP, create a new SAML application with these settings:
- Entity ID: Paste your Entity ID from PageCrawl (you copied this in the first section above, e.g.,
https://pagecrawl.io/sso/saml/abc-123.../metadata) - ACS URL: Paste your Reply URL from PageCrawl (e.g.,
https://pagecrawl.io/sso/saml/abc-123.../acs) - NameID Format: Email Address
- Binding: HTTP-POST for ACS, HTTP-Redirect for SSO
Step 2: Get IdP Information
From your identity provider, collect:
- Entity ID (IdP Issuer)
- SSO URL (Sign-on URL)
- SLO URL (Sign-out URL) - Optional
- X.509 Certificate
Step 3: Manual Configuration in PageCrawl
- In PageCrawl SSO settings, select the Manual Entry tab
- Enter the collected information:
- Entity ID
- SSO URL
- SLO URL (optional)
- X.509 Certificate (paste the full certificate including BEGIN/END markers)
- Enable SSO and configure JIT provisioning settings
- Click Save Changes
Validation
After configuration, test your SSO:
- Open an incognito/private browser window
- Go to PageCrawl login page
- Enter a test user's email address with your domain
- Verify you're redirected to your IdP
- Complete authentication
- Verify you're logged into PageCrawl successfully
If you encounter issues, check:
- User is assigned to the PageCrawl application in your IdP
- Email domain matches your configured domain
- Metadata was imported correctly
- X.509 certificate is valid and not expired
Notes
- Metadata XML Format: PageCrawl does not support the
EntitiesDescriptorelement. UseEntityDescriptorformat. - Multiple IdPs: Each team supports one identity provider. Organizations that need more than one IdP can set up multiple teams (each with its own identity provider) on a custom plan. Contact support@pagecrawl.io to set this up.
- Certificate Rotation: When your IdP certificate expires, update the metadata in PageCrawl SSO settings.
Support
For assistance with your specific identity provider, contact support@pagecrawl.io.