<?xml version="1.0" encoding="UTF-8"?>
<?xml-stylesheet href="/vendor/feed/atom.xsl" type="text/xsl"?>
<feed xmlns="http://www.w3.org/2005/Atom" xml:lang="en-US">
                        <id>https://pagecrawl.io/help/feed</id>
                                <link href="https://pagecrawl.io/help/feed" rel="self"></link>
                                <title><![CDATA[PageCrawl.io Help Center]]></title>
                    
                                <subtitle>PageCrawl.io Help Center rss feed.</subtitle>
                                                    <updated>2026-04-16T09:45:39+00:00</updated>
                        <entry>
            <title><![CDATA[Cancel or Upgrade Account]]></title>
            <link rel="alternate" href="https://pagecrawl.io/help/account-settings/article/cancel-or-upgrade-account" />
            <id>https://pagecrawl.io/1</id>
            <author>
                <name><![CDATA[PageCrawl.io]]></name>
            </author>
            <summary type="html">
                <![CDATA[<h1>Cancel or Upgrade Account</h1>
<h3>Changing plan or billing interval</h3>
<p>If you would like to change or upgrade your plan, just go to your <a href="/app/settings/subscription">Subscription settings</a> and choose a plan you want to switch to.
Upgrades/downgrades are prorated, meaning, that the unused time will be applied as a credit for the next payment. 
e.g. you subscribed to $8/mo plan but you only used it for half-a-month and decided to upgrade to $30/mo plan. When upgrading, 4$ will be credited back and the remaining half-of-the-month of $30/mo plan will only cost you 11$. </p>
<h3>Canceling or Suspending your account</h3>
<p>You can cancel your subscription, by going to your <a href="/app/settings/subscription">Subscription settings</a> and clicking on the red <strong>"Downgrade to Free"</strong> button. The subscription will be canceled immediately.</p>]]>
            </summary>
                                    <updated>2026-03-05T10:31:11+00:00</updated>
        </entry>
            <entry>
            <title><![CDATA[How to Change Email Address]]></title>
            <link rel="alternate" href="https://pagecrawl.io/help/account-settings/article/how-to-change-email-address" />
            <id>https://pagecrawl.io/2</id>
            <author>
                <name><![CDATA[PageCrawl.io]]></name>
            </author>
            <summary type="html">
                <![CDATA[<h1>How to Change Email Address</h1>
<p>Unfortunately, for security and to prevent service abuse, email addresses cannot be changed directly by users.</p>
<p>To change your email address please contact support at <a href="mailto:help_me@pagecrawl.io">help_me@pagecrawl.io</a> from your originally registered email address. We will verify the information and get back to you as soon as possible.</p>
<p><em>Email address for 'Free Forever' plan users cannot be changed to prevent service abuse.</em></p>]]>
            </summary>
                                    <updated>2026-03-05T10:31:11+00:00</updated>
        </entry>
            <entry>
            <title><![CDATA[Can I pay by Paypal?]]></title>
            <link rel="alternate" href="https://pagecrawl.io/help/subscription/article/can-i-pay-using-paypal" />
            <id>https://pagecrawl.io/3</id>
            <author>
                <name><![CDATA[PageCrawl.io]]></name>
            </author>
            <summary type="html">
                <![CDATA[<h1>Can I pay by Paypal?</h1>
<p>Unfortunately, it is not yet possible to pay via Paypal. </p>
<p>We only support subscription billing by credit/debit card for monthly and annual billing intervals.</p>]]>
            </summary>
                                    <updated>2026-03-05T10:31:13+00:00</updated>
        </entry>
            <entry>
            <title><![CDATA[How do I get invoices?]]></title>
            <link rel="alternate" href="https://pagecrawl.io/help/subscription/article/how-do-i-get-invoices" />
            <id>https://pagecrawl.io/4</id>
            <author>
                <name><![CDATA[PageCrawl.io]]></name>
            </author>
            <summary type="html">
                <![CDATA[<h1>How do I get invoices?</h1>
<p>You can find all your invoices <a href="/app/settings/subscription">here</a>.</p>
<p>If you wish to receive invoices to your email each month/year, enter your email address in the billing details section:</p>
<div style="background: #f5f5f5; padding: 30px; border-radius: 8px; text-align: center; margin: 20px 0; border: 1px solid #e0e0e0;">
  <img src="/images/blog/invoice-email.png" alt="Invoice to email" style="max-width: 100%; border-radius: 6px; box-shadow: 0 4px 12px rgba(0,0,0,0.15);">
</div>]]>
            </summary>
                                    <updated>2026-03-05T10:31:13+00:00</updated>
        </entry>
            <entry>
            <title><![CDATA[Is it possible to pay by a bank transfer or purchase order?]]></title>
            <link rel="alternate" href="https://pagecrawl.io/help/subscription/article/is-it-possible-to-pay-by-bank-transfer" />
            <id>https://pagecrawl.io/5</id>
            <author>
                <name><![CDATA[PageCrawl.io]]></name>
            </author>
            <summary type="html">
                <![CDATA[<h1>Is it possible to pay by a bank transfer or purchase order?</h1>
<p>We accept all major credit and debit cards for subscriptions.</p>
<p>For <strong>Ultimate plans paid annually</strong>, we also support:</p>
<ul>
<li>Bank transfers (wire/ACH)</li>
<li>Purchase orders (PO)</li>
<li>Invoicing</li>
</ul>
<p>If you would like to arrange an alternative payment method, please contact support at <a href="mailto:support@pagecrawl.io">support@pagecrawl.io</a>.</p>]]>
            </summary>
                                    <updated>2026-03-05T10:31:13+00:00</updated>
        </entry>
            <entry>
            <title><![CDATA[Why does my card keep getting declined?]]></title>
            <link rel="alternate" href="https://pagecrawl.io/help/subscription/article/why-does-my-card-keep-getting-declined" />
            <id>https://pagecrawl.io/6</id>
            <author>
                <name><![CDATA[PageCrawl.io]]></name>
            </author>
            <summary type="html">
                <![CDATA[<h1>Why does my card keep getting declined?</h1>
<p>The most common reasons for a failed transaction include insufficient funds, incorrect card details, and suspicions of fraud.</p>
<p>In case of a transaction failure first, check if the card details you entered are correct and make sure that there are enough funds in your account to make a purchase.</p>
<p>If the transaction keeps getting declined try using another card or contact your card issuer. In most cases your card issuer will be able to remove the block and allow the transaction to go through.</p>
<p>Common reasons for a payment failure:</p>
<ul>
<li>Insufficient funds</li>
<li>Your card has expired</li>
<li>Incorrectly entered information</li>
<li>Account flagged for fraud</li>
<li>Credit limit has been maxed out</li>
<li>Transaction blocked</li>
<li>Your card doesn't allow international transactions</li>
<li>Wrong billing address</li>
</ul>]]>
            </summary>
                                    <updated>2026-03-05T10:31:13+00:00</updated>
        </entry>
            <entry>
            <title><![CDATA[Tracking Text Changes in PDF Files]]></title>
            <link rel="alternate" href="https://pagecrawl.io/help/file-tracking/article/can-pagecrawl-detect-changes-in-pdf" />
            <id>https://pagecrawl.io/8</id>
            <author>
                <name><![CDATA[PageCrawl.io]]></name>
            </author>
            <summary type="html">
                <![CDATA[<h1>Tracking Text Changes in PDF Files</h1>
<p>PageCrawl can monitor PDF files hosted online and notify you when the text content changes. It extracts text from the PDF, compares it against the previous version, and highlights exactly what was added, removed, or modified.</p>
<h3>How It Works</h3>
<ol>
<li>PageCrawl downloads the PDF file at your configured check frequency</li>
<li>Text is extracted from the PDF</li>
<li>The extracted text is compared against the previous version</li>
<li>If changes are detected, you receive a notification with a diff showing exactly what changed</li>
</ol>
<h3>Setup</h3>
<ol>
<li>Click <strong>Track New Page</strong></li>
<li>Paste the direct URL to the PDF file</li>
<li>PageCrawl automatically detects it as a PDF and shows the appropriate configuration options</li>
<li>Choose your check frequency and notification preferences</li>
<li>Save</li>
</ol>
<h3>Password-Protected PDFs</h3>
<p>PDFs behind login authentication are also supported. Configure an <a href="/help/features/article/can-i-track-password-protected-websites">authentication setup</a> first, then select it when adding the PDF to monitor.</p>
<h3>PDF vs File Checksum</h3>
<table>
<thead>
<tr>
<th>Method</th>
<th>What It Detects</th>
<th>Diff Available</th>
</tr>
</thead>
<tbody>
<tr>
<td><strong>PDF text tracking</strong></td>
<td>Text content changes (additions, deletions, edits)</td>
<td>Yes, line-by-line diff</td>
</tr>
<tr>
<td><strong>File checksum</strong></td>
<td>Any modification to the file (including metadata, images)</td>
<td>No, only detects that something changed</td>
</tr>
</tbody>
</table>
<p>Use PDF text tracking when you need to see exactly what text changed. Use <a href="/help/file-tracking/article/file-checksum-hash-monitoring">file checksum monitoring</a> when you need to detect any modification, including non-text changes.</p>
<h3>Related Articles</h3>
<ul>
<li><a href="/help/file-tracking/article/file-checksum-hash-monitoring">File Checksum Monitoring</a> - Detect any file modification using SHA-256</li>
<li><a href="/help/tutorials/article/tracking-changes-in-pdf-files">Tracking PDF Files (Tutorial)</a> - Step-by-step PDF monitoring guide</li>
<li><a href="/help/file-tracking/article/track-changes-in-excel-files">Excel Spreadsheets</a> - Monitor Excel file changes</li>
</ul>]]>
            </summary>
                                    <updated>2026-03-05T10:31:12+00:00</updated>
        </entry>
            <entry>
            <title><![CDATA[Send SMS message when website change is detected]]></title>
            <link rel="alternate" href="https://pagecrawl.io/help/notifications/article/does-pagecrawl-have-sms-notifications" />
            <id>https://pagecrawl.io/11</id>
            <author>
                <name><![CDATA[PageCrawl.io]]></name>
            </author>
            <summary type="html">
                <![CDATA[<h1>Send SMS message when website change is detected</h1>
<div style="background: #f5f5f5; padding: 30px; border-radius: 8px; text-align: center; margin: 20px 0; border: 1px solid #e0e0e0;">
  <img src="/images/blog/sms-message.webp" alt="sms message notifications" style="max-width: 100%; border-radius: 6px; box-shadow: 0 4px 12px rgba(0,0,0,0.15);">
</div>
<p>While SMS messages can be useful for mission-critical applications, to avoid increasing the subscription costs, we do not include native SMS notifications in our subscription plans. </p>
<p>For personal use, we suggest using Telegram Messenger as an alternative of the SMS notifications. It is free of charge, and you only need Internet connection on your mobile phone, which you most likely already have and will need to review what has changed on your monitored page.</p>
<h2>Send SMS via Zapier Integration</h2>
<p>If you really need to receive change notifications by SMS, you can receive them by setting up <a href="https://zapier.com/apps/sms/integrations">Zapier integration</a> to send SMS messages. Zapier allows integrating our application to over 2000 services easily (for an additional cost and there may be a limit for the number of SMS each month).</p>
<h2>Other notification channels</h2>
<p>We have integrations with other notification channels, visit <a href="/help/integrations">PageCrawl.io Integrations</a> to learn more.</p>]]>
            </summary>
                                    <updated>2026-03-05T10:31:12+00:00</updated>
        </entry>
            <entry>
            <title><![CDATA[What is the difference between Enterprise Support and Standard Support?]]></title>
            <link rel="alternate" href="https://pagecrawl.io/help/subscription/article/difference-between-premium-and-standard-suport" />
            <id>https://pagecrawl.io/14</id>
            <author>
                <name><![CDATA[PageCrawl.io]]></name>
            </author>
            <summary type="html">
                <![CDATA[<h1>What is the difference between Enterprise Support and Standard Support?</h1>
<p>We aim to respond to your inquiries promptly but sometimes due to an increased number of support requests Enterprise customer requests/emails are prioritized over the Standard customers. Therefore, the response time is faster, also you may expect a 'higher level' of support in case you are not able to set up the page the way you want.</p>
<p>For technical support our response times are prioritized according to your subscription plan:</p>
<ul>
<li>Free Forever Plan: Technical support not offered</li>
<li>Standard Plan: Within 72 hours (excluding weekends)</li>
<li>Enterprise Plan: Within 24 hours (excluding weekends)</li>
</ul>]]>
            </summary>
                                    <updated>2026-03-05T10:31:13+00:00</updated>
        </entry>
            <entry>
            <title><![CDATA[Is there any limit to how many websites we can add to monitor?]]></title>
            <link rel="alternate" href="https://pagecrawl.io/help/subscription/article/is-there-limit-how-many-websites-i-can-add-to-monitor" />
            <id>https://pagecrawl.io/15</id>
            <author>
                <name><![CDATA[PageCrawl.io]]></name>
            </author>
            <summary type="html">
                <![CDATA[<h1>Is there any limit to how many websites we can add to monitor?</h1>
<p>No. We price our services based on the number of pages primarily and you can upgrade your plan if you need to track more pages.</p>]]>
            </summary>
                                    <updated>2026-03-05T10:31:13+00:00</updated>
        </entry>
            <entry>
            <title><![CDATA[Is there a limit to the number of checks in the plan?]]></title>
            <link rel="alternate" href="https://pagecrawl.io/help/subscription/article/is-there-limit-of-checks-in-standard-plan" />
            <id>https://pagecrawl.io/16</id>
            <author>
                <name><![CDATA[PageCrawl.io]]></name>
            </author>
            <summary type="html">
                <![CDATA[<h1>Is there a limit to the number of checks in the plan?</h1>
<p>The Standard plan includes 15,000 checks, and the Enterprise plan allows for 100,000 checks each month. Both plans can be purchased in multiples if you require more pages checked or more frequent checks.</p>
<h3>How many checks I need?</h3>
<p>It all depends on how many pages you want to track and how frequently. Also, <a href="/help/features/article/page-check-schedule">adjusting your schedule</a> may reduce the number of checks needed. You may start with the Standard plan and upgrade if you notice that you need more.</p>
<p>A few rules of thumb:</p>
<ol>
<li>A page checked daily will require 30 checks each month.</li>
<li>A page checked every hour will require 720 checks each month.</li>
<li>A page checked every 5 minutes will require 8,640 checks each month.</li>
</ol>
<h3>Estimating based on current usage</h3>
<p>If your estimated number of checks for this period will be over the limit, you will see an alert. You can check your <a href="/app/settings/team/stats">usage statistics</a> to find out your current estimate.</p>]]>
            </summary>
                                    <updated>2026-03-05T10:31:13+00:00</updated>
        </entry>
            <entry>
            <title><![CDATA[How to Delete My Account]]></title>
            <link rel="alternate" href="https://pagecrawl.io/help/account-settings/article/how-to-delete-my-account" />
            <id>https://pagecrawl.io/17</id>
            <author>
                <name><![CDATA[PageCrawl.io]]></name>
            </author>
            <summary type="html">
                <![CDATA[<h1>How to Delete My Account</h1>
<p><strong>Deletion of your account will result in loss of ALL data associated with it.</strong></p>
<p>To delete your account go to the <strong>General Settings</strong>, scroll to the bottom of the page, press <strong>Permanently delete your account</strong>, and proceed with the instructions.</p>]]>
            </summary>
                                    <updated>2026-03-05T10:31:11+00:00</updated>
        </entry>
            <entry>
            <title><![CDATA[Send Website Change Detection Notifications to Microsoft Teams channel]]></title>
            <link rel="alternate" href="https://pagecrawl.io/help/notifications/article/send-microsoft-teams-notification-when-changes-detected" />
            <id>https://pagecrawl.io/19</id>
            <author>
                <name><![CDATA[PageCrawl.io]]></name>
            </author>
            <summary type="html">
                <![CDATA[<h1>Send Website Change Detection Notifications to Microsoft Teams channel</h1>
<div style="background: #f5f5f5; padding: 30px; border-radius: 8px; text-align: center; margin: 20px 0; border: 1px solid #e0e0e0;">
  <img src="/images/blog/microsoftteams.jpeg" alt="microsoft teams change detection notifications" style="max-width: 100%; border-radius: 6px; box-shadow: 0 4px 12px rgba(0,0,0,0.15);">
</div>
<p>PageCrawl.io monitors websites for changes and sends instant notifications through your preferred channels. This guide walks you through connecting PageCrawl.io with Microsoft Teams to receive alerts directly in your Teams channels.</p>
<h2>What You'll Need</h2>
<p><strong>Before starting, ensure you have:</strong></p>
<ol>
<li>
<p><strong>A PageCrawl.io account</strong><br />
→ <a href="https://pagecrawl.io/app/auth/register">Sign up here</a> if you don't have one yet</p>
</li>
<li>
<p><strong>Microsoft 365 For Business subscription</strong><br />
Basic Teams plans don't support external webhooks - you need a Business plan</p>
</li>
</ol>
<h2>Setting Up the Integration</h2>
<h3>Step 1: Create a Teams Webhook</h3>
<p><strong>1.1</strong> In your Teams channel, click the <strong>Workflows</strong> menu</p>
<div style="background: #f5f5f5; padding: 30px; border-radius: 8px; text-align: center; margin: 20px 0; border: 1px solid #e0e0e0;">
  <img src="/images/blog/step-1-teams.png" alt="microsoft teams workflows webhook setup" style="max-width: 300px; border-radius: 6px; box-shadow: 0 4px 12px rgba(0,0,0,0.15);">
</div>
<p><strong>1.2</strong> Select <strong>"Post to a channel when a webhook request is received"</strong></p>
<div style="background: #f5f5f5; padding: 30px; border-radius: 8px; text-align: center; margin: 20px 0; border: 1px solid #e0e0e0;">
  <img src="/images/blog/step-2-teams.png" alt="microsoft teams incoming webhook location" style="max-width: 100%; border-radius: 6px; box-shadow: 0 4px 12px rgba(0,0,0,0.15);">
</div>
<p><strong>1.3</strong> Click <strong>Next</strong> and name your workflow
Use a descriptive name like "PageCrawl Website Monitoring"</p>
<div style="background: #f5f5f5; padding: 30px; border-radius: 8px; text-align: center; margin: 20px 0; border: 1px solid #e0e0e0;">
  <img src="/images/blog/step-3-teams.png" alt="microsoft teams configure webhook" style="max-width: 100%; border-radius: 6px; box-shadow: 0 4px 12px rgba(0,0,0,0.15);">
</div>
<p><strong>1.4</strong> Copy the generated webhook URL</p>
<div style="background: #f5f5f5; padding: 30px; border-radius: 8px; text-align: center; margin: 20px 0; border: 1px solid #e0e0e0;">
  <img src="/images/blog/step-4-teams.png" alt="Microsoft Teams workflows URL" style="max-width: 100%; border-radius: 6px; box-shadow: 0 4px 12px rgba(0,0,0,0.15);">
</div>
<h3>Step 2: Connect to PageCrawl.io</h3>
<p><strong>Choose your notification scope:</strong></p>
<p><strong>Option A: Monitor All Pages</strong><br />
→ Go to <a href="/app/settings/workspace/notifications">Workspace Settings</a><br />
→ Paste the Teams webhook URL<br />
→ Save changes</p>
<p><strong>Option B: Monitor Specific Pages</strong><br />
→ Open settings for individual pages<br />
→ Add the Teams webhook URL<br />
→ Save changes</p>
<p><strong>Tip</strong>: Set a default webhook for all pages, then override for specific ones that need special handling.</p>
<p><strong>Not working?</strong> Check that:</p>
<ul>
<li>The webhook URL was copied correctly</li>
<li>Your Microsoft 365 plan supports webhooks</li>
<li>The monitored page actually changed</li>
</ul>
<h2>More Notification Options</h2>
<h3>Other supported notification channels</h3>
<p>We do have more supported notification channels to suit everyone's preferences.</p>
<ul>
<li><a href="/help/integrations/article/track-website-changes-integrate-with-telegram-notifications">Be notified about website changes via Telegram</a></li>
<li><a href="/help/integrations/article/track-website-changes-integrate-with-discord-notifications">Be notified about website changes via Discord</a></li>
<li><a href="/help/integrations/article/send-slack-notification-when-changes-detected">Be notified about website changes via Slack</a></li>
<li>Be notified about website changes via Email</li>
<li>Be notified about website changes via Webhook</li>
<li>Be notified about website changes via Zapier</li>
</ul>]]>
            </summary>
                                    <updated>2026-03-05T10:31:13+00:00</updated>
        </entry>
            <entry>
            <title><![CDATA[Send Website Change Detection Notifications to Discord channel]]></title>
            <link rel="alternate" href="https://pagecrawl.io/help/notifications/article/track-website-changes-integrate-with-discord-notifications" />
            <id>https://pagecrawl.io/20</id>
            <author>
                <name><![CDATA[PageCrawl.io]]></name>
            </author>
            <summary type="html">
                <![CDATA[<h1>Send Website Change Detection Notifications to Discord channel</h1>
<div style="background: #f5f5f5; padding: 30px; border-radius: 8px; text-align: center; margin: 20px 0; border: 1px solid #e0e0e0;">
  <img src="/images/blog/discord.png" alt="discord change detection notifications" style="max-width: 100%; border-radius: 6px; box-shadow: 0 4px 12px rgba(0,0,0,0.15);">
</div>
<p>PageCrawl allows you to track changes in websites and get notified instantly via your preferred method. In this article we will discuss how you can setup PageCrawl to receive notifications in Discord.</p>
<h2>Prerequisites</h2>
<p>You need an PageCrawl.io account. This works in both Free and Paid accounts. If you don't already have one, <a href="https://pagecrawl.io/app/auth/register">go here to register an account</a>.</p>
<h2>Retrieve Discord Webhook URL</h2>
<p>Follow the steps below to retrieve a Discord Webhook URL</p>
<h3>1. You should go to a server and click "Edit Channel" (e.g. see below).</h3>
<div style="background: #f5f5f5; padding: 30px; border-radius: 8px; text-align: center; margin: 20px 0; border: 1px solid #e0e0e0;">
  <img src="/images/blog/edit-discord.png" alt="discord edit channel" style="max-width: 300px; border-radius: 6px; box-shadow: 0 4px 12px rgba(0,0,0,0.15);">
</div>
<h3>2. Click on "Integrations" and press "New Webhook" button</h3>
<div style="background: #f5f5f5; padding: 30px; border-radius: 8px; text-align: center; margin: 20px 0; border: 1px solid #e0e0e0;">
  <img src="/images/blog/integrations.png" alt="discord add new webhook" style="max-width: 100%; border-radius: 6px; box-shadow: 0 4px 12px rgba(0,0,0,0.15);">
</div>
<h3>3. Finally, click on "Copy Webhook URL"</h3>
<div style="background: #f5f5f5; padding: 30px; border-radius: 8px; text-align: center; margin: 20px 0; border: 1px solid #e0e0e0;">
  <img src="/images/blog/new-webhook.png" alt="discord copy webhook link" style="max-width: 100%; border-radius: 6px; box-shadow: 0 4px 12px rgba(0,0,0,0.15);">
</div>
<h2>Set Webhook URL in PageCrawl.io</h2>
<p>If you would like to receive notifications for all tracked pages, simply paste webhook URL in <a href="/app/settings/notifications">user notification preferences</a>.</p>
<p>If you only want a single page to be notified about in Discord. Just set this Webhook URL in a specific page.</p>
<h2>Troubleshooting</h2>
<p><strong>What if I can't edit the server?</strong> 
You should ensure you have permissions from the server owner to edit channel.</p>
<p><strong>I didn't receive a notification</strong> 
Please wait for page to change. We will only send a notification when we detect a change.</p>
<p><strong>I receive too many notifications? What can I do?</strong> 
You may setup notification rules to be notified only when e.g. text disappears, number increases, etc.</p>
<h3>Other supported notification channels</h3>
<p>We do have more supported notification channels to suit everyone's preferences.</p>
<ul>
<li><a href="/help/integrations/article/track-website-changes-integrate-with-telegram-notifications">Be notified about website changes via Telegram</a></li>
<li><a href="/help/integrations/article/send-microsoft-teams-notification-when-changes-detected">Be notified about website changes via Microsoft Teams</a></li>
<li><a href="/help/integrations/article/send-slack-notification-when-changes-detected">Be notified about website changes via Slack</a></li>
<li>Be notified about website changes via Email</li>
<li>Be notified about website changes via Webhook</li>
<li>Be notified about website changes via Zapier</li>
</ul>]]>
            </summary>
                                    <updated>2026-03-05T10:31:13+00:00</updated>
        </entry>
            <entry>
            <title><![CDATA[Send Website Change Detection Notifications to Telegram group or channel]]></title>
            <link rel="alternate" href="https://pagecrawl.io/help/notifications/article/track-website-changes-integrate-with-telegram-notifications" />
            <id>https://pagecrawl.io/21</id>
            <author>
                <name><![CDATA[PageCrawl.io]]></name>
            </author>
            <summary type="html">
                <![CDATA[<h1>Send Website Change Detection Notifications to Telegram group or channel</h1>
<div style="background: #f5f5f5; padding: 30px; border-radius: 8px; text-align: center; margin: 20px 0; border: 1px solid #e0e0e0;">
  <img src="/images/blog/telegram.png" alt="telegram change detections" style="max-width: 100%; border-radius: 6px; box-shadow: 0 4px 12px rgba(0,0,0,0.15);">
</div>
<p>PageCrawl.io allows you to track changes in websites and get notified instantly via your preferred method. In this article we will discuss how you can setup PageCrawl to receive notifications in Telegram.</p>
<h2>Prerequisites</h2>
<p>You need an PageCrawl.io account. This works in both Free and Paid accounts. If you don't already have one, <a href="/app/auth/register">go here to register an account</a>.</p>
<h2>Retrieve Telegram Chat ID</h2>
<p>Follow the steps below to retrieve a Telegram Chat ID. This is needed so you could receive notifications in a 1-to-1 chat, channel or a group conversation.</p>
<h3>Start 1-to-1 conversation with @PageCrawlBot, invite to a Channel, or add to group conversation.</h3>
<h4>1-to-1 conversation</h4>
<p>Simply begin a conversation with <a href="https://t.me/PageCrawlBot">@PageCrawlBot</a> and you will receive instructions how to configure it.</p>
<div style="background: #f5f5f5; padding: 30px; border-radius: 8px; text-align: center; margin: 20px 0; border: 1px solid #e0e0e0;">
  <img src="/images/blog/telegram1.jpg" alt="telegram start conversation" style="max-width: 300px; border-radius: 6px; box-shadow: 0 4px 12px rgba(0,0,0,0.15);">
</div>
<h4>Include in a Channel or Group conversation</h4>
<p>Instructions for Channels and Groups are identical. To include the bot in the Channel or Group you should invite <a href="https://t.me/PageCrawlBot">@PageCrawlBot</a> to the channel. You may likely also need to adjust bot permissions, so it could read and send messages. To get instructions what code you should put in PageCrawl.io settings, send a /start message to the bot: <code>@PageCrawlBot /start</code></p>
<div style="background: #f5f5f5; padding: 30px; border-radius: 8px; text-align: center; margin: 20px 0; border: 1px solid #e0e0e0;">
  <img src="/images/blog/telegram2.jpg" alt="telegram bot setup" style="max-width: 300px; border-radius: 6px; box-shadow: 0 4px 12px rgba(0,0,0,0.15);">
</div>
<p>Keep in mind that Channels or Group conversations have a <strong>negative</strong> chat id! 1-to-1 conversations - always positive chat id.</p>
<h2>Configure in PageCrawl.io</h2>
<p>If you would like to receive notifications for all tracked pages, enter the Chat ID you obtained in previously in <a href="/app/settings/notifications">user notification preferences</a>.</p>
<p>If you only want a single page to be notified about in Telegram. Just set this Chat ID in a specific page.</p>
<h2>Troubleshooting</h2>
<p><strong>What if I can't edit the server?</strong> 
You should ensure you have permissions from the server owner to edit channel.</p>
<p><strong>I didn't receive a notification</strong> 
Please wait for page to change. We will only send a notification when we detect a change.</p>
<p><strong>I receive too many notifications? What can I do?</strong> 
You may setup notification rules to be notified only when e.g. text disappears, number increases, etc.</p>
<h3>Other supported notification channels</h3>
<p>We do have more supported notification channels to suit everyone's preferences.</p>
<ul>
<li><a href="/help/integrations/article/track-website-changes-integrate-with-telegram-notifications">Be notified about website changes via Telegram</a></li>
<li><a href="/help/integrations/article/send-microsoft-teams-notification-when-changes-detected">Be notified about website changes via Microsoft Teams</a></li>
<li><a href="/help/integrations/article/track-website-changes-integrate-with-discord-notifications">Be notified about website changes via Discord</a></li>
<li><a href="/help/integrations/article/send-slack-notification-when-changes-detected">Be notified about website changes via Slack</a></li>
<li>Be notified about website changes via Email</li>
<li>Be notified about website changes via Webhook</li>
<li>Be notified about website changes via Zapier</li>
</ul>]]>
            </summary>
                                    <updated>2026-03-05T10:31:13+00:00</updated>
        </entry>
            <entry>
            <title><![CDATA[Monitoring password-protected pages]]></title>
            <link rel="alternate" href="https://pagecrawl.io/help/features/article/can-i-track-password-protected-websites" />
            <id>https://pagecrawl.io/23</id>
            <author>
                <name><![CDATA[PageCrawl.io]]></name>
            </author>
            <summary type="html">
                <![CDATA[<h1>Monitoring password-protected pages</h1>
<div style="background: #f5f5f5; padding: 30px; border-radius: 8px; text-align: center; margin: 20px 0; border: 1px solid #e0e0e0;">
  <img src="/images/blog/setup-authentication.png" alt="password protected pages monitoring" style="max-width: 100%; border-radius: 6px; box-shadow: 0 4px 12px rgba(0,0,0,0.15);">
</div>
<p>If you're looking to track pages on websites that require login authentication, the answer is yes – it is possible. Please note that this feature is only available on paid plans.</p>
<h2>How It Works</h2>
<p>Monitoring password-protected pages is a two-step process:</p>
<ol>
<li><strong>Configure authentication</strong> - Set up your login credentials once</li>
<li><strong>Select when monitoring</strong> - Choose the configuration when adding a page to monitor</li>
</ol>
<h2>Step 1: Configure Authentication</h2>
<p>Before you can monitor password-protected pages, you need to set up an authentication configuration:</p>
<ol>
<li>Go to <a href="/app/settings/workspace/authentication">Authentication Settings</a></li>
<li>Click "Add Authentication Configuration"</li>
<li>Fill in the required details:<ul>
<li><strong>Name</strong> - A friendly name to identify this configuration (e.g., "My Company Portal")</li>
<li><strong>Login URL</strong> - The URL of the login page</li>
<li><strong>Username/Email</strong> - Your login credentials</li>
<li><strong>Password</strong> - Your password</li>
<li><strong>Form fields</strong> - CSS selectors for the username field, password field, and submit button</li>
</ul>
</li>
<li>Save the configuration</li>
</ol>
<p>You can create multiple authentication configurations for different websites.</p>
<h2>Step 2: Add a Page to Monitor</h2>
<p>Once your authentication is configured:</p>
<ol>
<li>Go to add a new page to monitor</li>
<li>Enter the URL of the password-protected page you want to track</li>
<li>If an authentication configuration exists for that website's domain, a <strong>"Login Authentication"</strong> option will appear</li>
<li>Select the appropriate authentication configuration from the dropdown</li>
<li>Complete the rest of the setup as usual</li>
</ol>
<p>The system automatically detects and shows only authentication configurations that match the domain of the URL you're monitoring. For example, if you're monitoring <code>https://app.example.com/dashboard</code>, it will show authentication configs set up for <code>example.com</code>.</p>
<h2>Can You Also Track Files Behind Login Authentication?</h2>
<p>If you want to track files such as PDFs, Excel spreadsheets, CSVs, or Word documents, you're in luck. These types of files can also be tracked, even if they are behind login authentication. Simply provide the link to the file and select the appropriate authentication configuration.</p>
<h2>HTTP Basic Authentication</h2>
<div style="background: #f5f5f5; padding: 30px; border-radius: 8px; text-align: center; margin: 20px 0; border: 1px solid #e0e0e0;">
  <img src="/images/blog/http-basic.png" alt="http basic authentication setup" style="max-width: 100%; border-radius: 6px; box-shadow: 0 4px 12px rgba(0,0,0,0.15);">
</div>
<p>In case the website is using "HTTP Basic Authentication" (the browser popup that asks for credentials), you can enter the credentials under "Advanced Settings" when setting up your monitored page. This is different from form-based login authentication.</p>]]>
            </summary>
                                    <updated>2026-03-05T10:31:12+00:00</updated>
        </entry>
            <entry>
            <title><![CDATA[PageCrawl API & Webhooks]]></title>
            <link rel="alternate" href="https://pagecrawl.io/help/features/article/does-pagecrawl-support-api" />
            <id>https://pagecrawl.io/24</id>
            <author>
                <name><![CDATA[PageCrawl.io]]></name>
            </author>
            <summary type="html">
                <![CDATA[<h1>PageCrawl API &amp; Webhooks</h1>
<p>PageCrawl provides three ways to integrate with external systems: a REST API, webhooks, and RSS feeds.</p>
<p><em>API and webhooks are available on paid plans.</em></p>
<h3>API</h3>
<p>The REST API lets you manage monitors programmatically, including creating pages, retrieving change history, and triggering checks. Find your API key in <strong>Settings</strong> &gt; <strong>API</strong>.</p>
<p>See the <a href="/help/features/article/api-webhooks-for-custom-integrations">API &amp; Webhooks guide</a> for endpoints and authentication details.</p>
<h3>Webhooks</h3>
<p>Webhooks send HTTP POST requests to your endpoint whenever a change is detected or an error occurs. Configure them in <strong>Settings</strong> &gt; <strong>Workspace</strong> &gt; <strong>Integrations</strong> &gt; <strong>Webhooks</strong>.</p>
<p>See the <a href="/help/integrations/article/webhook-integration">Webhook Integration guide</a> for setup, payload fields, and example payloads.</p>
<h3>RSS Feeds</h3>
<p>Access recent changes in Atom RSS format. Generate a public RSS URL for a single page or for all pages in the workspace.</p>
<p>See the <a href="/help/features/article/page-monitoring-rss-feeds">RSS Feeds guide</a> for setup instructions.</p>]]>
            </summary>
                                    <updated>2026-03-05T10:31:12+00:00</updated>
        </entry>
            <entry>
            <title><![CDATA[Monitor Changes in CSV Files]]></title>
            <link rel="alternate" href="https://pagecrawl.io/help/file-tracking/article/track-changes-in-csv-files" />
            <id>https://pagecrawl.io/25</id>
            <author>
                <name><![CDATA[PageCrawl.io]]></name>
            </author>
            <summary type="html">
                <![CDATA[<h1>Monitor Changes in CSV Files</h1>
<p>PageCrawl can monitor CSV (comma-separated values) files hosted online and notify you when their content changes. It retrieves the file, compares the data against the previous version, and shows exactly what rows or values were added, removed, or modified.</p>
<h3>Setup</h3>
<ol>
<li>Click <strong>Track New Page</strong></li>
<li>Paste the direct URL to the CSV file</li>
<li>PageCrawl detects the file type and shows the appropriate configuration</li>
<li>Choose your check frequency and notification preferences</li>
<li>Save</li>
</ol>
<h3>Password-Protected Files</h3>
<p>CSV files behind login authentication are supported. Configure an <a href="/help/features/article/can-i-track-password-protected-websites">authentication setup</a> first, then select it when adding the file.</p>
<h3>Related Articles</h3>
<ul>
<li><a href="/help/file-tracking/article/track-changes-in-excel-files">Excel Spreadsheets</a> - Monitor Excel file changes</li>
<li><a href="/help/file-tracking/article/monitor-changes-in-google-sheets">Google Docs &amp; Sheets</a> - Monitor Google Sheets and Docs</li>
<li><a href="/help/file-tracking/article/file-checksum-hash-monitoring">File Checksum Monitoring</a> - Detect any file modification</li>
</ul>]]>
            </summary>
                                    <updated>2026-03-05T10:31:12+00:00</updated>
        </entry>
            <entry>
            <title><![CDATA[Monitor Changes in Excel Spreadsheets (xls, xlsx, ods)]]></title>
            <link rel="alternate" href="https://pagecrawl.io/help/file-tracking/article/track-changes-in-excel-files" />
            <id>https://pagecrawl.io/26</id>
            <author>
                <name><![CDATA[PageCrawl.io]]></name>
            </author>
            <summary type="html">
                <![CDATA[<h1>Monitor Changes in Excel Spreadsheets (xls, xlsx, ods)</h1>
<p>PageCrawl can monitor Excel files hosted online and notify you when their content changes. It extracts text and data from the spreadsheet, compares it against the previous version, and shows exactly what was added, removed, or modified.</p>
<h3>Supported File Types</h3>
<p><strong>xls</strong>, <strong>xlsx</strong>, <strong>ods</strong></p>
<h3>Setup</h3>
<ol>
<li>Click <strong>Track New Page</strong></li>
<li>Paste the direct URL to the Excel file</li>
<li>PageCrawl detects the file type and shows the appropriate configuration</li>
<li>Choose your check frequency and notification preferences</li>
<li>Save</li>
</ol>
<h3>Password-Protected Files</h3>
<p>Excel files behind login authentication are supported. Configure an <a href="/help/features/article/can-i-track-password-protected-websites">authentication setup</a> first, then select it when adding the file.</p>
<h3>Related Articles</h3>
<ul>
<li><a href="/help/file-tracking/article/track-changes-in-csv-files">CSV Files</a> - Monitor CSV file changes</li>
<li><a href="/help/file-tracking/article/monitor-changes-in-google-sheets">Google Docs &amp; Sheets</a> - Monitor Google Sheets and Docs</li>
<li><a href="/help/file-tracking/article/file-checksum-hash-monitoring">File Checksum Monitoring</a> - Detect any file modification</li>
</ul>]]>
            </summary>
                                    <updated>2026-03-05T10:31:12+00:00</updated>
        </entry>
            <entry>
            <title><![CDATA[Monitor Changes in PowerPoint Presentations]]></title>
            <link rel="alternate" href="https://pagecrawl.io/help/file-tracking/article/track-changes-in-powerpoint-files" />
            <id>https://pagecrawl.io/27</id>
            <author>
                <name><![CDATA[PageCrawl.io]]></name>
            </author>
            <summary type="html">
                <![CDATA[<h1>Monitor Changes in PowerPoint Presentations</h1>
<p>PageCrawl can monitor PowerPoint presentations hosted online and notify you when their text content changes. It extracts text from the slides, compares it against the previous version, and shows exactly what was added, removed, or modified.</p>
<h3>Supported File Types</h3>
<p><strong>pptx</strong></p>
<h3>Setup</h3>
<ol>
<li>Click <strong>Track New Page</strong></li>
<li>Paste the direct URL to the PowerPoint file</li>
<li>PageCrawl detects the file type and shows the appropriate configuration</li>
<li>Choose your check frequency and notification preferences</li>
<li>Save</li>
</ol>
<h3>Password-Protected Files</h3>
<p>PowerPoint files behind login authentication are supported. Configure an <a href="/help/features/article/can-i-track-password-protected-websites">authentication setup</a> first, then select it when adding the file.</p>
<h3>Related Articles</h3>
<ul>
<li><a href="/help/file-tracking/article/track-changes-in-word-files">Word Documents</a> - Monitor Word document changes</li>
<li><a href="/help/file-tracking/article/track-changes-in-excel-files">Excel Spreadsheets</a> - Monitor Excel file changes</li>
<li><a href="/help/file-tracking/article/file-checksum-hash-monitoring">File Checksum Monitoring</a> - Detect any file modification</li>
</ul>]]>
            </summary>
                                    <updated>2026-03-05T10:31:12+00:00</updated>
        </entry>
            <entry>
            <title><![CDATA[Monitor Changes in Word Documents (doc, docx, odt)]]></title>
            <link rel="alternate" href="https://pagecrawl.io/help/file-tracking/article/track-changes-in-word-files" />
            <id>https://pagecrawl.io/28</id>
            <author>
                <name><![CDATA[PageCrawl.io]]></name>
            </author>
            <summary type="html">
                <![CDATA[<h1>Monitor Changes in Word Documents (doc, docx, odt)</h1>
<p>PageCrawl can monitor Word documents hosted online and notify you when their text content changes. It extracts text from the document, compares it against the previous version, and shows exactly what was added, removed, or modified.</p>
<h3>Supported File Types</h3>
<p><strong>doc</strong>, <strong>docx</strong>, <strong>odt</strong></p>
<h3>Setup</h3>
<ol>
<li>Click <strong>Track New Page</strong></li>
<li>Paste the direct URL to the Word document</li>
<li>PageCrawl detects the file type and shows the appropriate configuration</li>
<li>Choose your check frequency and notification preferences</li>
<li>Save</li>
</ol>
<h3>Password-Protected Files</h3>
<p>Word files behind login authentication are supported. Configure an <a href="/help/features/article/can-i-track-password-protected-websites">authentication setup</a> first, then select it when adding the file.</p>
<h3>Related Articles</h3>
<ul>
<li><a href="/help/file-tracking/article/can-pagecrawl-detect-changes-in-pdf">PDF Changes</a> - Monitor PDF file changes</li>
<li><a href="/help/file-tracking/article/track-changes-in-powerpoint-files">PowerPoint Files</a> - Monitor PowerPoint presentations</li>
<li><a href="/help/file-tracking/article/file-checksum-hash-monitoring">File Checksum Monitoring</a> - Detect any file modification</li>
</ul>]]>
            </summary>
                                    <updated>2026-03-05T10:31:12+00:00</updated>
        </entry>
            <entry>
            <title><![CDATA[Send Website Change Detection Notifications to Slack channel]]></title>
            <link rel="alternate" href="https://pagecrawl.io/help/notifications/article/send-slack-notification-when-changes-detected" />
            <id>https://pagecrawl.io/29</id>
            <author>
                <name><![CDATA[PageCrawl.io]]></name>
            </author>
            <summary type="html">
                <![CDATA[<h1>Send Website Change Detection Notifications to Slack channel</h1>
<div style="background: #f5f5f5; padding: 30px; border-radius: 8px; text-align: center; margin: 20px 0; border: 1px solid #e0e0e0;">
  <img src="/images/blog/slack-features.jpeg" alt="slack web change detection notifications" style="max-width: 100%; border-radius: 6px; box-shadow: 0 4px 12px rgba(0,0,0,0.15);">
</div>
<p>PageCrawl.io allows you to track changes in websites and get notified instantly via your preferred method. In this article we will discuss how you can setup PageCrawl to receive notifications in Slack. </p>
<h2>Prerequisites</h2>
<ul>
<li>You need an PageCrawl.io account. If you don't already have one, <a href="https://pagecrawl.io/app/auth/register">go here to register an account</a> and setup pages you wish to track.</li>
<li>You need a Slack account.</li>
</ul>
<h2>Create Incoming Webhook Connector</h2>
<p>Follow the steps below to create a new Incoming Webhook connector</p>
<h3>1. Install "Incoming Webhooks" integration in your Slack workspace</h3>
<p>Visit <a href="https://slack.com/apps/A0F7XDUAZ-incoming-webhooks">https://slack.com/apps/A0F7XDUAZ-incoming-webhooks</a> to enable "Incoming WebHooks" for your workspace.</p>
<p>Please note, this is a legacy custom integration - an outdated way for teams to integrate with Slack. You may create <a href="https://api.slack.com/start">Slack app</a> instead, but the setup procedure of "Slack app" is significantly longer so we suggest using the legacy integration. </p>
<h3>2. Click "Add to Slack" to continue</h3>
<p>Simply click "Add to Slack" button. You may be prompted to sign in to your Slack account.</p>
<div style="background: #f5f5f5; padding: 30px; border-radius: 8px; text-align: center; margin: 20px 0; border: 1px solid #e0e0e0;">
  <img src="/images/blog/slack-incoming-webhook.png" alt="slack add incoming webhook" style="max-width: 100%; border-radius: 6px; box-shadow: 0 4px 12px rgba(0,0,0,0.15);">
</div>
<h3>3. Select channel or create a new channel.</h3>
<p>Here you will need to select a Slack channel where the messages from PageCrawl.io bot should be sent to and press "Add Incoming Webhook integration"</p>
<div style="background: #f5f5f5; padding: 30px; border-radius: 8px; text-align: center; margin: 20px 0; border: 1px solid #e0e0e0;">
  <img src="/images/blog/slack-post-to-channel.png" alt="slack select channel for incoming webhook" style="max-width: 100%; border-radius: 6px; box-shadow: 0 4px 12px rgba(0,0,0,0.15);">
</div>
<h3>4. Copy the "URL".</h3>
<p>Finally you should receive URL address. Copy it and paste in the notification settings as indicated below.</p>
<div style="background: #f5f5f5; padding: 30px; border-radius: 8px; text-align: center; margin: 20px 0; border: 1px solid #e0e0e0;">
  <img src="/images/blog/slack-final.png" alt="Slack copy incoming webhook url" style="max-width: 100%; border-radius: 6px; box-shadow: 0 4px 12px rgba(0,0,0,0.15);">
</div>
<h3>Set Webhook URL in PageCrawl.io</h3>
<p>If you would like to receive notifications for all tracked pages, simply paste webhook URL in <a href="/app/settings/notifications">user notification preferences</a>.</p>
<p>If you only want a single page to be notified via Slack. Just set this Webhook URL for a specific page.</p>
<h3>Troubleshooting</h3>
<p><strong>What if I can't the app?</strong>
You should ensure you have permissions from the Slack workspace owner.</p>
<p><strong>I didn't receive a notification</strong>
Please wait for page to change. We will only send a notification when we detect a change.</p>
<p><strong>I receive too many notifications? What can I do?</strong>
You may setup notification rules to be notified only when e.g. text disappears, number increases, etc.</p>
<h3>Other supported notification channels</h3>
<p>We do have more supported notification channels to suit everyone's preferences.</p>
<ul>
<li>
<p><a href="/help/integrations/article/track-website-changes-integrate-with-telegram-notifications">Be notified about website changes via Telegram</a></p>
</li>
<li>
<p><a href="/help/integrations/article/send-microsoft-teams-notification-when-changes-detected">Be notified about website changes via Microsoft Teams</a></p>
</li>
<li>
<p><a href="/help/integrations/article/track-website-changes-integrate-with-discord-notifications">Be notified about website changes via Discord</a></p>
</li>
<li>
<p><a href="/help/integrations/article/send-slack-notification-when-changes-detected">Be notified about website changes via Slack</a></p>
</li>
<li>
<p>Be notified about website changes via Email</p>
</li>
<li>
<p>Be notified about website changes via Webhook</p>
</li>
<li>
<p>Be notified about website changes via Zapier</p>
</li>
</ul>]]>
            </summary>
                                    <updated>2026-03-05T10:31:13+00:00</updated>
        </entry>
            <entry>
            <title><![CDATA[Blocking Cookies and Ads in Your Monitored Pages]]></title>
            <link rel="alternate" href="https://pagecrawl.io/help/reduce-false-positives/article/blocking-cookies-and-ads-track-changes" />
            <id>https://pagecrawl.io/30</id>
            <author>
                <name><![CDATA[PageCrawl.io]]></name>
            </author>
            <summary type="html">
                <![CDATA[<h1>Blocking Cookies and Ads in Your Monitored Pages</h1>
<div style="background: #f5f5f5; padding: 30px; border-radius: 8px; text-align: center; margin: 20px 0; border: 1px solid #e0e0e0;">
  <img src="/images/blog/block-cookies.png" alt="block cookies" style="max-width: 100%; border-radius: 6px; box-shadow: 0 4px 12px rgba(0,0,0,0.15);">
</div>
<p>Monitoring tracked pages can sometimes result in frequent false-positive notifications, often stemming from pesky cookie popups. To address this issue and enhance your monitoring experience, we provide the "Blocking Cookies and Ads" action. This action effectively handles the majority of cookie windows and blocks ads, minimizing unnecessary notifications. Here are some considerations and alternatives to optimize your monitoring experience.</p>
<h3>The "Blocking Cookies and Ads" Action</h3>
<p>To mitigate false positives, we highly recommend implementing the "Blocking Cookies and Ads" action on all tracked pages. This action has proven to be remarkably effective, successfully handling approximately 99% of cookie popups and preventing ad content from triggering notifications.</p>
<h3>Alternative approach</h3>
<p>In specific cases, if the tracked page is accessed from a location outside of Europe, cookie popups might not be displayed. As an alternative approach, you can opt to perform checks from a different country to avoid encountering cookie-related notifications.</p>
<h3>Legacy Version of "Block Cookies and Ads"</h3>
<p>Please be aware that a deprecated version of the "Block Cookies and Ads" action exists, which targets a narrower range of cookie popups. For optimal performance and to take advantage of the full feature set, we strongly advise updating to the current version. Keep in mind that automatic updates are not applied to prevent triggering unnecessary notifications.</p>]]>
            </summary>
                                    <updated>2026-03-05T10:31:13+00:00</updated>
        </entry>
            <entry>
            <title><![CDATA[Excluding Dates in the Monitored Pages]]></title>
            <link rel="alternate" href="https://pagecrawl.io/help/reduce-false-positives/article/excluding-dates" />
            <id>https://pagecrawl.io/31</id>
            <author>
                <name><![CDATA[PageCrawl.io]]></name>
            </author>
            <summary type="html">
                <![CDATA[<h1>Excluding Dates in the Monitored Pages</h1>
<div style="background: #f5f5f5; padding: 30px; border-radius: 8px; text-align: center; margin: 20px 0; border: 1px solid #e0e0e0;">
  <img src="/images/blog/exclude-dates-action.png" alt="remove dates action in page edit form" style="max-width: 100%; border-radius: 6px; box-shadow: 0 4px 12px rgba(0,0,0,0.15);">
</div>
<p>Frequently, you encounter text like "updated 1 month ago" or "last changed 1 hour ago" that continually updates on your monitored pages. While this information might seem informative, it often leads to false-positive notifications.</p>
<h3>The "Remove dates" action</h3>
<p>To address this issue and improve your monitoring experience, we recommend applying the "Remove Dates" action to your tracked page. This action will intelligently detect and replace all date-related text with a standardized [DATE REMOVED] tag.</p>
<h4>Supported Date Formats</h4>
<p>The "Remove Dates" action is designed to handle a wide range of common date formats, including:</p>
<ul>
<li>30 min ago</li>
<li>1 day ago</li>
<li>19 August 2022</li>
<li>2000</li>
<li>01-01-2020</li>
<li>Sat Aug 17 2020 18:40:39 GMT+0000 (GMT)</li>
<li>and many more...</li>
</ul>
<h3>The "Ignore numbers" filter</h3>
<p>Instead of replacing dates with [DATE REMOVED] placeholders you may completely ignore all changes in numbers by adding "Ignore numbers" filters to "Conditions/Filters" section. Only use this if you are not interested in numeric changes.</p>]]>
            </summary>
                                    <updated>2026-03-05T10:31:13+00:00</updated>
        </entry>
            <entry>
            <title><![CDATA[Excluding a Part of the Page from Triggering Notifications]]></title>
            <link rel="alternate" href="https://pagecrawl.io/help/reduce-false-positives/article/how-to-exclude-page-section" />
            <id>https://pagecrawl.io/32</id>
            <author>
                <name><![CDATA[PageCrawl.io]]></name>
            </author>
            <summary type="html">
                <![CDATA[<h1>Excluding a Part of the Page from Triggering Notifications</h1>
<div style="background: #f5f5f5; padding: 30px; border-radius: 8px; text-align: center; margin: 20px 0; border: 1px solid #e0e0e0;">
  <img src="/images/blog/remove-element.png" alt="exclude page element from tracking" style="max-width: 100%; border-radius: 6px; box-shadow: 0 4px 12px rgba(0,0,0,0.15);">
</div>
<p>In certain situations, you may wish to exclude or remove a specific section on the page to prevent (false positive) notifications, especially when the content changes frequently. For instance, you might want to exclude a sidebar containing new blog posts or a Twitter feed at the bottom of the page.</p>
<p>When your tracked element type is "Full page" you may choose to track <strong>Everything on the page</strong> or <strong>Content only</strong>. If you choose <strong>Content only</strong>, text in header, sidebar, footer will not be tracked.</p>
<p>If you would like more control on what is removed, we recommend using the "Remove Element" action to exclude sections that do not interest you. You can either utilize the visual selector to remove the area or add the selector manually. Below you will find a few suggested selectors you can use.</p>
<h3>Commonly Excluded Sections</h3>
<div style="background: #f5f5f5; padding: 30px; border-radius: 8px; text-align: center; margin: 20px 0; border: 1px solid #e0e0e0;">
  <img src="/images/blog/remove-common.png" alt="Commonly Excluded Sections" style="max-width: 100%; border-radius: 6px; box-shadow: 0 4px 12px rgba(0,0,0,0.15);">
</div>
<p>Frequently, there are areas where tracking changes may not be of interest, including:</p>
<ul>
<li>Sidebars (commonly placed within <aside> HTML elements)</li>
<li>Footers (commonly placed within <footer> HTML elements)</li>
<li>Navigation menus (commonly placed within <nav> HTML elements)</li>
</ul>
<p>You can use the following selector (which you can paste into the "CSS/XPath selector") to exclude the mentioned elements: <code>nav,aside,footer,.footer,header</code></p>
<h3>The Selector Didn't Work?</h3>
<p>Unfortunately, not all websites adhere to the content sectioning guidelines. In such cases, you may need to use the visual selector to identify the area or manually input the selector.</p>]]>
            </summary>
                                    <updated>2026-03-05T10:31:13+00:00</updated>
        </entry>
            <entry>
            <title><![CDATA[Using Custom Proxies to Monitor Pages]]></title>
            <link rel="alternate" href="https://pagecrawl.io/help/features/article/custom-proxies" />
            <id>https://pagecrawl.io/33</id>
            <author>
                <name><![CDATA[PageCrawl.io]]></name>
            </author>
            <summary type="html">
                <![CDATA[<h1>Using Custom Proxies to Monitor Pages</h1>
<p>PageCrawl provides built-in proxy locations and supports custom proxy servers for pages that require specific geographic access or have IP-based restrictions.</p>
<h3>Built-in Proxy Locations</h3>
<p>PageCrawl offers multiple proxy locations across North America, Europe, and the Middle East, plus a residential proxy option. Select a proxy location per page or apply one to multiple pages via <a href="/help/features/article/bulk-edit-pages">Bulk Edit</a>. You can also choose <strong>Random</strong> to rotate between locations automatically.</p>
<h3>Custom Proxy Setup</h3>
<p>Use your own proxy servers when the built-in locations do not work for your use case.</p>
<p><strong>Supported formats:</strong></p>
<pre><code>host:port
username:password@host:port</code></pre>
<p><strong>Configuration options:</strong></p>
<table>
<thead>
<tr>
<th>Method</th>
<th>How</th>
</tr>
</thead>
<tbody>
<tr>
<td><strong>Single page</strong></td>
<td>Edit the page &gt; Power User settings &gt; Custom Proxy</td>
</tr>
<tr>
<td><strong>Multiple pages</strong></td>
<td>Select pages &gt; Bulk Edit &gt; Custom Proxies</td>
</tr>
<tr>
<td><strong>Template</strong></td>
<td>Add proxy settings to a template for reuse</td>
</tr>
</tbody>
</table>
<p>You can paste multiple proxy servers (one per line). PageCrawl will randomly select one for each check. If a proxy fails, the system automatically retries with a different proxy from the list.</p>
<h3>Automatic Engine Switching</h3>
<p>When a page is blocked (timeout, 403, or 401), PageCrawl automatically switches to <a href="/help/features/article/what-is-real-browser-page-monitoring">Stealth mode</a> in addition to the proxy configuration. This combination resolves most access issues.</p>
<h3>Premium Residential Proxies</h3>
<p>For pages that require residential proxies, PageCrawl offers <a href="/help/features/article/residential-proxies">Premium Residential Proxies</a> with pay-as-you-go bandwidth starting at $10/GB. Purchase bandwidth in your account settings and select "Premium Residential" as the proxy location on your monitors. See the <a href="/help/features/article/residential-proxies">residential proxies guide</a> for details on pricing, geo-targeting, and setup.</p>
<h3>Choosing a Proxy Provider</h3>
<p>Most pages work fine without any proxy configuration. You only need a custom proxy if a website is actively blocking bots or restricting access by geographic location. Start without a proxy, and only set one up if you are seeing access errors (403, bot protection blocks, empty pages).</p>
<p>If the built-in proxy locations are not enough for your needs, you can use a third-party proxy provider. Here is what to look for and some popular options.</p>
<p><strong>Understanding bandwidth usage:</strong></p>
<p>Each page check downloads the full page without caching, so bandwidth adds up quickly. An average web page uses 2-3 MB per check. Heavier pages (news sites, e-commerce, image-heavy pages) can use 5-10 MB or more. For example, monitoring 50 pages every 30 minutes at 3 MB each would use roughly 7 GB per day, or around 216 GB per month. Because of this, avoid proxy providers that charge per GB of traffic. Those plans are designed for one-off scraping, not ongoing monitoring.</p>
<p><strong>What to look for:</strong></p>
<ul>
<li><strong>Unlimited bandwidth</strong> - This is the most important factor. Look for plans priced per proxy/port or as a flat monthly rate, not per GB.</li>
<li><strong>Username/password authentication</strong> - PageCrawl connects to proxies dynamically, so IP-based allowlists will not work. Choose a provider that supports <code>username:password@host:port</code> authentication.</li>
<li><strong>Rotating IPs</strong> - Providers that rotate IPs automatically reduce the chance of being blocked over time.</li>
<li><strong>Geographic coverage</strong> - Pick a provider with servers in the regions your monitored pages target.</li>
<li><strong>HTTP/HTTPS support</strong> - PageCrawl requires standard HTTP proxies. SOCKS proxies are not supported.</li>
</ul>
<p><strong>Datacenter vs. residential proxies:</strong></p>
<p>Datacenter proxies with unlimited bandwidth are the most cost-effective option for monitoring. They work well for most websites. Residential proxies (using real ISP addresses) are only needed for sites with strict bot detection that blocks datacenter IPs. If you need residential proxies, look for providers that offer them with unlimited bandwidth or per-IP pricing rather than per-GB billing.</p>
<p><strong>Popular proxy providers that work with PageCrawl:</strong></p>
<table>
<thead>
<tr>
<th>Provider</th>
<th>Type</th>
<th>Pricing Model</th>
<th>Notes</th>
</tr>
</thead>
<tbody>
<tr>
<td><a href="https://www.webshare.io">Webshare</a></td>
<td>Datacenter, Residential</td>
<td>Per proxy, unlimited bandwidth</td>
<td>Free tier available, good for testing. Paid datacenter plans include unlimited bandwidth.</td>
</tr>
<tr>
<td><a href="https://iproyal.com">IPRoyal</a></td>
<td>Datacenter, Static residential</td>
<td>Per proxy (datacenter)</td>
<td>Datacenter proxies with unlimited traffic. Static residential proxies available per IP.</td>
</tr>
<tr>
<td><a href="https://www.proxy-cheap.com">Proxy-Cheap</a></td>
<td>Datacenter, Static residential</td>
<td>Per proxy, unlimited bandwidth</td>
<td>Budget-friendly static residential and datacenter proxies with no traffic limits.</td>
</tr>
<tr>
<td><a href="https://www.proxyrack.com">ProxyRack</a></td>
<td>Datacenter, Residential</td>
<td>Flat monthly rate</td>
<td>Unlimited bandwidth on most plans. Rotating and geo-targeted options.</td>
</tr>
</tbody>
</table>
<p>These are independent providers and not affiliated with PageCrawl. Prices and features may change.</p>
<p><strong>Not every provider works for every website.</strong> A proxy that works perfectly for one site may get blocked on another. This depends on the website's bot detection, the proxy provider's IP reputation, and the type of proxies used. Always test a provider against your specific pages before committing to a long-term plan. Most providers offer short trial periods or small starter plans for this purpose.</p>
<p><strong>Country-specific access:</strong> Some websites restrict content to visitors from a specific country (geo-blocking). Government portals, local news sites, and region-locked services often require an IP address from that country to load correctly. If you are monitoring pages like these, make sure the proxy provider offers proxies in the required country. Check the provider's location list before purchasing, as coverage varies significantly between providers, especially for smaller countries.</p>
<p><strong>Note:</strong> Most providers give you a proxy endpoint in the <code>username:password@host:port</code> format. Paste it directly into the Custom Proxy field in PageCrawl. If the provider offers rotating proxies through a single gateway endpoint, you only need to add one line.</p>
<h3>Avoiding Free Proxies</h3>
<p>Free proxy servers are unreliable, slow, and frequently stop working. They should not be used for monitoring pages where uptime matters. Use the built-in proxy locations, your own paid proxy service, or contact us for residential proxy options.</p>
<h3>Related Articles</h3>
<ul>
<li><a href="/help/features/article/what-is-real-browser-page-monitoring">Real Browser Mode</a> - Engine selection including Stealth mode</li>
<li><a href="/help/features/article/monitoring-pages-behind-cloudflare-bot-protection">Monitoring Pages Behind Bot Protection</a> - Handling bot-protected pages</li>
<li><a href="/help/features/article/bulk-edit-pages">Bulk Edit</a> - Apply proxy settings to multiple pages at once</li>
</ul>]]>
            </summary>
                                    <updated>2026-03-30T14:25:31+00:00</updated>
        </entry>
            <entry>
            <title><![CDATA[Monitoring Pages Protected with CAPTCHA]]></title>
            <link rel="alternate" href="https://pagecrawl.io/help/troubleshooting/article/bypass-captcha-tracked-pages" />
            <id>https://pagecrawl.io/34</id>
            <author>
                <name><![CDATA[PageCrawl.io]]></name>
            </author>
            <summary type="html">
                <![CDATA[<h1>Monitoring Pages Protected with CAPTCHA</h1>
<p>Some websites use CAPTCHA challenges to block automated access. PageCrawl integrates with <a href="https://2captcha.com">2Captcha</a>, a CAPTCHA-solving service, to handle these protections automatically.</p>
<p><em>Available on Enterprise and Ultimate plans.</em></p>
<h3>How It Works</h3>
<ol>
<li>PageCrawl encounters a CAPTCHA when checking a page</li>
<li>The CAPTCHA is sent to 2Captcha for solving</li>
<li>2Captcha returns the solution (using a combination of human workers and AI)</li>
<li>PageCrawl submits the solution and accesses the page content</li>
<li>The page is checked for changes as normal</li>
</ol>
<h3>Setup</h3>
<ol>
<li>Create an account at <a href="https://2captcha.com">2captcha.com</a> and add funds</li>
<li>Copy your 2Captcha API key from the 2Captcha dashboard</li>
<li>In PageCrawl, go to <strong>Settings</strong> &gt; <strong>Workspace</strong> &gt; <strong>Integrations</strong></li>
<li>Enter your 2Captcha API key and save</li>
<li>Pages that encounter CAPTCHAs will now be solved automatically</li>
</ol>
<h3>Supported CAPTCHA Types</h3>
<p>2Captcha handles most common CAPTCHA types including reCAPTCHA v2, reCAPTCHA v3, hCaptcha, and image-based challenges.</p>
<h3>Cost</h3>
<p>CAPTCHA solving is billed by 2Captcha separately from your PageCrawl subscription. Typical costs are $1-3 per 1,000 CAPTCHAs solved. Check <a href="https://2captcha.com">2captcha.com/pricing</a> for current rates.</p>
<h3>Tips</h3>
<ul>
<li>Not all blocked pages use CAPTCHA. If you see 403 errors or bot protection challenges, try <a href="/help/troubleshooting/article/monitoring-pages-behind-cloudflare-bot-protection">Stealth mode</a> first</li>
<li>CAPTCHA solving adds a few seconds to each check while waiting for the solution</li>
<li>If a page always shows CAPTCHA, consider reducing check frequency to minimize costs</li>
</ul>
<h3>Related Articles</h3>
<ul>
<li><a href="/help/troubleshooting/article/monitoring-pages-behind-cloudflare-bot-protection">Bot Protection</a> - Handle bot-protected pages</li>
<li><a href="/help/troubleshooting/article/common-issues-with-page-not-loading">Page Loading Issues</a> - Common loading problems and solutions</li>
<li><a href="/help/features/article/custom-proxies">Custom Proxies</a> - Use proxy servers to avoid blocks</li>
</ul>]]>
            </summary>
                                    <updated>2026-03-26T05:33:22+00:00</updated>
        </entry>
            <entry>
            <title><![CDATA[Common Problems and Solutions for Page Loading Issues]]></title>
            <link rel="alternate" href="https://pagecrawl.io/help/troubleshooting/article/common-issues-with-page-not-loading" />
            <id>https://pagecrawl.io/35</id>
            <author>
                <name><![CDATA[PageCrawl.io]]></name>
            </author>
            <summary type="html">
                <![CDATA[<h1>Common Problems and Solutions for Page Loading Issues</h1>
<p>There may be various reasons why a page fails to open. This guide describes the most common problems and suggests solutions to help you overcome these issues.</p>
<h3>Timeout</h3>
<p>A timeout occurs when the page takes too long to respond. This may be a temporary issue with the page, or the page may be loading very slowly. Timeout limits vary depending on your plan:</p>
<ul>
<li>Free plan: 45 seconds</li>
<li>Standard plan: 90 seconds</li>
<li>Enterprise plan: 180 seconds</li>
</ul>
<p>To avoid timeouts please consider subscribing to a paid plan or upgrading your plan.</p>
<h3>Selector not found</h3>
<p>This error will be shown if the page has changed significantly and element with configured XPath/CSS selector could not be found. In this case, you should review the page and update selector if needed.</p>
<h3>Page blocked</h3>
<p>Some pages may use site protection features to block scrapers and website tracking tools like PageCrawl.io. Different pages may use different blocking mechanisms, but here are the most common ones:</p>
<ul>
<li>
<p><strong>Access Restricted to Specific Countries</strong> Page may be configured to only allow visitors from a specific country.</p>
<ul>
<li><strong>Solution</strong>: Specify a proxy location from a country that is not blocked. If you cannot find an available proxy, consider purchasing a proxy service for a specific country and <a href="/help/features/article/custom-proxies">configuring custom proxy in PageCrawl.io</a>.</li>
</ul>
</li>
<li>
<p><strong>Proxy Location blocked</strong> The website may block the IP address of the proxy server PageCrawl is using.</p>
<ul>
<li><strong>Solution</strong>: Use "Residential proxy pool" to avoid being blocked. You will need to purchase a proxy service for a specific country and <a href="/help/features/article/custom-proxies">configuring custom proxy in PageCrawl.io</a>.</li>
</ul>
</li>
</ul>
<h3>401 or 403 Error</h3>
<p>Most often indicates that PageCrawl.io Bot was not allowed to access the website. Use "Residential proxy pool" to avoid being blocked. </p>
<h3>404 Page Not Found</h3>
<p>In most cases this error indicates that page is no longer available to view. You should check and update the page URL.</p>
<h3>500 Series error</h3>
<p>500, 502, 503, 504 indicates that website server is not responsive, overloaded, currently in maintenance or experiencing server issues. If such error occurs, our bots will retry page check later.</p>
<h3>Page Unreachable</h3>
<p>The page can't be opened. In most cases website is down or the website in only reachable from a specific country</p>
<h3>Site Protected with CAPTCHA</h3>
<p>Pages may use CAPTCHA to protect the website from bots. To bypass this, you can use a service like 2Captcha which will use human workers to solve the captcha for you. PageCrawl.io has an <a href="/help/integrations/article/bypass-captcha-tracked-pages">integration with 2Captcha</a> (you must be subscribed to Enterprise plan) you can sign up for and configure the API token generated from 2Captcha.</p>
<h3>Unknown Error</h3>
<p>In some cases there could be an unexpected error that causes the PageCrawl bot to fail to check the page for changes. In case this error does not go away after a while, please contact support to notify us about the problem so we could prioritize the issue.</p>]]>
            </summary>
                                    <updated>2026-03-05T10:31:13+00:00</updated>
        </entry>
            <entry>
            <title><![CDATA[How to Easily Find XPath or CSS Selector in Major Browsers]]></title>
            <link rel="alternate" href="https://pagecrawl.io/help/tutorials/article/find-xpath-css-selector-in-chrome" />
            <id>https://pagecrawl.io/36</id>
            <author>
                <name><![CDATA[PageCrawl.io]]></name>
            </author>
            <summary type="html">
                <![CDATA[<h1>How to Easily Find XPath or CSS Selector in Major Browsers</h1>
<div style="background: #f5f5f5; padding: 30px; border-radius: 8px; text-align: center; margin: 20px 0; border: 1px solid #e0e0e0;">
  <img src="/images/blog/simple-create-specific.png" alt="Quick Setup showing Specific Area monitoring with selector input" style="max-width: 100%; border-radius: 6px; box-shadow: 0 4px 12px rgba(0,0,0,0.15);">
</div>
<p>If you encounter a problem with PageCrawl's visual selector and are unable to open the page you are trying to access, there is another option you can try. You can manually copy the selector by opening the desired page in your preferred web browser. This manual method may be more time-consuming, but it can provide a reliable solution if the visual selector is not functioning properly. Additionally, by manually copying the selector, you can have greater control over the elements on the page and the data you want to extract.</p>
<p>This guide will show you how to do it quickly and easily for Chrome, Firefox and Safari browsers. </p>
<h3>XPath vs CSS Selector: Which One to Choose for Tracking?</h3>
<p>When it comes to web scraping, finding the right element on a webpage can be a challenge. This is where expression languages like XPath and CSS Selector come in handy. These two powerful tools help you locate elements on a webpage, and choosing between them can be difficult.</p>
<h3>Understanding XPath and CSS Selector</h3>
<p>CSS Selectors are favored by many web developers as they are easy to learn if you already know CSS syntax. On the other hand, XPath Selectors offer greater power and flexibility, such as the ability to find elements that contain specific text. However, the learning curve for XPath can be steeper.</p>
<p>For those just starting out, CSS Selectors are the recommended choice due to their simplicity and versatility. Most advanced selectors can be written in CSS, making it a good option for web scraping beginners.</p>
<h3>Relative vs Absolute Selector</h3>
<p>When it comes to CSS and XPath Selectors, there are two ways to generate them: relative and absolute.</p>
<p><strong>Relative selectors are preferred in most cases, as they are less prone to break.</strong>  </p>
<p>Absolute selectors, on the other hand, are useful when tracking a large number of pages, and you are only interested in specific elements. However, with even a slight change in page layout, the selector will break. If an element is added or removed from a page, the absolute XPath will need to be updated to continue tracking the page contents.</p>
<p>Relative selectors tend to be short, while absolute selectors can be lengthy. Here are some examples of relative and absolute selectors for both CSS and XPath:</p>
<ul>
<li><strong>Relative XPath selector:</strong> ///h2[@id='get-started']//span[1]</li>
<li><strong>Relative CSS selector:</strong> h2[id='get-started'] span</li>
<li><strong>Absolute XPath selector:</strong> //*[@id="root"]/section/section/main/div/main/div/div[5]/div/div/div/div/div[1]/div/table/tbody/tr[20]</li>
<li><strong>Absolute CSS selector:</strong> #root &gt; section &gt; section &gt; main &gt; div &gt; main &gt; div &gt; div:nth-child(6) &gt; div &gt; div &gt; div &gt; div &gt; div.ant-table-container &gt; div &gt; table &gt; tbody &gt; tr:nth-child(20)</li>
</ul>
<h3>Generating Selectors with a Browser Extension</h3>
<p>There are multiple browser extensions available that can help you copy CSS or XPath Selectors. Two options that we tried and can recommend include "SelectorsHub" and "SelectorGadget".</p>
<ul>
<li>SelectorsHub is a browser extension available for all browsers that allows you to right-click on an element and copy the "Relative XPath selector" or "Relative CSS selector." </li>
<li>SelectorGadget, on the other hand, is only available for Chrome and offers a visual selector that allows you to click on elements and see the generated selector.</li>
</ul>
<h3>Generating Selectors Without a Browser Extension</h3>
<p>If you prefer not to use a browser extension, you can also find CSS or XPath Selectors by inspecting an element. In most cases, you will get an absolute selector, and if the page content changes, you will need to update the selector.</p>
<p>In conclusion, choosing between XPath and CSS Selectors for web scraping comes down to your personal preference and level of experience. Both offer powerful tools for locating elements on a webpage, and with a little practice, you can become an expert in no time!</p>
<h4>Steps to Find XPath or CSS Selector in Chrome Browser:</h4>
<ol>
<li>Right-click on the element on the web page you want to select.</li>
<li>Choose the "Inspect" option from the context menu.</li>
<li>The "Elements" tab in the DevTools window will open, displaying the HTML code for the page.</li>
<li>Right-click on the HTML code for the element you want to select and choose "Copy" from the context menu.</li>
<li>Choose "Copy XPath" or "Copy selector" to copy the XPath or CSS selector for that element.</li>
<li>If you selected "Copy full XPath", it will copy the absolute XPath (Check in section above: Relative vs Absolute Selector).</li>
<li>Paste the generated selector in PageCrawl.io Tracked Element field.</li>
</ol>
<h4>Steps to Find XPath or CSS Selector in Firefox Browser:</h4>
<ol>
<li>Right-click on the element on the web page you want to select.</li>
<li>Choose the "Inspect Element" option from the context menu.</li>
<li>The "Developer Tools" window will open, displaying the HTML code for the page.</li>
<li>Right-click on the HTML code for the element you want to select and choose "Copy XPath" or "Copy CSS Path" from the context menu.</li>
<li>Paste the generated selector in PageCrawl.io Tracked Element field.</li>
</ol>
<h4>Steps to Find XPath or CSS Selector in Safari Browser:</h4>
<ol>
<li>Enable the "Develop" menu in Safari by going to Safari &gt; Preferences &gt; Advanced, and checking the "Show Develop menu in menu bar" option.</li>
<li>Right-click on the element on the web page you want to select.</li>
<li>Choose the "Inspect Element" option from the context menu.</li>
<li>The "Web Inspector" will open, displaying the HTML code for the page.</li>
<li>Right-click on the HTML code for the element you want to select and choose "Copy XPath" or "Copy CSS Path" from the context menu.</li>
<li>Paste the generated selector in PageCrawl.io Tracked Element field.</li>
</ol>]]>
            </summary>
                                    <updated>2026-03-05T10:31:13+00:00</updated>
        </entry>
            <entry>
            <title><![CDATA[Dealing with Website Language Changes When Monitoring Page for Updates]]></title>
            <link rel="alternate" href="https://pagecrawl.io/help/troubleshooting/article/monitored-page-language-keeps-changing" />
            <id>https://pagecrawl.io/37</id>
            <author>
                <name><![CDATA[PageCrawl.io]]></name>
            </author>
            <summary type="html">
                <![CDATA[<h1>Dealing with Website Language Changes When Monitoring Page for Updates</h1>
<p>If you are reading this, you may have experienced the frustration of the language suddenly switching on your monitored page, causing false positive notifications. Unfortunately, the language behavior of a website is determined by the site developers, and there are several approaches they may use. Some websites base their language on the browser or system settings, which is the best option. Others guess the language based on the country information from the IP address, while others use a mixed approach. There are two approaches you can use to prevent the page language from changing.</p>
<h3>Set the browser language</h3>
<p>To prevent language switching from occurring when monitoring a website for changes, there are a few things you can do. One option is to set the browser language to a specific language, such as "Danish", in "Advanced Settings" by editing the tracked page configuration in PageCrawl. However, keep in mind that some bot detection services can detect this, so use this option only if absolutely necessary.</p>
<p>If you are using "Stealth Mode", be aware that setting the browser language may cause issues. Overriding the browser language can be inconsistent with what bot detection services expect, which may trigger blocks.</p>
<h3>Use fixed IP address</h3>
<p>Another option is to access the website from a fixed IP address by setting Proxy Location to "Fixed IP". This ensures that the same IP is used to check for changes on the page. However, if the proxy location gets blocked, PageCrawl may not be able to bypass the blocks and displays a crawl error.</p>]]>
            </summary>
                                    <updated>2026-03-26T05:33:22+00:00</updated>
        </entry>
            <entry>
            <title><![CDATA[Monitoring SEO Tags for Changes]]></title>
            <link rel="alternate" href="https://pagecrawl.io/help/tutorials/article/tracking-seo-keywords-for-each-website-page" />
            <id>https://pagecrawl.io/38</id>
            <author>
                <name><![CDATA[PageCrawl.io]]></name>
            </author>
            <summary type="html">
                <![CDATA[<h1>Monitoring SEO Tags for Changes</h1>
<div style="background: #f5f5f5; padding: 30px; border-radius: 8px; text-align: center; margin: 20px 0; border: 1px solid #e0e0e0;">
  <img src="/images/blog/seo-template.png" alt="monitoring seo tags" style="max-width: 100%; border-radius: 6px; box-shadow: 0 4px 12px rgba(0,0,0,0.15);">
</div>
<p>Optimizing your website for search engines requires effective monitoring of SEO tags. PageCrawl makes it easy to track changes to title tags, meta descriptions, canonical URLs, robots directives, Open Graph tags, and headings.</p>
<h3>One-Click SEO Monitoring</h3>
<p>The fastest way to monitor SEO tags is with the built-in <strong>SEO Tags</strong> tracking mode:</p>
<ol>
<li>Log in to your PageCrawl account.</li>
<li>Click on <strong>Track New Page</strong> and enter the page URL.</li>
<li>Select <strong>SEO Tags</strong> as the tracking type.</li>
<li>Save and start monitoring.</li>
</ol>
<p>PageCrawl will automatically extract and track:</p>
<ul>
<li><strong>Title</strong> tag</li>
<li><strong>Meta description</strong></li>
<li><strong>Meta keywords</strong> (if present)</li>
<li><strong>Canonical URL</strong></li>
<li><strong>Robots</strong> directive</li>
<li><strong>H1</strong> heading</li>
<li><strong>Open Graph</strong> tags (og:title, og:description, og:image, og:url, og:type)</li>
</ul>
<p>When any of these fields change, you will see exactly which tag was modified and what the previous and new values are.</p>
<p>If you plan to monitor SEO tags for multiple pages, we recommend creating a <strong>Template</strong> with the SEO Tags tracking type. This lets you reuse the configuration across many pages without repeating setup.</p>
<h3>Advanced: Track Individual SEO Elements</h3>
<p>If you only need to monitor specific SEO tags (rather than all of them), you can create individual tracked elements using CSS or XPath selectors.</p>
<p>Use "Text" for the following tracked elements:</p>
<p><strong>SEO</strong></p>
<ul>
<li>Title: <code>title</code></li>
<li>Meta description: <code>/html/head/meta[@name="description"]/@content</code></li>
<li>Meta keywords: <code>/html/head/meta[@name="keywords"]/@content</code></li>
<li>Meta robots: <code>/html/head/meta[@name="robots"]/@content</code></li>
<li>Meta viewport: <code>/html/head/meta[@name="viewport"]/@content</code></li>
</ul>
<p><strong>Social Media Tags</strong></p>
<ul>
<li>og:title: <code>/html/head/meta[@property="og:title"]/@content</code></li>
<li>og:type: <code>/html/head/meta[@property="og:type"]/@content</code></li>
<li>og:image: <code>/html/head/meta[@property="og:image"]/@content</code></li>
<li>og:url: <code>/html/head/meta[@property="og:url"]/@content</code></li>
</ul>
<p>Use "Text (all elements)" for the following tracked elements:</p>
<p><strong>Headings</strong></p>
<ul>
<li>h1 tags: <code>h1</code></li>
<li>h2 tags: <code>h2</code></li>
<li>h3 tags: <code>h3</code></li>
<li>h4 tags: <code>h4</code></li>
<li>h5 tags: <code>h5</code></li>
</ul>]]>
            </summary>
                                    <updated>2026-03-26T05:33:22+00:00</updated>
        </entry>
            <entry>
            <title><![CDATA[Tracking (outgoing) links for changes]]></title>
            <link rel="alternate" href="https://pagecrawl.io/help/tutorials/article/tracking-link-on-page" />
            <id>https://pagecrawl.io/39</id>
            <author>
                <name><![CDATA[PageCrawl.io]]></name>
            </author>
            <summary type="html">
                <![CDATA[<h1>Tracking (outgoing) links for changes</h1>
<div style="background: #f5f5f5; padding: 30px; border-radius: 8px; text-align: center; margin: 20px 0; border: 1px solid #e0e0e0;">
  <img src="/images/blog/track-links.png" alt="test xpath selector" style="max-width: 100%; border-radius: 6px; box-shadow: 0 4px 12px rgba(0,0,0,0.15);">
</div>
<p>You may also wish to track outgoing links that exist on the page. We suggest using "Text (all elements, sorted)" to capture links to other pages. You may use these selectors to track:</p>
<h3>All links on the page</h3>
<p>Use the following selector to track all links on a web page:</p>
<ul>
<li><code>//a/@href</code></li>
</ul>
<h3>External Links</h3>
<p>To track only external links (those not belonging to a specific website), use this selector:</p>
<ul>
<li><code>//@href[not(contains(.,'not-this-website.com'))]</code>
<em>Note: You should substitute 'not-this-website.com' with the website URL.</em></li>
</ul>
<h3>Links with Specific Keywords in the URL</h3>
<p>If you want to track links containing specific keywords in their URLs, use this selector as an example:</p>
<ul>
<li><code>//a[contains(@href,'/download/oursoftware_')]/@href</code></li>
</ul>
<h3>PDF Links</h3>
<p>To specifically track links leading to PDF documents, you can use this selector:</p>
<ul>
<li><code>//a[contains(@href,'.pdf')]/@href</code></li>
</ul>
<h3>Links with Text as Anchor Text</h3>
<ul>
<li><code>//a[contains(text(),'Download')]/@href</code>
<em>Note: This selector is case-sensitive. e.g. if the text actually is "download", it will not be found</em></li>
</ul>
<h3>Links with Specific CSS Classes</h3>
<p>If you want to track links with specific CSS classes, use this selector:</p>
<ul>
<li><code>//a[contains(@class,'your-class-name')]/@href</code>
<em>Note: You should substitute 'your-class-name' with the class.</em></li>
</ul>
<h3>Links with Specific Attributes</h3>
<p>To track links with specific attributes (other than href), use this selector and replace "attribute-name" with the name of the attribute you're interested in:</p>
<ul>
<li><code>//a[@attribute-name='attribute-value']/@href</code>
<em>Note: You should substitute 'attribute-name' and 'attribute-value' with the relevant attribute values.</em></li>
</ul>]]>
            </summary>
                                    <updated>2026-03-05T10:31:13+00:00</updated>
        </entry>
            <entry>
            <title><![CDATA[Monitoring Pages Behind Bot Protection]]></title>
            <link rel="alternate" href="https://pagecrawl.io/help/troubleshooting/article/monitoring-pages-behind-cloudflare-bot-protection" />
            <id>https://pagecrawl.io/40</id>
            <author>
                <name><![CDATA[PageCrawl.io]]></name>
            </author>
            <summary type="html">
                <![CDATA[<h1>Monitoring Pages Behind Bot Protection</h1>
<p>Over 30% of websites now use bot protection services like Cloudflare, Akamai, and similar tools that block automated access. This means your monitored pages can stop returning data without warning.</p>
<p>PageCrawl provides multiple layers of protection to keep your monitors working, most of which happen automatically.</p>
<h3>What Happens Automatically</h3>
<p>PageCrawl handles most bot protection automatically. When a check fails, PageCrawl detects the block and adjusts its approach on the next attempt. This includes automatic retries, switching to stealth mode, and rotating through different proxy locations.</p>
<p>For most pages, you do not need to configure anything. The steps below are only needed if automatic handling does not resolve the issue.</p>
<h3>How Do I Know If My Page Is Blocked?</h3>
<p>PageCrawl will show a warning on the page if it detects a block. You may also notice that the captured content is empty, shows an error code (403, 401), or looks different from what you see when you visit the page yourself.</p>
<h3>Troubleshooting Guide</h3>
<p>Note: The settings below require <strong>Advanced</strong> mode. To enable it, click <strong>Edit</strong> on any page and toggle <strong>Advanced</strong> at the bottom of the form.</p>
<p>Follow these steps in order. After each step, wait for the check to complete before moving on.</p>
<h4>Step 1: Enable Stealth Mode</h4>
<p>This is the first thing to try and resolves most blocking issues.</p>
<ol>
<li>Open the blocked page in PageCrawl</li>
<li>Click <strong>Edit</strong></li>
<li>Scroll down and enable <strong>Advanced</strong> mode</li>
<li>Change <strong>Engine</strong> from "Default" to <strong>Stealth</strong></li>
<li>Click <strong>Save</strong> - a check will trigger automatically</li>
<li>Wait for the check to complete and review the result</li>
</ol>
<p>If the content now loads correctly, you are done. Stealth mode will be used for all future checks on this page.</p>
<h4>Step 2: Change Proxy Location</h4>
<p>If Stealth mode alone does not work, the site may be blocking the specific IP address or region.</p>
<ol>
<li>Open the page and click <strong>Edit</strong></li>
<li>Under <strong>Proxy Location</strong>, select <strong>Random</strong></li>
<li>Click <strong>Save</strong> - a check will trigger automatically</li>
</ol>
<p>Random proxy rotation means each check comes from a different IP address, making IP-based blocking ineffective.</p>
<p>You can also try specific locations (London, New York, San Francisco, Toronto, Frankfurt) if you know the site serves content differently by region.</p>
<h4>Step 3: Use Residential Proxies</h4>
<p>For sites with the strictest protections, residential proxies are the most effective option. These route requests through real consumer internet connections, making them virtually indistinguishable from regular visitors.</p>
<ol>
<li>Open the page and click <strong>Edit</strong></li>
<li>Under <strong>Proxy Location</strong>, select <strong>Residential</strong></li>
<li>Select a <strong>country</strong> for the residential proxy</li>
<li>Click <strong>Save</strong> - a check will trigger automatically</li>
</ol>
<p>Residential proxy traffic is available as an add-on. You can <a href="/residential-proxies">purchase residential proxy traffic</a> directly from your PageCrawl account.</p>
<p>Note: Residential proxies consume traffic from your purchased balance. Each check uses a small amount of traffic depending on the page size.</p>
<h4>Step 4: Use a Custom Proxy</h4>
<p>If none of the built-in options work, you can use your own proxy server from a third-party provider.</p>
<ol>
<li>Open the page and click <strong>Edit</strong></li>
<li>Enable <strong>Advanced</strong> mode</li>
<li>Enter your proxy details in the <strong>Custom Proxy</strong> field (format: <code>http://user:password@host:port</code>)</li>
<li>Click <strong>Save</strong> and trigger a manual check</li>
</ol>
<p>This is useful when you need a proxy from a specific country or provider, or when you already have a proxy subscription. See <a href="/help/features/article/custom-proxies">Custom Proxies</a> for more details.</p>
<h3>Quick Reference</h3>
<table>
<thead>
<tr>
<th>Solution</th>
<th>How to Enable</th>
<th>When to Use</th>
</tr>
</thead>
<tbody>
<tr>
<td><strong>Stealth mode</strong></td>
<td>Edit &gt; Advanced &gt; Engine: Stealth</td>
<td>First thing to try for any blocked page</td>
</tr>
<tr>
<td><strong>Proxy rotation</strong></td>
<td>Edit &gt; Proxy: Random</td>
<td>When a specific IP is blocked</td>
</tr>
<tr>
<td><strong>Residential proxy</strong></td>
<td>Edit &gt; Proxy: Residential</td>
<td>For the strictest access controls</td>
</tr>
<tr>
<td><strong>Custom proxy</strong></td>
<td>Edit &gt; Advanced &gt; Custom Proxy</td>
<td>When you need a specific provider or location</td>
</tr>
</tbody>
</table>
<h3>Still Blocked?</h3>
<p>If you have tried all the steps above and the page is still not loading:</p>
<ul>
<li><strong>Double-check the URL</strong> - Make sure the URL is correct and the page is publicly accessible. Try opening it in a private/incognito browser window to confirm.</li>
<li><a href="/residential-proxies">Purchase residential proxy traffic</a> directly from PageCrawl if you have not already. This is the most effective solution for heavily protected sites.</li>
<li>Try a <a href="/help/features/article/custom-proxies">custom proxy</a> from a third-party provider if you need a specific geographic location or a different proxy type.</li>
<li><strong>Contact support</strong> - Email <a href="mailto:support@pagecrawl.io">support@pagecrawl.io</a> with the page URL and a description of what you see. We can review the specific page and suggest the best configuration.</li>
</ul>
<h3>Related Articles</h3>
<ul>
<li><a href="/help/features/article/what-is-real-browser-page-monitoring">Real Browser Mode</a> - Engine selection including Stealth mode</li>
<li><a href="/help/features/article/custom-proxies">Custom Proxies</a> - Configure proxy servers</li>
<li><a href="/residential-proxies">Residential Proxies</a> - Purchase residential proxy traffic</li>
<li><a href="/help/troubleshooting/article/common-issues-with-page-not-loading">Page Loading Issues</a> - Other common loading problems</li>
</ul>]]>
            </summary>
                                    <updated>2026-04-07T05:09:15+00:00</updated>
        </entry>
            <entry>
            <title><![CDATA[Monitor Changes in XML Files]]></title>
            <link rel="alternate" href="https://pagecrawl.io/help/tutorials/article/tracking-changes-in-xml-files" />
            <id>https://pagecrawl.io/41</id>
            <author>
                <name><![CDATA[PageCrawl.io]]></name>
            </author>
            <summary type="html">
                <![CDATA[<h1>Monitor Changes in XML Files</h1>
<pre><code class="language-xml">&lt;?xml version="1.0"?&gt;
&lt;catalog&gt;
    &lt;book id="bk101"&gt;
        &lt;author&gt;Gambardella, Matthew&lt;/author&gt;
        &lt;title&gt;XML Developer's Guide&lt;/title&gt;
        &lt;genre&gt;Computer&lt;/genre&gt;
        &lt;price&gt;44.95&lt;/price&gt;
        &lt;publish_date&gt;2000-10-01&lt;/publish_date&gt;
        &lt;description&gt;An in-depth look at creating applications with XML.&lt;/description&gt;
    &lt;/book&gt;
&lt;/catalog&gt;</code></pre>
<p><a href="https://pagecrawl.io/">pagecrawl.io</a> offers an efficient way to monitor and track changes in XML files. Instead of sifting through the whole XML file for changes, which can be overwhelming due to frequent updates, you can focus on specific things that matter. This helps you avoid getting flooded with unnecessary alerts for minor changes like 'updated at' dates.</p>
<p>This guide will walk you through the process of setting up and utilizing this feature to simplify your tracking experience.</p>
<p>To reduce the number of false positive you may want to monitor a specific attribute (or multiple attributes), whether it was added, removed or changed.</p>
<h3>Step 1: Getting Started</h3>
<p>To begin tracking changes in XML files, follow these steps:</p>
<ol>
<li>
<p>Access PageCrawl: Log in to your PageCrawl account or sign up if you're new to the platform.</p>
</li>
<li>
<p>Create a Monitored Page: Once logged in, navigate to the dashboard and click on the "New Page" button. This will initiate the setup process for monitoring pages for changes.</p>
</li>
</ol>
<h3>Step 2: Choosing Attributes to Track</h3>
<p>Instead of monitoring the entire XML file, you can narrow down your focus to specific attributes that are relevant to you. For example, you might want to track changes in book names within an XML catalog.</p>
<h4>Example XML File</h4>
<p>Consider the <a href="/downloads/books.xml">following example xml file</a> structure:</p>
<pre><code class="language-xml">&lt;?xml version="1.0"?&gt;
&lt;catalog&gt;
    &lt;catalog&gt;
        &lt;book id="bk101"&gt;
            &lt;title&gt;XML Developer's Guide&lt;/title&gt;
            &lt;!-- Other book details... --&gt;
        &lt;/book&gt;
        &lt;book id="bk102"&gt;
            &lt;title&gt;Dummy XML Developer's Guide&lt;/title&gt;
            &lt;!-- Other book details... --&gt;
        &lt;/book&gt;
        &lt;!-- More book entries... --&gt;
    &lt;/catalog&gt;
&lt;/catalog&gt;</code></pre>
<h3>Step 3: Configuring Tracking Elements</h3>
<div style="background: #f5f5f5; padding: 30px; border-radius: 8px; text-align: center; margin: 20px 0; border: 1px solid #e0e0e0;">
  <img src="/images/blog/xml-monitoring.png" alt="xml file monitoring" style="max-width: 100%; border-radius: 6px; box-shadow: 0 4px 12px rgba(0,0,0,0.15);">
</div>
<p>Follow these steps to configure tracking elements for your XML file:</p>
<ol>
<li>
<p>Select Tracked Element: Within the PageCrawl setup interface, choose the "Text (all matches)" as tracking element type.</p>
</li>
<li>
<p>Specify Element to Track: In this step, you'll specify the exact element within the XML that you want to track. For instance, if you're interested in changes to book titles, you'll set the element as <code>title</code>.</p>
</li>
</ol>
<p>In this case, by focusing on the <code>title</code> element, you'll receive notifications only when book titles change, new is added or removed, filtering out less significant updates.</p>
<p><em>If you would like to also keep the full history of what has changed in the XML document but only be notified when a specific attribute changes, you can also add "Full Page" as the Tracked Element and then add a condition to be notified when the monitored attribute changes.</em></p>]]>
            </summary>
                                    <updated>2026-03-05T10:31:13+00:00</updated>
        </entry>
            <entry>
            <title><![CDATA[Daily, Weekly or Monthly Change Monitoring Reports]]></title>
            <link rel="alternate" href="https://pagecrawl.io/help/features/article/monitoring-reports-tracked-pages" />
            <id>https://pagecrawl.io/42</id>
            <author>
                <name><![CDATA[PageCrawl.io]]></name>
            </author>
            <summary type="html">
                <![CDATA[<h1>Daily, Weekly or Monthly Change Monitoring Reports</h1>
<p><em>Note: This feature is available on paid plans only.</em></p>
<div style="background: #f5f5f5; padding: 30px; border-radius: 8px; text-align: center; margin: 20px 0; border: 1px solid #e0e0e0;">
  <img src="/images/blog/workspace-notifications.png" alt="notification settings for change monitoring reports" style="max-width: 100%; border-radius: 6px; box-shadow: 0 4px 12px rgba(0,0,0,0.15);">
</div>
<p>With <a href="https://pagecrawl.io">pagecrawl.io</a>, you can customize your notifications to receive updates either immediately as changes are detected or opt for summarized reports delivered on a daily, weekly, or monthly basis, all at times that align with your preferences.</p>
<p>By default, your account is configured to send email notifications immediately upon detecting changes. Here are scenarios where "Immediate" notifications might be the preferred choice:</p>
<ul>
<li>
<p><strong>Real-Time Monitoring</strong>: If you're monitoring critical web pages where even the slightest change holds significant importance, immediate notifications are ideal. For instance, if you're tracking a service status page or an e-commerce website with limited-stock items, getting notified immediately ensures you're always up-to-date.</p>
</li>
<li>
<p><strong>Time-Sensitive Events</strong>: For pages related to events like ticket releases, flash sales, or limited-time offers, immediate alerts are essential. This option lets you act fast on opportunities and respond promptly to changing circumstances.</p>
</li>
</ul>
<p>If real-time updates aren’t needed, summarized reports offer a more manageable approach:</p>
<ul>
<li>
<p><strong>Daily Reports</strong>: Best for pages with frequent updates where you’d rather not receive constant notifications. Daily reports summarize all changes in one email, making it easier to stay updated without distraction.</p>
</li>
<li>
<p><strong>Weekly Reports</strong>: Ideal for a bigger-picture overview. Weekly reports work well for pages with moderate update frequency or for tracking trends on less time-sensitive content, like blogs or research articles.</p>
</li>
</ul>
<h3>How to Set Your Notification Preferences</h3>
<ol>
<li>Log in to your <a href="https://pagecrawl.io">pagecrawl.io</a> account.</li>
<li>Go to the <strong>Settings</strong> section.</li>
<li>Click on <strong>Workspace</strong>, then select <strong>Notifications</strong>.</li>
<li>Find the "Send change reports" option and select your preferred notification schedule.</li>
</ol>
<p>You can choose from the following report options:</p>
<ul>
<li><strong>Daily</strong>: Get a report every day.</li>
<li><strong>Daily (except weekends)</strong>: Receive reports daily, but skip weekends.</li>
<li><strong>Weekly</strong>: Get a weekly summary of changes.</li>
<li><strong>Monthly</strong>: Receive a summary report every month.</li>
</ul>]]>
            </summary>
                                    <updated>2026-03-05T10:31:12+00:00</updated>
        </entry>
            <entry>
            <title><![CDATA[Check Scheduling]]></title>
            <link rel="alternate" href="https://pagecrawl.io/help/features/article/page-check-schedule" />
            <id>https://pagecrawl.io/43</id>
            <author>
                <name><![CDATA[PageCrawl.io]]></name>
            </author>
            <summary type="html">
                <![CDATA[<h1>Check Scheduling</h1>
<p>Control when PageCrawl runs checks on your monitored pages by setting active days, hours, and check frequency. This is configured per workspace.</p>
<p><em>Available on paid plans.</em></p>
<h3>Check Frequency</h3>
<p>Set how often each page is checked. Available frequencies depend on your plan:</p>
<table>
<thead>
<tr>
<th>Plan</th>
<th>Minimum Interval</th>
</tr>
</thead>
<tbody>
<tr>
<td><strong>Free</strong></td>
<td>Every hour</td>
</tr>
<tr>
<td><strong>Standard</strong></td>
<td>Every 15 minutes</td>
</tr>
<tr>
<td><strong>Enterprise</strong></td>
<td>Every 5 minutes</td>
</tr>
<tr>
<td><strong>Ultimate</strong></td>
<td>Every 2 minutes</td>
</tr>
</tbody>
</table>
<p>Full frequency options: every 5 min, 15 min, 30 min, 45 min, hourly, every 2 hours, 3 hours, 6 hours, twice daily, daily, every 2 days, every 3 days, weekly, every 2 weeks, and monthly.</p>
<h3>Workspace Schedule</h3>
<p>Limit checks to specific days and times for an entire workspace:</p>
<ol>
<li>Go to <strong>Settings</strong> &gt; <strong>Workspace</strong> &gt; <strong>Scheduling</strong></li>
<li>Select which days of the week to run checks (Monday through Sunday)</li>
<li>Set the active hours (start and end time)</li>
<li>Hours are automatically converted to UTC based on your workspace timezone</li>
</ol>
<p>When outside the scheduled hours or on inactive days, PageCrawl pauses checks for all pages in the workspace. Checks resume automatically when the next active period begins.</p>
<h3>Email Digest</h3>
<p>Instead of receiving individual notifications for each change, you can configure a daily email digest:</p>
<ol>
<li>Go to <strong>Settings</strong> &gt; <strong>Workspace</strong> &gt; <strong>Notifications</strong></li>
<li>Enable the daily digest</li>
<li>Choose the day and time for delivery</li>
</ol>
<p>The digest summarizes all changes detected since the last digest was sent.</p>
<h3>Related Articles</h3>
<ul>
<li><a href="/help/features/article/bulk-edit-pages">Bulk Edit</a> - Change frequency and schedule settings across multiple pages</li>
<li><a href="/help/subscription/article/is-there-limit-of-checks-in-standard-plan">Check Limits</a> - Understand plan check quotas</li>
<li><a href="/help/features/article/advanced-configuration">Advanced Configuration</a> - Power User mode and per-page settings</li>
</ul>]]>
            </summary>
                                    <updated>2026-03-05T10:31:12+00:00</updated>
        </entry>
            <entry>
            <title><![CDATA[PageCrawl.io + Zapier integration]]></title>
            <link rel="alternate" href="https://pagecrawl.io/help/integrations/article/pagecrawl-zapier-integration" />
            <id>https://pagecrawl.io/45</id>
            <author>
                <name><![CDATA[PageCrawl.io]]></name>
            </author>
            <summary type="html">
                <![CDATA[<h1>PageCrawl.io + Zapier integration</h1>
<div style="background: #f5f5f5; padding: 30px; border-radius: 8px; text-align: center; margin: 20px 0; border: 1px solid #e0e0e0;">
  <img src="/images/blog/integrations-overview.png" alt="PageCrawl integrations page showing Zapier connection" style="max-width: 100%; border-radius: 6px; box-shadow: 0 4px 12px rgba(0,0,0,0.15);">
</div>
<p>The integration of PageCrawl.io with Zapier takes web monitoring to the next level by automating tasks and connecting your web monitoring data to countless other applications. In this guide, we'll explore how to set up this powerful integration and unlock a world of possibilities.</p>
<h3>Why Integrate PageCrawl.io with Zapier?</h3>
<p>Zapier is an automation platform that connects your favorite apps and services, allowing them to work together seamlessly. By integrating PageCrawl.io with Zapier, you can:</p>
<ol>
<li><strong>Automate Workflow</strong>: Create "Zaps" to automate tasks triggered by changes detected by PageCrawl.io.</li>
<li><strong>Extend Integration</strong>: Connect PageCrawl.io data to a vast array of other applications, enhancing its usefulness and allowing for more extensive analysis.</li>
<li><strong>Improve Efficiency</strong>: Eliminate manual data entry and automate processes, saving time and reducing the risk of errors.</li>
</ol>
<h3>Setting Up PageCrawl.io + Zapier Integration</h3>
<p>Here's a step-by-step guide to help you integrate PageCrawl.io with Zapier and enhance your web monitoring capabilities:</p>
<h4>Step 1: Sign in to PageCrawl.io</h4>
<p>If you're not already a PageCrawl.io user, sign up for an account.</p>
<h4>Step 2: Configure A Page To Monitor</h4>
<p>Set up the monitoring settings for the web page you're interested in tracking. Customize the elements you want to monitor and your notification preferences.</p>
<h4>Step 3: Enable Zapier Integration</h4>
<p>Visit <a href="/app/settings/workspace/integrations">Integrations page</a> and click on a button "Open on Zapier" and setup the Zapier + PageCrawl.io integration.</p>
<h4>Step 4: Create a Zap in Zapier</h4>
<ol>
<li>Create a new Zap by clicking "Make a Zap.". </li>
<li>Search for "PageCrawl.io" and select it as your trigger app.</li>
<li>Choose the trigger event, such as "New Change Detected"</li>
</ol>
<h4>Step 5: Set Up Zap Actions</h4>
<p>Define the actions you want to take when a trigger event occurs. This can include sending notifications, updating other apps, or performing custom actions.</p>
<h4>Step 6: Activate Your Zap</h4>
<p>Once you're satisfied with the setup, activate your Zap, and it will start automating tasks based on changes detected by PageCrawl.io.</p>
<h3>Related Articles</h3>
<ul>
<li><a href="/help/integrations/article/pagecrawl-n8n-integration">n8n Integration</a> - Open-source workflow automation</li>
<li><a href="/help/integrations/article/webhook-integration">Webhook Integration</a> - Send change data to any endpoint</li>
<li><a href="/help/features/article/api-webhooks-for-custom-integrations">API &amp; Webhooks</a> - Programmatic access</li>
</ul>]]>
            </summary>
                                    <updated>2026-03-05T10:31:12+00:00</updated>
        </entry>
            <entry>
            <title><![CDATA[Store Website Changes on Google Sheets]]></title>
            <link rel="alternate" href="https://pagecrawl.io/help/integrations/article/sync--monitored-pages-to-google-sheets" />
            <id>https://pagecrawl.io/46</id>
            <author>
                <name><![CDATA[PageCrawl.io]]></name>
            </author>
            <summary type="html">
                <![CDATA[<h1>Store Website Changes on Google Sheets</h1>
<div style="background: #f5f5f5; padding: 30px; border-radius: 8px; text-align: center; margin: 20px 0; border: 1px solid #e0e0e0;">
  <img src="/images/blog/google-sheets-integration.png" alt="website change detections syncing to Google Sheets" style="max-width: 100%; border-radius: 6px; box-shadow: 0 4px 12px rgba(0,0,0,0.15);">
</div>
<p>Managing and tracking changes on websites is essential for various purposes, from monitoring competitors to ensuring your web services are running smoothly. PageCrawl.io simplifies this process by allowing you to effortlessly monitor web page changes and integrate the data directly into Google Sheets. In this guide, we'll explore how to set up this powerful integration to store website change history efficiently.</p>
<h3>Why Store Website Change History on Google Sheets?</h3>
<p>Google Sheets offers a versatile and collaborative platform for storing and analyzing data. By integrating PageCrawl.io with Google Sheets, you can keep all your web page change history in one place for easy access and analysis.</p>
<h3>Setting Up PageCrawl.io Integration with Google Sheets</h3>
<p>Here's a step-by-step guide to help you integrate PageCrawl.io with Google Sheets and start storing website change history effortlessly:</p>
<ol>
<li>Log in to your PageCrawl account.</li>
<li>Navigate to the Settings -&gt; <strong><a href="/app/settings/workspace/integrations">Integrations</a></strong> section.</li>
<li>Click on <strong>Connect with Google Sheets</strong>, then authorize your Google Account and select where to store the data.</li>
<li>Once new changes are detected a new row will automatically be created in your Google Sheets document.</li>
</ol>]]>
            </summary>
                                    <updated>2026-03-05T10:31:12+00:00</updated>
        </entry>
            <entry>
            <title><![CDATA[Common XPath Selectors to Use For Monitoring Websites Changes]]></title>
            <link rel="alternate" href="https://pagecrawl.io/help/tutorials/article/common-xpath-selectors" />
            <id>https://pagecrawl.io/47</id>
            <author>
                <name><![CDATA[PageCrawl.io]]></name>
            </author>
            <summary type="html">
                <![CDATA[<h1>Common XPath Selectors to Use For Monitoring Websites Changes</h1>
<p>XPath selectors are powerful tools that help you identify and extract specific elements on a web page. In this guide, we'll explore common XPath selectors that you can use when monitoring websites for changes to make your web monitoring efforts more effective.</p>
<h3>Why Not CSS Selector?</h3>
<p>CSS Selectors are favored by many web developers as they are easy to learn if you already know CSS syntax. On the other hand, XPath Selectors offer greater power and flexibility, such as the ability to find elements that contain specific text. However, the learning curve for XPath can be steeper. If you already know CSS - that's good, you should be able to use it for most use cases. If you don't know any, we recommend starting with XPath, since it can be more flexible.</p>
<h3>XPath Cheat sheet</h3>
<p>Here, you'll find a convenient 'cheat sheet' that comprehensively covers the most commonly used XPath selectors for your reference. We suggest taking a quick look through this list before proceeding to the <a href="#common-xpath-selectors-for-web-monitoring">Common XPath Selectors for Web Monitoring</a> section below.</p>
<h4>HTML Basics</h4>
<p>Before we start, you should familiarize yourself with some fundamental concepts to better understand the terminology and functionality. Here are a few key terms:</p>
<ol>
<li>
<p><strong>Attribute</strong>: An attribute provides additional information about an HTML element. It is always specified in the start tag of an element and usually comes in name/value pairs like <code>name="value"</code>. For example, in <code>&lt;a href="https://example.com"&gt;</code>, <code>href</code> is an attribute name and <code>https://example.com</code> is its value.</p>
</li>
<li>
<p><strong>Element</strong>: An HTML element is an individual component of an HTML document or web page. It is written with a start tag, with an optional end tag, and content in between. For example, <code>&lt;p&gt;This is a paragraph&lt;/p&gt;</code>; here, <code>&lt;p&gt;</code> is the start tag, <code>&lt;/p&gt;</code> is the end tag, and <code>This is a paragraph</code> is the content.</p>
</li>
<li>
<p><strong>ID</strong>: The <code>id</code> attribute is used to specify a unique id for an HTML element. You cannot have more than one element with the same id in an HTML document. It is used for identifying and targeting the element with CSS and JavaScript. For example, <code>&lt;div id="header"&gt;</code> defines a division with a unique id of <code>header</code>.</p>
</li>
<li>
<p><strong>Class</strong>: The <code>class</code> attribute is used for specifying a class name for an HTML element. Unlike the <code>id</code> attribute, the same class can be used on multiple elements. This is useful for applying the same styling or behavior to different elements. For example, <code>&lt;span class="highlight"&gt;</code> assigns the <code>highlight</code> class to a span element, which can be targeted with CSS or JavaScript.</p>
</li>
</ol>
<h4>How to test the selector?</h4>
<div style="background: #f5f5f5; padding: 30px; border-radius: 8px; text-align: center; margin: 20px 0; border: 1px solid #e0e0e0;">
  <img src="/images/blog/console-xpath-test.png" alt="test xpath selector" style="max-width: 100%; border-radius: 6px; box-shadow: 0 4px 12px rgba(0,0,0,0.15);">
</div>
<p>You might wonder where you can try the selector before pasting it in PageCrawl.io You should open browser console and use following commands to test your selector.</p>
<p><strong>XPath</strong></p>
<pre><code>$x('//a')</code></pre>
<p><strong>CSS</strong></p>
<pre><code>document.querySelectorAll('a')</code></pre>
<h4>XPath Selector Basics</h4>
<ul>
<li><code>//</code>: Selects all matching elements anywhere in the document.</li>
<li><code>/</code>: Selects from the root element.</li>
<li><code>element</code>: Selects elements with the specified name.</li>
<li><code>[@attribute]</code>: Selects elements with the specified attribute.</li>
</ul>
<h4>Advanced XPath Selectors</h4>
<ul>
<li><code>[@attribute='value']</code>: Selects elements with a specific attribute value.</li>
<li><code>[@attribute!='value']</code>: Selects elements with an attribute value not equal to 'value'.</li>
<li><code>[@attribute^='prefix']</code>: Selects elements with an attribute starting with 'prefix'.</li>
<li><code>[@attribute$='suffix']</code>: Selects elements with an attribute ending with 'suffix'.</li>
<li><code>[@attribute*='substring']</code>: Selects elements with an attribute containing 'substring'.</li>
<li><code>[@attribute1='value1' and @attribute2='value2']</code>: Selects elements that meet multiple attribute conditions.</li>
<li><code>[@attribute1='value1' or @attribute2='value2']</code>: Selects elements that meet at least one of the attribute conditions.</li>
<li><code>not(expression)</code>: Negates a condition.</li>
</ul>
<h4>Text and Content Selection</h4>
<ul>
<li><code>text()</code>: Selects the text content of an element.</li>
<li><code>contains(text(),'substring')</code>: Selects elements containing specific text.</li>
<li><code>starts-with(text(),'prefix')</code>: Selects elements with text starting with 'prefix'.</li>
<li><code>ends-with(text(),'suffix')</code>: Selects elements with text ending with 'suffix'.</li>
</ul>
<h4>Navigation and Hierarchy</h4>
<ul>
<li><code>/parent::element</code>: Selects the parent of the current element.</li>
<li><code>/child::element</code>: Selects the children of the current element.</li>
<li><code>/ancestor::element</code>: Selects ancestors of the current element.</li>
<li><code>/descendant::element</code>: Selects descendants of the current element.</li>
<li><code>[position()=1]</code>: Selects the first matching element.</li>
<li><code>[last()]</code>: Selects the last matching element.</li>
<li><code>[position()&gt;2]</code>: Selects elements after the first two.</li>
</ul>
<h4>Wildcards and Dynamic Selection</h4>
<ul>
<li><code>*</code>: Selects all elements.</li>
<li><code>element[*]</code>: Selects elements with at least one child element.</li>
<li><code>element[@*]</code>: Selects elements with at least one attribute.</li>
<li><code>element[contains(@attribute,'value')]</code>: Selects elements with attributes containing 'value'.</li>
</ul>
<h4>Functions</h4>
<ul>
<li><code>count(expression)</code>: Counts the number of matching elements.</li>
<li><code>sum(expression)</code>: Sums numeric values within matching elements.</li>
<li><code>concat(string1, string2)</code>: Combines two strings.</li>
<li><code>substring(string, start, length)</code>: Extracts a substring.</li>
<li><code>normalize-space(string)</code>: Removes leading/trailing spaces and collapses internal spaces.</li>
</ul>
<h3>Common XPath Selectors for Web Monitoring</h3>
<p>Here are some common XPath selectors that you can employ when monitoring websites for changes. Initially, basic XPath selectors will be covered, and we will then proceed to more advanced examples.</p>
<h4>1. Selecting Text</h4>
<p>XPath allows you to target specific text elements on a webpage, which is useful for tracking changes in content, headlines, or paragraphs. For example:</p>
<pre><code class="language-xpath">//h1       // Selects all h1 headers on the page.
//p        // Selects all paragraph elements.
//div[@class='content'] // Selects text within div elements with a specific class.</code></pre>
<h4>2. Tracking Links</h4>
<p>XPath selectors help you monitor links, whether you want to track all links on a page, external links, or links with specific text. For instance:</p>
<pre><code class="language-xpath">//a[@href]                  // Selects all links with an href attribute.
//@href[not(contains(.,'example.com'))] // Selects external links (replace 'example.com' with the target domain).
//a[contains(text(),'Download')]   // Selects links with specific anchor text, case-sensitive.</code></pre>
<p>To view more examples with links, visit <a href="/help/tutorials/article/tracking-link-on-page">Tracking links with text</a> tutorial.</p>
<h4>3. Checking Images</h4>
<p>To monitor images on a webpage, you can use XPath selectors to identify images by their source (src) attribute or alt text. For example:</p>
<pre><code class="language-xpath">//img               // Selects all image elements.
//img/@src          // Selects the src attribute of all images.
//img[contains(@alt,'logo')] // Selects images with specific alt text.</code></pre>
<h4>4. Handling Tables</h4>
<p>XPath selectors are particularly useful for extracting data from tables, which are commonly used on websites for displaying structured information. For example:</p>
<pre><code class="language-xpath">//table                // Selects all tables on the page.
//table//tr             // Selects all table rows.
//table//tr/td[2]       // Selects the second column (td) in all rows.</code></pre>
<h4>5. Monitoring Specific Elements</h4>
<p>You can target elements with specific attributes or attributes containing certain values using XPath selectors. For instance:</p>
<pre><code class="language-xpath">//*[@id='specificId'] // Selects elements with a specific ID attribute.
//*[@class='highlight'] // Selects elements with a specific class attribute.</code></pre>
<h4>6. Monitoring Elements where Text contains in Class or ID</h4>
<div style="background: #f5f5f5; padding: 30px; border-radius: 8px; text-align: center; margin: 20px 0; border: 1px solid #e0e0e0;">
  <img src="/images/blog/randomized_classnames.png" alt="class name example" style="max-width: 400px; border-radius: 6px; box-shadow: 0 4px 12px rgba(0,0,0,0.15);">
</div>
<p>To monitor elements when their class or ID contains a part of text, you can use XPath selectors with the contains() function. For example:</p>
<pre><code class="language-xpath">//*[contains(@class, 'partial-text')] // Selects elements with a class containing 'partial-text'.
//*[contains(@id, 'partial-text')]    // Selects elements with an ID containing 'partial-text'.
//input[starts-with(@name, 'user_')] // Selects input elements with names starting with 'user_'.
//input[contains(@id, 'search')]  // Selects input elements with IDs containing 'search'.
//button[contains(@class, 'btn-')] // Selects buttons with class names containing 'btn-'.
</code></pre>
<p><strong>This XPath selector is particularly valuable, especially when dealing with CSS classes that include unpredictable or random text fragments.</strong></p>
<p>For instance, suppose you want to extract the text 'Quality Choice' from an image, as shown in the example above. However, the CSS class, such as <code>productTile_urgencyMessaging__V5DTS</code> includes a suffix like <code>__V5DTS</code> that is prone to change with each website update.</p>
<p>To avoid having to update the selector each time website updates, you may employ the XPath contains() function to select an element.</p>
<pre><code class="language-xpath">//*[contains(@class, 'productTile_urgencyMessaging')] // Retrieve 'Quality Choice' text</code></pre>
<h4>6. Using Logical Operators</h4>
<p>XPath supports logical operators for combining conditions. This is particularly useful for complex selections. For example:</p>
<pre><code class="language-xpath">//a[@class='external' or @class='external-link'] // Selects links with class 'external' or 'external-link'.
//div[@class='important' and contains(text(),'Alert')] // Selects divs with class 'important' containing 'Alert'.
</code></pre>
<h4>7. Complex Expressions</h4>
<p>You can create complex XPath expressions by combining multiple conditions and functions. This provides immense flexibility in your selections. For example:</p>
<pre><code class="language-xpath">//div[@class='content' and (contains(text(),'Important') or contains(text(),'Alert'))]
//table[not(@class='hidden')]/tbody/tr[td[2]='Completed']/td[3]
</code></pre>
<h3>Using XPath Selectors in PageCrawl.io</h3>
<p>To leverage these advanced XPath selectors effectively for website monitoring, you can integrate them with web monitoring tools such as PageCrawl.io:</p>
<ol>
<li>Log in to your PageCrawl account.</li>
<li>Click on <strong>Track New Page</strong>, fill in the page URL then select <strong>Tracked Elements</strong> to track.</li>
<li>Select "Text" as tracked element and then specifying XPath selector to track.</li>
<li>Save &amp; start monitoring page for changes.</li>
</ol>]]>
            </summary>
                                    <updated>2026-03-05T10:31:13+00:00</updated>
        </entry>
            <entry>
            <title><![CDATA[Common Problems With Visual Selector]]></title>
            <link rel="alternate" href="https://pagecrawl.io/help/troubleshooting/article/common-problems-with-visual-selector" />
            <id>https://pagecrawl.io/48</id>
            <author>
                <name><![CDATA[PageCrawl.io]]></name>
            </author>
            <summary type="html">
                <![CDATA[<h1>Common Problems With Visual Selector</h1>
<p>Occasionally, you might encounter challenges when using the Visual Selector tool. This guide outlines some common problems and provides solutions to help you resolve them.</p>
<h3>Problem: Page Styles Are Not Displayed Properly</h3>
<div style="background: #f5f5f5; padding: 30px; border-radius: 8px; text-align: center; margin: 20px 0; border: 1px solid #e0e0e0;">
  <img src="/images/blog/enable-javascript.png" alt="microsoft teams change detection notifications" style="max-width: 100%; border-radius: 6px; box-shadow: 0 4px 12px rgba(0,0,0,0.15);">
</div>
<p>You can sometimes see a page loaded but missing some or all of their styles or elements on page. </p>
<p><strong>Solution:</strong> To go around this issue you may try <strong>Enabling/Disabling JavaScript</strong>. If that does not help, you can always  <a href="/help/tutorials/article/find-xpath-css-selector-in-chrome">copy and paste the selector from your browser window</a>.</p>
<h3>Problem: Page Doesn't Load</h3>
<p>In some instances, the Visual Selector tool may have difficulty loading certain pages. Our development team is continually working to enhance its compatibility. You may contact support to report a page that is not working.</p>
<p><strong>Solution:</strong> If you encounter this issue, you can try <a href="/help/tutorials/article/find-xpath-css-selector-in-chrome">pasting the selector directly from your web browser</a> to work around the problem.</p>
<h3>Problem: Visual Selector-Generated Selectors Frequently Change</h3>
<p>The Visual Selector tool may generate CSS selectors that become obsolete when a website updates. In certain cases, websites intentionally modify CSS selectors or add suffixes to thwart page monitoring tools like PageCrawl.</p>
<p><strong>Solution:</strong> For example, a selector like <code>.productTile_urgencyMessaging__V5DTS</code> might include a suffix like <code>__V5DTS</code> that is prone to change. To avoid having to update the selector each time the website changes you may use a specialized XPath function to search if class name contains:</p>
<pre><code class="language-xpath">//*[contains(@class, 'productTile_urgencyMessaging')]</code></pre>
<p>Visit <a href="/help/tutorials/article/common-xpath-selectors">XPath tutorial for common selectors</a> for more information how to create a XPath selector by yourself.</p>
<h3>Problem: Uncertainty About Selector Method to Choose</h3>
<p>We offer three selector generation methods:</p>
<ol>
<li><strong>CSS Selector</strong>: A short and unique CSS selector.</li>
<li><strong>Relative XPath</strong>: A short and unique XPath selector. XPath is more flexible than CSS.</li>
<li><strong>Absolute XPath</strong>: A longer XPath that is more likely to break when page contents change significantly.</li>
</ol>
<p>By default, you can use the CSS selector method. In some cases, generated CSS may be more effective on certain websites, while generated XPath works better on others. If you have expertise in writing CSS or XPath selectors, you have the flexibility to choose your preferred method and optimize it as necessary.</p>
<p>Looking to learn how to write a XPath selector yourself or explore common XPath selectors? Check out our <a href="/help/tutorials/article/common-xpath-selectors">XPath tutorial for common selectors</a>. As a tip, you can also request ChatGPT to assist you in creating a CSS/XPath selector.</p>]]>
            </summary>
                                    <updated>2026-03-05T10:31:13+00:00</updated>
        </entry>
            <entry>
            <title><![CDATA[Complete Guide to Reducing False Positive Notifications When Monitoring Websites for Changes]]></title>
            <link rel="alternate" href="https://pagecrawl.io/help/reduce-false-positives/article/reduce-false-positives-monitoring-website-for-changes" />
            <id>https://pagecrawl.io/49</id>
            <author>
                <name><![CDATA[PageCrawl.io]]></name>
            </author>
            <summary type="html">
                <![CDATA[<h1>Complete Guide to Reducing False Positive Notifications When Monitoring Websites for Changes</h1>
<p>False positive notifications can be frustrating when monitoring websites. These alerts signal changes that are either irrelevant or nonexistent, leading to wasted time and reduced efficiency.</p>
<p>When using PageCrawl to monitor website changes, the rate of false-positive alerts is typically low if pages are correctly configured. However, some detected changes may not be relevant to your specific monitoring needs. This comprehensive guide will show you how to effectively reduce unnecessary alerts and ensure you only receive notifications for meaningful changes.</p>
<h3>1. Choose the Right Element to Track</h3>
<div style="background: #f5f5f5; padding: 30px; border-radius: 8px; text-align: center; margin: 20px 0; border: 1px solid #e0e0e0;">
  <img src="/images/blog/monitor-full-page.png" alt="monitor full page text" style="max-width: 100%; border-radius: 6px; box-shadow: 0 4px 12px rgba(0,0,0,0.15);">
</div>
<p>Selecting the wrong type of element to monitor is one of the most common causes of false positives. With multiple monitoring options available, it's easy to get overwhelmed, especially if you're new to website monitoring.</p>
<h4>Getting Started</h4>
<p>Begin by tracking the <strong>text of the full page</strong>. This approach works best as a starting point for most monitoring scenarios, particularly when you need to monitor a large number of websites. If you notice frequent false positives, you can always revisit your setup and focus on specific page sections instead.</p>
<h4>Optimizing Full Page Text Tracking</h4>
<div style="background: #f5f5f5; padding: 30px; border-radius: 8px; text-align: center; margin: 20px 0; border: 1px solid #e0e0e0;">
  <img src="/images/blog/full-text-tracking-options.png" alt="monitor reader mode" style="max-width: 100%; border-radius: 6px; box-shadow: 0 4px 12px rgba(0,0,0,0.15);">
</div>
<p>Monitoring <strong>Content Only</strong> is the first step to reduce false positives. This option filters out common page elements like headers, navigation menus, sidebars, and footers, focusing only on the main content area of the page. It's an effective way to eliminate noise from less relevant sections while still capturing most important content changes.</p>
<p><strong>Reader mode</strong> takes content filtering a step further, similar to the reader mode you <a href="https://support.apple.com/en-gb/guide/iphone/iphdc30e3b86/ios">may have used on your phone</a>. This mode monitors only the primary article text, using advanced algorithms to identify and extract the core content while filtering out everything else.</p>
<p>Reader mode is more restrictive than "Content Only" and works best for:</p>
<ul>
<li><strong>News articles</strong> and blog posts with clear article structure</li>
<li><strong>Documentation pages</strong> with structured content</li>
<li><strong>Research papers</strong> and academic content</li>
<li><strong>Press releases</strong> and announcements</li>
<li><strong>Tutorial and how-to articles</strong></li>
<li><strong>Terms of service</strong> and privacy policy pages</li>
<li><strong>Legal documents</strong> and policy updates</li>
</ul>
<p>However, Reader mode may not work well on:</p>
<ul>
<li><strong>Landing pages</strong> with mixed content types</li>
<li><strong>E-commerce product pages</strong> with specifications, reviews, and pricing</li>
<li><strong>Dashboard pages</strong> with multiple data sections</li>
<li><strong>Pages with pricing tables, feature lists, or comparison charts</strong></li>
<li><strong>Forum discussions</strong> or comment sections</li>
<li><strong>Complex layouts</strong> with multiple content blocks</li>
</ul>
<p><strong>Note:</strong> If you find that important content changes are being missed, consider switching back to "Content Only" for broader coverage.</p>
<h4>When to Be More Selective</h4>
<div style="background: #f5f5f5; padding: 30px; border-radius: 8px; text-align: center; margin: 20px 0; border: 1px solid #e0e0e0;">
  <img src="/images/blog/text-tracked-element.png" alt="tracking text element" style="max-width: 100%; border-radius: 6px; box-shadow: 0 4px 12px rgba(0,0,0,0.15);">
</div>
<p>If tracking "Content Only" or "Reader mode" still results in unnecessary notifications, switch to the "Text" tracked element type and use our "Visual Selector" (click on the blue button) to pinpoint the exact area you want to monitor. Be aware that significant page redesigns can cause these selectors to stop working.</p>
<p><strong>Advanced Tips:</strong></p>
<ul>
<li><strong>AI Suggest feature:</strong> You may use "AI Suggest" when adding a new page to monitor. Describe what you want to monitor (e.g., "product price" or "availability status"), and PageCrawl's AI will suggest an optimal monitoring configuration for you.</li>
<li><strong>Manual selectors:</strong> For maximum precision, <a href="/help/tutorials/article/common-xpath-selectors">manually create CSS or XPath selectors</a> to track specific sections of the page. This approach works best for users with a technical background, but you can also use tools like ChatGPT to craft selectors by pasting the relevant HTML code.</li>
</ul>
<h3>2. Filter Out Irrelevant Updates</h3>
<div style="background: #f5f5f5; padding: 30px; border-radius: 8px; text-align: center; margin: 20px 0; border: 1px solid #e0e0e0;">
  <img src="/images/blog/date-example.png" alt="monitor footer" style="max-width: 100%; border-radius: 6px; box-shadow: 0 4px 12px rgba(0,0,0,0.15);">
</div>
<p>Websites frequently undergo minor updates, such as date changes, without substantial alterations to their content. These small updates can create unnecessary alerts that distract from meaningful changes. Here's how to avoid them.</p>
<h4>Ignore Repeatedly Changing Text</h4>
<div style="background: #f5f5f5; padding: 30px; border-radius: 8px; text-align: center; margin: 20px 0; border: 1px solid #e0e0e0;">
  <img src="/images/blog/select-timeline-text.png" alt="select text to ignore in timeline" style="max-width: 100%; border-radius: 6px; box-shadow: 0 4px 12px rgba(0,0,0,0.15);">
</div>
<p>In Timeline, when reviewing detected changes, you can select irrelevant text and ignore any line that contains the selected text. For example, if a page has a section with a latest news headline like "Latest News: Bitcoin has reached a new all-time high," you can select "Latest News" and all lines containing this text will be ignored in future change detections. If you monitor multiple pages on the same website, this will be applied to all pages with the same domain name.</p>
<p>Alternatively, you can add an "Ignore Text" condition or create a global filter (update your team settings) to ignore it across all pages. Use % as a wildcard to indicate that any line containing a %specific word% or sentence should be ignored.</p>
<h4>Remove Specific Page Elements</h4>
<div style="background: #f5f5f5; padding: 30px; border-radius: 8px; text-align: center; margin: 20px 0; border: 1px solid #e0e0e0;">
  <img src="/images/blog/remove-element.png" alt="action remove page elements" style="max-width: 100%; border-radius: 6px; box-shadow: 0 4px 12px rgba(0,0,0,0.15);">
</div>
<p>If a specific page area keeps triggering change detections, add a "Remove page element" action and select an area to suppress it completely.</p>
<h4>Remove Dates</h4>
<div style="background: #f5f5f5; padding: 30px; border-radius: 8px; text-align: center; margin: 20px 0; border: 1px solid #e0e0e0;">
  <img src="/images/blog/remove-dates.png" alt="action remove dates" style="max-width: 100%; border-radius: 6px; box-shadow: 0 4px 12px rgba(0,0,0,0.15);">
</div>
<p>Use the <strong>"Remove dates"</strong> action to replace dates with placeholders like [DATE REMOVED]. This prevents alerts for irrelevant updates like "updated 3 minutes ago" or publication timestamps such as "Updated at: 2025-02-25" that change frequently even when nothing was updated on the page.</p>
<h4>Set a Change Threshold</h4>
<div style="background: #f5f5f5; padding: 30px; border-radius: 8px; text-align: center; margin: 20px 0; border: 1px solid #e0e0e0;">
  <img src="/images/blog/change-threshold.png" alt="change detection threshold" style="max-width: 100%; border-radius: 6px; box-shadow: 0 4px 12px rgba(0,0,0,0.15);">
</div>
<p>You can configure a threshold to be alerted only when significant changes occur (e.g., when more than 1% of the page content changes). Before setting the threshold, review historic changes in Timeline to avoid setting it too high and missing important updates.</p>
<h4>Ignore Numbers</h4>
<div style="background: #f5f5f5; padding: 30px; border-radius: 8px; text-align: center; margin: 20px 0; border: 1px solid #e0e0e0;">
  <img src="/images/blog/ignore-numbers.png" alt="ignore changed numbers" style="max-width: 100%; border-radius: 6px; box-shadow: 0 4px 12px rgba(0,0,0,0.15);">
</div>
<p>If numeric changes aren't relevant to you, you can add an action to ignore all numbers from triggering change detections. This is particularly useful for pages with counters, view counts, or other metrics that change frequently.</p>
<h3>3. Let AI Help Reduce False Positives</h3>
<p>PageCrawl uses AI to analyze every detected change and help you focus on what matters most.</p>
<h4>How AI Analysis Works</h4>
<p>When a change is detected, our AI:</p>
<ul>
<li><strong>Summarizes the change</strong> in plain language so you can quickly understand what happened</li>
<li><strong>Assigns a priority score</strong> to indicate how important the change likely is</li>
<li><strong>Sorts your notifications</strong> so the most significant changes appear first</li>
</ul>
<h4>Provide Feedback on Changes</h4>
<p>Use the feedback buttons to tell us which changes matter to you:</p>
<div style="display: inline-flex; gap: 8px; align-items: center; padding: 8px 12px; background: #fafafa; border-radius: 4px; margin: 12px 0;">
  <span style="cursor: pointer; padding: 2px 4px; color: #bfbfbf; font-size: 14px;" title="Useful change">
    <svg width="14" height="14" viewBox="0 0 512 512" fill="currentColor"><path d="M313.4 32.9c26 5.2 42.9 30.5 37.7 56.5l-2.3 11.4c-5.3 26.7-15.1 52.1-28.8 75.2H464c26.5 0 48 21.5 48 48c0 18.5-10.5 34.6-25.9 42.6C497 275.4 504 288.9 504 304c0 23.4-16.8 42.9-38.9 47.1c4.4 7.3 6.9 15.8 6.9 24.9c0 21.3-13.9 39.4-33.1 45.6c.7 3.3 1.1 6.8 1.1 10.4c0 26.5-21.5 48-48 48H294.5c-19 0-37.5-5.6-53.3-16.1l-38.5-25.7C176 420.4 160 390.4 160 358.3V320 272 247.1c0-29.2 13.3-56.7 36-75l7.4-5.9c26.5-21.2 44.6-51 51.2-84.2l2.3-11.4c5.2-26 30.5-42.9 56.5-37.7zM32 192H96c17.7 0 32 14.3 32 32V448c0 17.7-14.3 32-32 32H32c-17.7 0-32-14.3-32-32V224c0-17.7 14.3-32 32-32z"/></svg>
  </span>
  <span style="cursor: pointer; padding: 2px 4px; color: #bfbfbf; font-size: 14px;" title="Not useful">
    <svg width="14" height="14" viewBox="0 0 512 512" fill="currentColor"><path d="M313.4 479.1c26-5.2 42.9-30.5 37.7-56.5l-2.3-11.4c-5.3-26.7-15.1-52.1-28.8-75.2H464c26.5 0 48-21.5 48-48c0-18.5-10.5-34.6-25.9-42.6C497 236.6 504 223.1 504 208c0-23.4-16.8-42.9-38.9-47.1c4.4-7.3 6.9-15.8 6.9-24.9c0-21.3-13.9-39.4-33.1-45.6c.7-3.3 1.1-6.8 1.1-10.4c0-26.5-21.5-48-48-48H294.5c-19 0-37.5 5.6-53.3 16.1L202.7 73.8C176 91.6 160 121.6 160 153.7V192v48 24.9c0 29.2 13.3 56.7 36 75l7.4 5.9c26.5 21.2 44.6 51 51.2 84.2l2.3 11.4c5.2 26 30.5 42.9 56.5 37.7zM32 384H96c17.7 0 32-14.3 32-32V128c0-17.7-14.3-32-32-32H32c-17.7 0-32 14.3-32 32V352c0 17.7 14.3 32 32 32z"/></svg>
  </span>
</div>
<ul>
<li><strong>Thumbs up</strong>: This change is useful or important</li>
<li><strong>Thumbs down</strong>: This change is noise or irrelevant</li>
</ul>
<p>You can provide feedback:</p>
<ul>
<li>On the <strong>page view</strong> when reviewing changes</li>
<li>Directly from <strong>email notifications</strong> using the quick-action links</li>
</ul>
<h3>4. Handling Dynamic Content</h3>
<p>Dynamic websites load or update parts of their content after the initial page load. For example, prices, stock availability, or user-specific recommendations might load dynamically, leading to unnecessary notifications. Here's how to handle these scenarios.</p>
<h4>Expand Collapsed Sections and Hidden Content</h4>
<div style="background: #f5f5f5; padding: 30px; border-radius: 8px; text-align: center; margin: 20px 0; border: 1px solid #e0e0e0;">
  <img src="/images/blog/reveal-hidden-text.png" alt="reveal hidden text" style="max-width: 100%; border-radius: 6px; box-shadow: 0 4px 12px rgba(0,0,0,0.15); margin-bottom: 16px;">
  <img src="/images/blog/accordion.png" alt="collapsed sections" style="max-width: 100%; border-radius: 6px; box-shadow: 0 4px 12px rgba(0,0,0,0.15);">
</div>
<p>PageCrawl only captures text that is visible when in "Full-page text" mode. This can be problematic if the page contains collapsible sections (accordions, panels, etc.) that are only revealed when clicked.</p>
<p>To address this, add the "Reveal hidden text" action, which will automatically expand any collapsed sections on the page before capturing content.</p>
<h4>Wait Until Page is Fully Loaded</h4>
<div style="background: #f5f5f5; padding: 30px; border-radius: 8px; text-align: center; margin: 20px 0; border: 1px solid #e0e0e0;">
  <img src="/images/blog/wait-until-actions.png" alt="wait until page loaded" style="max-width: 100%; border-radius: 6px; box-shadow: 0 4px 12px rgba(0,0,0,0.15);">
</div>
<p>PageCrawl waits until the page is fully loaded. However, in some situations, certain page elements only appear after additional time or after specific actions are executed (clicking, form submission, redirects, etc.).</p>
<p>You can add wait actions to ensure the page is completely ready before capturing content. Multiple "Wait" actions are available:</p>
<ul>
<li><strong>"Wait for Text to appear":</strong> Waits until specific text appears on the page.</li>
<li><strong>"Wait for Text to disappear":</strong> Waits until specific text disappears from the page.</li>
<li><strong>"Wait for page element to appear":</strong> Waits for a specific page element to become visible.</li>
<li><strong>"Wait for Redirect":</strong> Waits for page redirects to complete. This is especially helpful when redirects are not immediate and take longer to process.</li>
<li><strong>"Wait for Seconds":</strong> Waits between 1 to 9 seconds (least recommended option).</li>
</ul>
<p><strong>Note:</strong> Actions will wait up to 15 seconds before continuing. To avoid unnecessarily long wait times, different subscription tiers have varying timeout limits: Free (45 seconds), Standard (90 seconds), Enterprise (180 seconds). If loading takes longer than the timeout limit, the page will result in a timeout error.</p>
<h3>5. Changes in Headers, Footers, and Sidebars</h3>
<div style="background: #f5f5f5; padding: 30px; border-radius: 8px; text-align: center; margin: 20px 0; border: 1px solid #e0e0e0;">
  <img src="/images/blog/changing-footer.webp" alt="monitor footer" style="max-width: 100%; border-radius: 6px; box-shadow: 0 4px 12px rgba(0,0,0,0.15);">
</div>
<p>Frequently updated areas like footers, headers, and sidebars can result in irrelevant notifications. These sections often include changing elements such as timestamps, menus, or recent updates that are unrelated to the main content.</p>
<h4>How to Avoid This</h4>
<ol>
<li><strong>Switch to "Content Only":</strong> When tracking the full page, this option automatically filters out these less important areas. Change the Element from "Everything on the page" to "Content Only."</li>
<li><strong>Remove Specific Elements:</strong> Use the "Remove Elements" action with the selector <code>header,nav,aside,footer</code> to exclude them. This directly alters the page, and these areas will not be visible in screenshots. You may want to use this approach when using a Tracked Element other than "Full page text."</li>
<li><strong>Focus on the Main Section:</strong> Track only the main content using the "Text" tracked element and the <code>main</code> selector. If no such element exists (e.g., the website is not semantically structured), you will see a "No selector found" error.</li>
</ol>
<h3>6. Page Errors or Blank Content</h3>
<div style="background: #f5f5f5; padding: 30px; border-radius: 8px; text-align: center; margin: 20px 0; border: 1px solid #e0e0e0;">
  <img src="/images/blog/bot-protection-guard.png" alt="handling monitoring errors" style="max-width: 100%; border-radius: 6px; box-shadow: 0 4px 12px rgba(0,0,0,0.15);">
</div>
<p>Occasionally, a monitored page may fail to load properly, leading to blank content or error messages. While PageCrawl detects these situations in most cases, it can still trigger false positives. This often happens when a website doesn't report errors properly, relies on external data sources that fail to load, or when dynamic content is not displayed correctly.</p>
<h4>How to Avoid This</h4>
<p>Use the <strong>"Mark Check as Failed When"</strong> action to flag a page as failed without recording changes. For example:</p>
<ul>
<li>If a product's price unexpectedly drops to $0 due to an error and a message such as "Not available" is shown, PageCrawl can mark the page as failed instead of notifying you about a false change from $9.99 to $0.00.<ul>
<li>Add "Mark Check as Failed When" with "Text Contains" set to "Not available"</li>
</ul>
</li>
</ul>
<p>Additionally, customize the "Report Errors" setting to trigger only after a certain number of consecutive failures (e.g., after 10 consecutive failed checks) to avoid being overwhelmed by temporary issues.</p>
<p>If you check pages frequently, ensure the "Delay when Failed" setting is deactivated (in Advanced preferences) to prevent page failures from reducing the page-checking frequency.</p>
<h3>7. Appearing/Disappearing Content</h3>
<div style="background: #f5f5f5; padding: 30px; border-radius: 8px; text-align: center; margin: 20px 0; border: 1px solid #e0e0e0;">
  <img src="/images/blog/conditional.png" alt="monitor conditional pages" style="max-width: 100%; border-radius: 6px; box-shadow: 0 4px 12px rgba(0,0,0,0.15);">
</div>
<p>Websites may display varying content based on user sessions, location, or elements that frequently appear and disappear. This can lead to false positive notifications.</p>
<h4>Smart Suggestions</h4>
<p>Once sufficient sample data is collected, PageCrawl will automatically suggest filters to reduce false triggers. Look for the <strong>"Frequently changing content detected"</strong> panel on your monitored page.</p>
<div style="background: #f5f5f5; padding: 30px; border-radius: 8px; text-align: center; margin: 20px 0; border: 1px solid #e0e0e0;">
  <img src="/images/blog/suggested-actions.png" alt="suggested actions" style="max-width: 100%; border-radius: 6px; box-shadow: 0 4px 12px rgba(0,0,0,0.15);">
</div>
<p>You can:</p>
<ul>
<li><strong>Click on text fragments</strong> to add them to your ignore list</li>
<li><strong>Click "Ignore all above"</strong> to ignore all suggested items at once</li>
<li><strong>Use "Ignore all numbers"</strong> if numeric changes aren't relevant</li>
</ul>
<h4>Provide Feedback</h4>
<p>For changes that slip through, use the <strong>thumbs down</strong> button to mark them as noise.</p>
<h4>Additional Solutions</h4>
<ol>
<li><strong>Ensure the page is fully loaded</strong>: Add a "Wait" action until specific text or elements appear on the page before capturing content.</li>
<li><strong>Consider deactivating "Intelligent Reconnect"</strong> if the page content changes depending on the user's location or session (found under Advanced Preferences).</li>
</ol>
<h3>8. Cookie Banners and Overlay Popups <em>(Default Settings)</em></h3>
<div style="background: #f5f5f5; padding: 30px; border-radius: 8px; text-align: center; margin: 20px 0; border: 1px solid #e0e0e0;">
  <img src="/images/blog/webcookies.jpeg" alt="blocking cookies" style="max-width: 100%; border-radius: 6px; box-shadow: 0 4px 12px rgba(0,0,0,0.15);">
</div>
<p>By default, PageCrawl enables <strong>"Block cookie banners and ads"</strong> and <strong>"Hide website overlays and popups"</strong> actions to reduce unnecessary notifications. However, you can disable these settings if not needed. </p>
<div style="background: #f5f5f5; padding: 30px; border-radius: 8px; text-align: center; margin: 20px 0; border: 1px solid #e0e0e0;">
  <img src="/images/blog/actions-cookies.png" alt="blocking cookies action" style="max-width: 100%; border-radius: 6px; box-shadow: 0 4px 12px rgba(0,0,0,0.15);">
</div>
<h4>Cookie Banners</h4>
<p>Cookie banners often appear dynamically after the page loads, altering the content and triggering false positives.</p>
<ul>
<li><strong>Default Setting</strong>: Cookie banners are automatically suppressed during monitoring.</li>
<li><strong>Optional</strong>: You can disable this feature in your settings if necessary.</li>
</ul>
<h4>Overlay Popups</h4>
<p>Overlay popups, such as ads or newsletter subscription prompts, may appear sporadically and interfere with accurate monitoring.</p>
<ul>
<li><strong>Default Setting</strong>: PageCrawl hides overlay popups by default to ensure they don’t trigger false positives.</li>
<li><strong>Optional</strong>: This feature can also be turned off if not required.</li>
</ul>
<p>These default settings simplify the monitoring process but can be adjusted based on your specific needs.</p>
<h3>9. Scroll-Triggered Content</h3>
<p>Sometimes pages use animations to reveal content sections that only appear as you scroll down the page.</p>
<h4>Solutions</h4>
<ol>
<li><strong>Use the "Scroll to Bottom" action</strong> to automatically scroll to the bottom of the page before capturing content.</li>
<li><strong>Use the "Disable JavaScript" action</strong> which will likely disable all animations. Note that this may cause issues with loading dynamic content on some websites.</li>
</ol>
<hr />
<h2>Conclusion</h2>
<p>By implementing these strategies, you can significantly reduce false positive notifications when monitoring websites with PageCrawl.</p>
<p><strong>Quick wins for reducing false positives:</strong></p>
<ol>
<li>Start with "Content Only" or "Reader mode" for text tracking</li>
<li>Use the <strong>thumbs down button</strong> to mark irrelevant changes</li>
<li>Review and apply <strong>suggested filters</strong> when they appear</li>
<li>Set up appropriate filters for dates, numbers, and repeated text</li>
</ol>
<p>Remember:</p>
<ul>
<li>AI analysis helps prioritize important changes</li>
<li>Regularly review your settings and filters</li>
<li>Use the suggested actions when they appear</li>
<li>Test different approaches to find what works best for your specific use case</li>
</ul>
<p>With proper configuration and ongoing fine-tuning, you'll achieve efficient and reliable website change monitoring.</p>
<p>If you're still experiencing issues with false positives after trying these solutions, don't hesitate to contact our support team for personalized assistance with your specific monitoring setup.</p>]]>
            </summary>
                                    <updated>2026-03-05T10:31:13+00:00</updated>
        </entry>
            <entry>
            <title><![CDATA[How to Track All Pages Within a Website]]></title>
            <link rel="alternate" href="https://pagecrawl.io/help/tutorials/article/track-all-pages-within-website-for-changes" />
            <id>https://pagecrawl.io/50</id>
            <author>
                <name><![CDATA[PageCrawl.io]]></name>
            </author>
            <summary type="html">
                <![CDATA[<h1>How to Track All Pages Within a Website</h1>
<p>PageCrawl.io is a powerful website changes monitoring tool designed to help you keep track of all the pages within your website effortlessly. One of its standout features is the ability to crawl and automatically discover all pages within a website, much like Google's indexing process. This article will guide you through the process of utilizing PageCrawl.io to effectively track and manage all pages within your website.</p>
<p>Creating a template within PageCrawl.io is the initial step to enable auto-discovery for tracking all pages within a website.</p>
<h4>Setting Up Automatic Page Discovery</h4>
<div style="background: #f5f5f5; padding: 30px; border-radius: 8px; text-align: center; margin: 20px 0; border: 1px solid #e0e0e0;">
  <img src="/images/blog/page-discovery.png" alt="monitor all website pages via page discovery" style="max-width: 100%; border-radius: 6px; box-shadow: 0 4px 12px rgba(0,0,0,0.15);">
</div>
<ol>
<li>
<p><strong>Create a Template:</strong> </p>
<ul>
<li>
<p><strong>Provide Sample URL:</strong> Sample URL helps to automatically setup common parameters such as Base Discovery URL, filters and automatically detect sitemaps within the site.</p>
</li>
<li>
<p><strong>Activate Automatic Page Discovery:</strong> Enable this feature to automatically uncover new pages as they're added to the site.</p>
</li>
<li>
<p><strong>Choose Your Crawling Method:</strong></p>
<ul>
<li>
<p><strong>Sitemap:</strong> Perfect if tracked site has a sitemap.xml file detailing all pages.</p>
</li>
<li>
<p><strong>Scan Base URL:</strong> Start the crawl from your provided URL, letting the tool discover pages through internal links.</p>
</li>
<li>
<p><strong>Deep Scan Website:</strong> Opt for an extensive exploration, ensuring maximum page coverage by following links extensively.</p>
</li>
<li>
<p><strong>Automatic:</strong> Uses all available methods for page discovery.</p>
</li>
</ul>
</li>
</ul>
</li>
<li>
<p><strong>Configuration:</strong> Fine-tune additional settings like tracked elements to monitor, update frequency, and specific directories for inclusion or exclusion.</p>
</li>
<li>
<p><strong>Apply and Save:</strong> Save your template settings and apply them to the relevant projects within your PageCrawl.io account.</p>
</li>
<li>
<p><strong>Wait</strong> for newly discovered pages to appear in your PageCrawl.io account.</p>
</li>
</ol>
<h4>Leveraging Automatic Page Discovery for Thorough Tracking</h4>
<p>Once your template is in place, PageCrawl.io systematically discovers and indexes all available pages within your website.</p>
<ul>
<li>
<p><strong>Real-Time Monitoring:</strong> Keep tabs on crawl progress through the dashboard, receiving live updates on discovered pages and any encountered issues.</p>
</li>
<li>
<p><strong>Review Discovered Pages:</strong> Navigate through a detailed list of URLs sorted by categories or hierarchy within the dashboard.</p>
</li>
<li>
<p><strong>Customized Monitoring:</strong> Set up tailored monitoring for specific pages or sections, configuring alerts to notify you of any modifications.</p>
</li>
<li>
<p><strong>Analytical Insights:</strong> Utilize PageCrawl.io's analytical tools to gain deeper insights into page performance, traffic patterns, and content changes over time.</p>
</li>
<li>
<p><strong>Optimization:</strong> Employ the insights gathered to optimize your website, refining user experience, enhancing SEO strategies, and rectifying any issues spotted during the crawl.</p>
</li>
</ul>
<h4>In Conclusion</h4>
<p>PageCrawl.io's automatic page discovery feature simplifies the process of monitoring all pages within a website. By following these steps, efficiently manage, monitor, and stay updated on your website's content, ensuring an informed approach to website management.</p>
<p>For further guidance or inquiries, consult PageCrawl.io's support resources or reach out to their customer service team.</p>
<p>Happy tracking!</p>]]>
            </summary>
                                    <updated>2026-03-05T10:31:13+00:00</updated>
        </entry>
            <entry>
            <title><![CDATA[Hiding Popup Overlays When Monitoring Pages for Changes]]></title>
            <link rel="alternate" href="https://pagecrawl.io/help/reduce-false-positives/article/automatically-hiding-overlays-to-avoid-popups-from-triggering-notifications" />
            <id>https://pagecrawl.io/51</id>
            <author>
                <name><![CDATA[PageCrawl.io]]></name>
            </author>
            <summary type="html">
                <![CDATA[<h1>Hiding Popup Overlays When Monitoring Pages for Changes</h1>
<div style="background: #f5f5f5; padding: 30px; border-radius: 8px; text-align: center; margin: 20px 0; border: 1px solid #e0e0e0;">
  <img src="/images/blog/overlay-example.png" alt="block cookies" style="max-width: 100%; border-radius: 6px; box-shadow: 0 4px 12px rgba(0,0,0,0.15);">
</div>
<p>When you visit a website for the first time, you may sometimes encounter an annoying ad or offer that overlays the content. While this is usually not a problem when monitoring websites for changes, it can still sometimes cause false-positive alerts if screenshots capture the content overlaid with the popup. These popups may only appear once, or for specific visitors or geographic locations.</p>
<h4>The "Hide Overlays" Action</h4>
<p>To mitigate false positives, we highly recommend using the "Hide Overlays" action on affected pages. Keep in mind that this may not work on all pages.</p>
<h4>Alternative Approach</h4>
<p>If the "Hide Overlays" action did not work, or if all content on the page becomes invisible, you can manually target the overlay with the <a href="/help/reduce-false-positives/article/how-to-exclude-page-section">"Remove Elements" action</a> to exclude it.</p>]]>
            </summary>
                                    <updated>2026-03-05T10:31:13+00:00</updated>
        </entry>
            <entry>
            <title><![CDATA[Keep an HTML Record of a Page Without Being Notified of Minor Changes]]></title>
            <link rel="alternate" href="https://pagecrawl.io/help/reduce-false-positives/article/keep-html-record-but-not-be-notified-of-changes" />
            <id>https://pagecrawl.io/52</id>
            <author>
                <name><![CDATA[PageCrawl.io]]></name>
            </author>
            <summary type="html">
                <![CDATA[<h1>Keep an HTML Record of a Page Without Being Notified of Minor Changes</h1>
<div style="background: #f5f5f5; padding: 30px; border-radius: 8px; text-align: center; margin: 20px 0; border: 1px solid #e0e0e0;">
  <img src="/images/blog/two-tracked-elements.png" alt="multiple tracked elements html" style="max-width: 100%; border-radius: 6px; box-shadow: 0 4px 12px rgba(0,0,0,0.15);">
</div>
<p>When monitoring web pages, you might find it useful to keep a historical HTML record for future reference. However, minor changes—such as dynamic updates to attributes, styles, or tags—can often trigger unnecessary alerts. These changes, while technically present in the HTML, might not affect the visual representation or the substantive content of the page.</p>
<p><strong>Focus on Text Content</strong>: By monitoring the text content of a page rather than its HTML structure, you can significantly reduce the number of false alerts. Text content changes are more likely to represent meaningful updates to the page.</p>
<p><strong>Use several Tracked Elements</strong>:
In addition to text content, you can specify particular elements within the HTML that are of interest. This allows you to keep an eye on specific parts of a page without being overwhelmed by minor updates elsewhere.</p>
<h3>Apply the Filter</h3>
<div style="background: #f5f5f5; padding: 30px; border-radius: 8px; text-align: center; margin: 20px 0; border: 1px solid #e0e0e0;">
  <img src="/images/blog/filters-do-not-trigger.png" alt="monitor html but not trigger notifications" style="max-width: 100%; border-radius: 6px; box-shadow: 0 4px 12px rgba(0,0,0,0.15);">
</div>
<p>To effectively manage your notifications and avoid being inundated with alerts for inconsequential changes, configure "Do not trigger notifications" filter. This filter is located within the "Conditions &amp; Filters" section of your monitoring setup. Here's how to apply it:</p>
<ol>
<li>Navigate to the "Conditions &amp; Filters" area under a specific page configuration.</li>
<li>Look for the "Do not trigger notifications" filter and select it.</li>
<li>Specify a tracked element (in this case HTML) that should not trigger change detection notifications. </li>
</ol>
<p>By carefully adjusting your monitoring settings, you can ensure that you're alerted only to significant changes that impact the content's meaning or visual presentation. This approach helps maintain the effectiveness of your monitoring efforts without the distraction of frequent, unnecessary notifications.</p>]]>
            </summary>
                                    <updated>2026-03-05T10:31:13+00:00</updated>
        </entry>
            <entry>
            <title><![CDATA[Can I pay by Crypto?]]></title>
            <link rel="alternate" href="https://pagecrawl.io/help/subscription/article/can-i-pay-using-crypto" />
            <id>https://pagecrawl.io/53</id>
            <author>
                <name><![CDATA[PageCrawl.io]]></name>
            </author>
            <summary type="html">
                <![CDATA[<h1>Can I pay by Crypto?</h1>
<p>Yes, we support cryptocurrency payments for <strong>Ultimate plans paid annually</strong>.</p>
<p>To arrange payment, please contact support at <a href="mailto:support@pagecrawl.io">support@pagecrawl.io</a>.</p>]]>
            </summary>
                                    <updated>2026-03-05T10:31:13+00:00</updated>
        </entry>
            <entry>
            <title><![CDATA[Automatically Discover New Pages To Track]]></title>
            <link rel="alternate" href="https://pagecrawl.io/help/features/article/page-discovery" />
            <id>https://pagecrawl.io/54</id>
            <author>
                <name><![CDATA[PageCrawl.io]]></name>
            </author>
            <summary type="html">
                <![CDATA[<h1>Automatically Discover New Pages To Track</h1>
<p>PageCrawl is designed to make website change monitoring and management seamless. The "Discover New Pages" feature takes your change monitoring to the next level by automatically identifying new links, tracking changes, and ensuring your online presence remains up-to-date. In this guide, we'll delve into the capabilities of this feature, including its scanning methods, automated monitoring, and filtering options.</p>
<h3>Automated Link Discovery</h3>
<p>This feature performs automated scans of your website, identifying new links that have been added. This proactive approach keeps you informed about any changes to your website's link structure and updates.</p>
<h3>Choice of Scanning Methods</h3>
<p>PageCrawl provides multiple scanning methods to suit your needs. All available discovery options are enabled by default (Mode: Automatic):</p>
<ul>
<li><strong>Base URL Link Discovery</strong>: Discover new links directly on your provided base URL. This method is particularly useful if you want to focus on specific sections of your website without going too deep.</li>
<li><strong>Deep Scan</strong>: Conduct a comprehensive analysis by visiting every accessible page on your website. This ensures that no new links go unnoticed, even on nested pages.</li>
<li><strong>Sitemap Scan</strong>:  Utilize existing sitemaps to uncover new links. This method is efficient for websites with extensive content structures. Since most websites want to be featured on search engines like Google and Bing, they usually have sitemaps. </li>
</ul>
<h3>Filtering Options</h3>
<ul>
<li><strong>Include Pages</strong>: Specify keywords or patterns that pages must contain to be included in monitoring. Useful for tracking specific types of content.</li>
<li><strong>Exclude Pages</strong>: Define keywords or patterns that pages must not contain to be included in monitoring. Ideal for excluding pages that you are not interested in.</li>
</ul>
<h3>Configuring Automated Monitoring and Tracking</h3>
<div style="background: #f5f5f5; padding: 30px; border-radius: 8px; text-align: center; margin: 20px 0; border: 1px solid #e0e0e0;">
  <img src="/images/new-template.png" alt="automatic page discovery" style="max-width: 100%; border-radius: 6px; box-shadow: 0 4px 12px rgba(0,0,0,0.15);">
</div>
<h3>Create a Template</h3>
<p>To start monitoring the website and automatically discover all new pages, configure a new <a href="https://pagecrawl.io/app/settings/workspace/templates">Template</a>  which will serve as the basis for monitoring new pages.</p>
<ol>
<li>Under "Sample URL address," enter an example page URL that you wish to track. The rest of the fields will be auto-filled for you.</li>
</ol>
<h3>Configure Tracked Elements</h3>
<p>You may choose to monitor all pages on the website or only those with a specific structure (e.g., if you only want to track product pages and not other pages).</p>
<ol>
<li>If you wish to monitor all pages, for Tracked Element configuration, select "Full-page Text."</li>
<li>To monitor pages with a specific layout, configure multiple Tracked Element configurations, such as product title, price, and description. If these elements do not exist on the page, the page will simply be skipped.</li>
</ol>
<h3>Enable "Discover New Pages" feature</h3>
<div style="background: #f5f5f5; padding: 30px; border-radius: 8px; text-align: center; margin: 20px 0; border: 1px solid #e0e0e0;">
  <img src="/images/page-discovery.png" alt="Discover New Pages" style="max-width: 100%; border-radius: 6px; box-shadow: 0 4px 12px rgba(0,0,0,0.15);">
</div>
<ol>
<li>Activate the "Discover New Pages" feature and customize any settings if needed.</li>
<li>Save the template and watch out for newly added pages when they become discovered</li>
<li>If there are too many irrelevant pages discovered, adjust filters and remove irrelevant pages.</li>
</ol>]]>
            </summary>
                                    <updated>2026-03-05T10:31:12+00:00</updated>
        </entry>
            <entry>
            <title><![CDATA[File Checksum Monitoring]]></title>
            <link rel="alternate" href="https://pagecrawl.io/help/file-tracking/article/file-checksum-hash-monitoring" />
            <id>https://pagecrawl.io/55</id>
            <author>
                <name><![CDATA[PageCrawl.io]]></name>
            </author>
            <summary type="html">
                <![CDATA[<h1>File Checksum Monitoring</h1>
<p>File Checksum Monitoring detects when any online file has been modified by comparing its SHA-256 hash. Unlike text-based monitoring, this works with any file type, including zip archives, images, videos, and binary files. When a change is detected, the original file is stored so you can download and compare versions.</p>
<h3>What is SHA-256?</h3>
<p>SHA-256 is a cryptographic hash function that produces a unique fingerprint for a file. If even a single byte changes, the hash changes completely, making it reliable for detecting modifications.</p>
<h3>How It Works</h3>
<ol>
<li>You provide the URL of the file to monitor</li>
<li>PageCrawl downloads the file and calculates its SHA-256 checksum</li>
<li>On each subsequent check, the checksum is recalculated and compared</li>
<li>If the checksum differs, you receive a notification</li>
<li>The previous version of the file is saved for manual comparison</li>
</ol>
<h3>Setup</h3>
<ol>
<li>Click <strong>Track New Page</strong></li>
<li>Paste the direct URL to the file</li>
<li>PageCrawl detects the file and shows checksum monitoring options</li>
<li>Choose your check frequency and notification preferences</li>
<li>Save</li>
</ol>
<h3>Supported File Types</h3>
<p>Any file accessible via URL, including: zip, rar, psd, video, audio, images, and more. Maximum file size is <strong>15 MB</strong>. Contact support if you need to monitor larger files.</p>
<h3>Checksum vs Text Monitoring</h3>
<table>
<thead>
<tr>
<th>Method</th>
<th>Best For</th>
<th>Shows Exact Changes</th>
</tr>
</thead>
<tbody>
<tr>
<td><strong>File checksum</strong></td>
<td>Any file type (binary, images, archives)</td>
<td>No, only that the file changed</td>
</tr>
<tr>
<td><strong>Text monitoring</strong></td>
<td>PDF, Excel, Word, CSV, PowerPoint</td>
<td>Yes, line-by-line diff</td>
</tr>
</tbody>
</table>
<p>If you need to see exactly what text changed in a document, use the dedicated text monitoring for <a href="/help/file-tracking/article/can-pagecrawl-detect-changes-in-pdf">PDF</a>, <a href="/help/file-tracking/article/track-changes-in-excel-files">Excel</a>, <a href="/help/file-tracking/article/track-changes-in-word-files">Word</a>, <a href="/help/file-tracking/article/track-changes-in-csv-files">CSV</a>, or <a href="/help/file-tracking/article/track-changes-in-powerpoint-files">PowerPoint</a> files instead.</p>
<h3>FAQ</h3>
<ul>
<li><strong>How often are files checked?</strong> You can set the frequency from every 5 minutes to monthly, depending on your plan.</li>
<li><strong>What if the file is no longer accessible?</strong> You will be notified with an error status.</li>
<li><strong>Can I stop monitoring a file?</strong> Yes, disable or delete it at any time.</li>
</ul>
<h3>Related Articles</h3>
<ul>
<li><a href="/help/file-tracking/article/can-pagecrawl-detect-changes-in-pdf">PDF Changes</a> - Monitor PDF text changes</li>
<li><a href="/help/file-tracking/article/track-changes-in-excel-files">Excel Spreadsheets</a> - Monitor spreadsheet text changes</li>
<li><a href="/help/file-tracking/article/track-changes-in-word-files">Word Documents</a> - Monitor Word text changes</li>
</ul>]]>
            </summary>
                                    <updated>2026-03-05T10:31:12+00:00</updated>
        </entry>
            <entry>
            <title><![CDATA[Monitor Changes in Google Sheets, Docs, and Drive Files]]></title>
            <link rel="alternate" href="https://pagecrawl.io/help/file-tracking/article/monitor-changes-in-google-sheets" />
            <id>https://pagecrawl.io/56</id>
            <author>
                <name><![CDATA[PageCrawl.io]]></name>
            </author>
            <summary type="html">
                <![CDATA[<h1>Monitor Changes in Google Sheets, Docs, and Drive Files</h1>
<p>PageCrawl can monitor publicly shared Google Sheets, Google Docs, and other Google Drive files for text changes. When content is added, edited, or removed, you receive a notification with a diff showing exactly what changed.</p>
<h3>Requirements</h3>
<p>The Google file must be accessible via a shareable link. In Google Drive, set the sharing to <strong>"Anyone with the link can view"</strong> to allow PageCrawl to access the content.</p>
<h3>Setup</h3>
<ol>
<li>Click <strong>Track New Page</strong></li>
<li>Paste the shareable link to your Google Sheet, Doc, or Drive file</li>
<li>PageCrawl detects the file type and shows the appropriate configuration</li>
<li>Choose your check frequency and notification preferences</li>
<li>Save</li>
</ol>
<h3>Supported File Types</h3>
<table>
<thead>
<tr>
<th>File Type</th>
<th>What Is Tracked</th>
</tr>
</thead>
<tbody>
<tr>
<td><strong>Google Sheets</strong></td>
<td>Cell text content across all sheets</td>
</tr>
<tr>
<td><strong>Google Docs</strong></td>
<td>Full document text</td>
</tr>
<tr>
<td><strong>Google Drive files</strong></td>
<td>Text content (for supported formats like PDF, DOCX)</td>
</tr>
</tbody>
</table>
<h3>Related Articles</h3>
<ul>
<li><a href="/help/file-tracking/article/monitor-changes-in-sharepoint-documents">SharePoint Documents</a> - Monitor Microsoft SharePoint files</li>
<li><a href="/help/file-tracking/article/track-changes-in-excel-files">Excel Spreadsheets</a> - Monitor Excel file changes</li>
<li><a href="/help/integrations/article/sync--monitored-pages-to-google-sheets">Google Sheets Sync</a> - Export change data to Google Sheets</li>
</ul>]]>
            </summary>
                                    <updated>2026-03-05T10:31:12+00:00</updated>
        </entry>
            <entry>
            <title><![CDATA[Monitor Changes in Microsoft SharePoint Documents]]></title>
            <link rel="alternate" href="https://pagecrawl.io/help/file-tracking/article/monitor-changes-in-sharepoint-documents" />
            <id>https://pagecrawl.io/57</id>
            <author>
                <name><![CDATA[PageCrawl.io]]></name>
            </author>
            <summary type="html">
                <![CDATA[<h1>Monitor Changes in Microsoft SharePoint Documents</h1>
<p>PageCrawl can monitor Microsoft SharePoint pages and documents for text changes. When content is added, edited, or removed, you receive a notification showing what changed.</p>
<h3>Requirements</h3>
<p>The SharePoint page or document must be accessible via a direct URL.</p>
<h3>Setup</h3>
<ol>
<li>Click <strong>Track New Page</strong></li>
<li>Paste the URL to the SharePoint page or document</li>
<li>Choose your check frequency and notification preferences</li>
<li>If the page requires login, select your authentication configuration</li>
<li>Save</li>
</ol>
<h3>What Can Be Monitored</h3>
<table>
<thead>
<tr>
<th>Content Type</th>
<th>How It Works</th>
</tr>
</thead>
<tbody>
<tr>
<td><strong>SharePoint pages</strong></td>
<td>Tracks text content changes on the page</td>
</tr>
<tr>
<td><strong>Word documents</strong></td>
<td>Extracts and compares text content</td>
</tr>
<tr>
<td><strong>Excel files</strong></td>
<td>Extracts and compares cell data</td>
</tr>
<tr>
<td><strong>PDF files</strong></td>
<td>Extracts and compares text content</td>
</tr>
</tbody>
</table>
<h3>Related Articles</h3>
<ul>
<li><a href="/help/file-tracking/article/monitor-changes-in-google-sheets">Google Docs &amp; Sheets</a> - Monitor Google Drive files</li>
<li><a href="/help/features/article/can-i-track-password-protected-websites">Password-Protected Pages</a> - Configure login authentication</li>
<li><a href="/help/file-tracking/article/track-changes-in-word-files">Word Documents</a> - Monitor Word file changes</li>
</ul>]]>
            </summary>
                                    <updated>2026-03-05T10:31:12+00:00</updated>
        </entry>
            <entry>
            <title><![CDATA[Monitoring Changes in PDF Files]]></title>
            <link rel="alternate" href="https://pagecrawl.io/help/tutorials/article/tracking-changes-in-pdf-files" />
            <id>https://pagecrawl.io/58</id>
            <author>
                <name><![CDATA[PageCrawl.io]]></name>
            </author>
            <summary type="html">
                <![CDATA[<h1>Monitoring Changes in PDF Files</h1>
<div style="background: #f5f5f5; padding: 30px; border-radius: 8px; text-align: center; margin: 20px 0; border: 1px solid #e0e0e0;">
  <img src="/images/blog/simple-create-file.png" alt="Quick Setup showing File monitoring mode for PDF tracking" style="max-width: 100%; border-radius: 6px; box-shadow: 0 4px 12px rgba(0,0,0,0.15);">
</div>
<p>Monitoring text changes in PDF files can be essential for managing contracts, reports, or any important documents that may be frequently updated. Manually reviewing each document for changes can be time-consuming and prone to error. This is where PageCrawl.io comes in handy, offering an automated solution for tracking text changes in PDF files and notifying you whenever there’s an update.</p>
<h3>Why Monitor PDF Files for Text Changes?</h3>
<p>PDFs are often used for official or finalized documents, which means any change can be significant. Whether it's contracts, legal documents, or product manuals, keeping an eye on text changes ensures that you're always aware of important updates. Monitoring PDF files helps with:</p>
<ul>
<li>Keeping track of contract modifications.</li>
<li>Ensuring that no important edits are made without your knowledge.</li>
<li>Detecting unauthorized changes in sensitive documents.</li>
</ul>
<h3>How PageCrawl.io Helps with PDF Monitoring</h3>
<p>With PageCrawl.io, you can set up automated tracking for PDF files. It scans the text in your PDF files and alerts you whenever there’s a change, so you don’t have to sift through documents manually.</p>
<h3>What if PDF does not contain text</h3>
<p>If the PDF you want to monitor does not contain readable text you can use <a href="/help/file-tracking/article/file-checksum-hash-monitoring">File checksum monitoring</a> instead to check if the PDF has been modified or changed. The downside of such approach is that you will not be able to quickly glance what exactly has changed but you will need to review page by page.</p>
<h3>Setting Up PDF Monitoring with PageCrawl.io</h3>
<p>Setting up PDF monitoring is easy with PageCrawl.io. Here’s a quick guide:</p>
<h4>Step 1: Sign in to PageCrawl.io</h4>
<p>Log in to your PageCrawl.io account or sign up if you’re new to the platform.</p>
<h4>Step 2: Add a New Monitored Page</h4>
<p>Navigate to the dashboard and click on the "Track New Page" button. Here, you can paste a link to the PDF file you want to monitor.</p>
<h4>Step 3: Set Up Notifications &amp; How often to check for changes</h4>
<p>Customize how and when you receive notifications. You can choose to be notified immediately when text changes, or you can set up periodic checks if you want less frequent updates.</p>
<h3>Tracking PDFs Embedded in Web Pages</h3>
<p>Some websites display PDF documents directly within a web page using iframes. This is common for contracts, terms of service, financial reports, and other documents that are embedded alongside regular page content.</p>
<p>PageCrawl automatically detects embedded iframes when you add a page for monitoring. When setting up fullpage monitoring on a page that contains iframes, you will see an <strong>"Include embedded content"</strong> checkbox. Enabling this option tells PageCrawl to extract and track text from the embedded PDF along with the rest of the page content.</p>
<p>This means you can monitor both the surrounding web page and the embedded PDF document in a single monitor, receiving notifications whenever either part changes.</p>]]>
            </summary>
                                    <updated>2026-03-05T10:31:13+00:00</updated>
        </entry>
            <entry>
            <title><![CDATA[Bulk Edit Pages]]></title>
            <link rel="alternate" href="https://pagecrawl.io/help/features/article/bulk-edit-pages" />
            <id>https://pagecrawl.io/59</id>
            <author>
                <name><![CDATA[PageCrawl.io]]></name>
            </author>
            <summary type="html">
                <![CDATA[<h1>Bulk Edit Pages</h1>
<p>Select multiple monitored pages and change their settings in one operation. Bulk edit is available on paid plans.</p>
<h3>How to Bulk Edit</h3>
<ol>
<li>Go to your page list</li>
<li>Select pages using the checkboxes (or select all)</li>
<li>Click <strong>Bulk Edit</strong> in the toolbar</li>
<li>Choose what to change and apply</li>
</ol>
<h3>Available Bulk Operations</h3>
<table>
<thead>
<tr>
<th>Operation</th>
<th>Description</th>
</tr>
</thead>
<tbody>
<tr>
<td><strong>Enable / Disable</strong></td>
<td>Turn monitoring on or off for selected pages</td>
</tr>
<tr>
<td><strong>Delete</strong></td>
<td>Permanently delete selected pages and/or folders</td>
</tr>
<tr>
<td><strong>Trigger check</strong></td>
<td>Run an immediate check on all selected pages</td>
</tr>
<tr>
<td><strong>Mark as seen</strong></td>
<td>Clear the "changed" indicator on selected pages</td>
</tr>
</tbody>
</table>
<h3>Bulk-Editable Settings</h3>
<table>
<thead>
<tr>
<th>Setting</th>
<th>Options</th>
</tr>
</thead>
<tbody>
<tr>
<td><strong>Check frequency</strong></td>
<td>5 min to monthly (depending on plan)</td>
</tr>
<tr>
<td><strong>Engine</strong></td>
<td>Default, Stealth, or Fast</td>
</tr>
<tr>
<td><strong>Proxy location</strong></td>
<td>London, New York, San Francisco, Toronto, Frankfurt, Residential, or Random</td>
</tr>
<tr>
<td><strong>Custom proxies</strong></td>
<td>Paste your own proxy list</td>
</tr>
<tr>
<td><strong>Notifications</strong></td>
<td>Email, Slack, Telegram, Discord, Teams, or disable</td>
</tr>
<tr>
<td><strong>Notification emails</strong></td>
<td>Choose which verified emails receive alerts</td>
</tr>
<tr>
<td><strong>Labels</strong></td>
<td>Add or remove labels</td>
</tr>
<tr>
<td><strong>Folder</strong></td>
<td>Move pages to a specific folder</td>
</tr>
<tr>
<td><strong>Template</strong></td>
<td>Apply a monitoring template</td>
</tr>
<tr>
<td><strong>Screenshots</strong></td>
<td>Enable or disable</td>
</tr>
<tr>
<td><strong>Smart retries</strong></td>
<td>Enable or disable automatic retry on failure</td>
</tr>
<tr>
<td><strong>Device</strong></td>
<td>Emulate a specific device viewport</td>
</tr>
<tr>
<td><strong>Language</strong></td>
<td>Set browser language</td>
</tr>
<tr>
<td><strong>Ignored text</strong></td>
<td>Add or replace text patterns to ignore</td>
</tr>
<tr>
<td><strong>Full page selector</strong></td>
<td>Choose between all content, main content, or article only</td>
</tr>
<tr>
<td><strong>AI summaries</strong></td>
<td>Enable or disable AI-powered change summaries</td>
</tr>
<tr>
<td><strong>AI focus</strong></td>
<td>Set custom AI instructions for what matters</td>
</tr>
<tr>
<td><strong>AI tier</strong></td>
<td>Basic or Pro (Pro requires Ultimate plan)</td>
</tr>
<tr>
<td><strong>Cookie blocking</strong></td>
<td>Add or remove cookie consent blocking</td>
</tr>
<tr>
<td><strong>Overlay removal</strong></td>
<td>Add or remove popup overlay hiding</td>
</tr>
<tr>
<td><strong>Date exclusion</strong></td>
<td>Add or remove date filtering</td>
</tr>
<tr>
<td><strong>Number exclusion</strong></td>
<td>Add or remove number filtering</td>
</tr>
<tr>
<td><strong>Archive</strong></td>
<td>Enable web archiving (Ultimate plan only)</td>
</tr>
<tr>
<td><strong>Record always</strong></td>
<td>Always save check results, even when no change detected</td>
</tr>
</tbody>
</table>
<h3>Adding Pages in Bulk</h3>
<p>Beyond editing, you can also add multiple pages at once:</p>
<table>
<thead>
<tr>
<th>Method</th>
<th>Description</th>
</tr>
</thead>
<tbody>
<tr>
<td><strong>Paste URLs</strong></td>
<td>Paste a list of URLs (one per line) to add them all at once</td>
</tr>
<tr>
<td><strong>Upload file</strong></td>
<td>Import URLs from a CSV or Excel file</td>
</tr>
<tr>
<td><strong>Website scan</strong></td>
<td>Scan an entire website to discover and add pages automatically</td>
</tr>
</tbody>
</table>
<h3>Bulk Export</h3>
<p>Select pages and export their data to Excel, including current values, change history, and configuration.</p>
<h3>Related Articles</h3>
<ul>
<li><a href="/help/features/article/organized-page-monitoring">Labels, Folders &amp; Workspaces</a> - Organize your monitored pages</li>
<li><a href="/help/features/article/advanced-configuration">Advanced Configuration</a> - Templates and Power User settings</li>
<li><a href="/help/features/article/page-discovery">Page Discovery</a> - Automatically discover new pages to monitor</li>
</ul>]]>
            </summary>
                                    <updated>2026-03-05T10:31:12+00:00</updated>
        </entry>
            <entry>
            <title><![CDATA[Organize Monitored Pages with Labels, Folders, and Workspaces]]></title>
            <link rel="alternate" href="https://pagecrawl.io/help/features/article/organized-page-monitoring" />
            <id>https://pagecrawl.io/60</id>
            <author>
                <name><![CDATA[PageCrawl.io]]></name>
            </author>
            <summary type="html">
                <![CDATA[<h1>Organize Monitored Pages with Labels, Folders, and Workspaces</h1>
<p>PageCrawl provides three levels of organization for your monitored pages: labels for tagging, folders for grouping, and workspaces for separating entire environments.</p>
<h3>Labels</h3>
<p>Labels are color-coded tags you can attach to any monitored page. Each label has a name, optional description, and a color.</p>
<table>
<thead>
<tr>
<th>Feature</th>
<th>Details</th>
</tr>
</thead>
<tbody>
<tr>
<td><strong>Colors</strong></td>
<td>Each label has a hex color, auto-generated if not specified</td>
</tr>
<tr>
<td><strong>Multiple labels per page</strong></td>
<td>Attach as many labels as needed</td>
</tr>
<tr>
<td><strong>Filtering</strong></td>
<td>Filter your page list by one or more labels</td>
</tr>
<tr>
<td><strong>Bulk tagging</strong></td>
<td>Apply labels to multiple pages at once via <a href="/help/features/article/bulk-edit-pages">Bulk Edit</a></td>
</tr>
<tr>
<td><strong>Workspace-scoped</strong></td>
<td>Labels belong to a workspace and are not shared across workspaces</td>
</tr>
</tbody>
</table>
<p>To manage labels, go to any page list and use the label filter, or manage them when editing a page.</p>
<p>Labels can also be applied automatically by AI. See <a href="/help/features/article/ai-powered-change-detection#ai-label-automation">AI Label Automation</a> for details.</p>
<h3>Folders</h3>
<p>Folders let you group pages into a nested hierarchy with unlimited depth. Each folder belongs to a workspace and can contain both pages and sub-folders.</p>
<table>
<thead>
<tr>
<th>Feature</th>
<th>Details</th>
</tr>
</thead>
<tbody>
<tr>
<td><strong>Nested hierarchy</strong></td>
<td>Create sub-folders at any depth</td>
</tr>
<tr>
<td><strong>Page counts</strong></td>
<td>Each folder shows the total number of pages, including those in sub-folders</td>
</tr>
<tr>
<td><strong>Bulk move</strong></td>
<td>Move multiple pages to a folder via <a href="/help/features/article/bulk-edit-pages">Bulk Edit</a></td>
</tr>
<tr>
<td><strong>URL slugs</strong></td>
<td>Each folder has a unique slug for direct navigation</td>
</tr>
</tbody>
</table>
<h3>Workspaces</h3>
<p>Workspaces are separate environments within your account. Each workspace has its own pages, folders, labels, notification settings, schedule, and integrations.</p>
<table>
<thead>
<tr>
<th>Feature</th>
<th>Details</th>
</tr>
</thead>
<tbody>
<tr>
<td><strong>Separate everything</strong></td>
<td>Pages, folders, labels, webhooks, and settings are workspace-scoped</td>
</tr>
<tr>
<td><strong>Team access</strong></td>
<td>Invite team members to specific workspaces</td>
</tr>
<tr>
<td><strong>Independent settings</strong></td>
<td>Each workspace has its own notification channels, schedule, AI configuration, and integrations</td>
</tr>
<tr>
<td><strong>Quick switching</strong></td>
<td>Switch between workspaces from the sidebar</td>
</tr>
</tbody>
</table>
<p>Use workspaces to separate monitoring by team, client, project, or environment (e.g., production vs staging).</p>
<h3>Creating and Managing</h3>
<table>
<thead>
<tr>
<th>Action</th>
<th>Where</th>
</tr>
</thead>
<tbody>
<tr>
<td><strong>Create a folder</strong></td>
<td>Click the folder icon in the page list sidebar</td>
</tr>
<tr>
<td><strong>Create a label</strong></td>
<td>When editing a page, or via the label filter</td>
</tr>
<tr>
<td><strong>Create a workspace</strong></td>
<td><strong>Settings</strong> &gt; <strong>Workspace</strong> &gt; <strong>Manage Workspaces</strong></td>
</tr>
<tr>
<td><strong>Switch workspace</strong></td>
<td>Sidebar workspace selector</td>
</tr>
<tr>
<td><strong>Bulk assign labels/folders</strong></td>
<td>Select pages &gt; <strong>Bulk Edit</strong></td>
</tr>
</tbody>
</table>
<h3>Related Articles</h3>
<ul>
<li><a href="/help/features/article/bulk-edit-pages">Bulk Edit</a> - Apply labels, folders, and settings to multiple pages at once</li>
<li><a href="/help/features/article/advanced-configuration">Advanced Configuration</a> - Templates and workspace settings</li>
<li><a href="/help/features/article/page-check-schedule">Check Scheduling</a> - Configure per-workspace monitoring schedules</li>
</ul>]]>
            </summary>
                                    <updated>2026-03-05T10:31:12+00:00</updated>
        </entry>
            <entry>
            <title><![CDATA[Real Browser Monitoring and Engine Selection]]></title>
            <link rel="alternate" href="https://pagecrawl.io/help/features/article/what-is-real-browser-page-monitoring" />
            <id>https://pagecrawl.io/61</id>
            <author>
                <name><![CDATA[PageCrawl.io]]></name>
            </author>
            <summary type="html">
                <![CDATA[<h1>Real Browser Monitoring and Engine Selection</h1>
<p>PageCrawl renders web pages using a real browser, executing JavaScript and loading dynamic content exactly as a visitor would see it. You can choose between three engine modes depending on the page you are monitoring.</p>
<h3>Available Engines</h3>
<table>
<thead>
<tr>
<th>Engine</th>
<th>Best For</th>
<th>How It Works</th>
</tr>
</thead>
<tbody>
<tr>
<td><strong>Default</strong></td>
<td>Most websites</td>
<td>Full browser with JavaScript rendering</td>
</tr>
<tr>
<td><strong>Stealth</strong></td>
<td>Bot-protected pages</td>
<td>Enhanced mode for reliably accessing protected pages</td>
</tr>
<tr>
<td><strong>Fast</strong></td>
<td>Static pages, speed</td>
<td>Optimized for speed when JavaScript rendering is not needed</td>
</tr>
</tbody>
</table>
<h3>Default Engine</h3>
<p>The default engine loads pages using a real browser. It processes JavaScript, waits for dynamic content, handles cookies, and renders the page as a real user would see it. This works for the majority of websites.</p>
<h3>Stealth Mode</h3>
<p>Some websites use bot protection services that block automated access. Stealth mode is designed to reliably access these pages.</p>
<p>PageCrawl automatically switches to Stealth mode when a page is blocked (timeout, 403 Forbidden, or 401 Unauthorized). You can also enable it manually per page.</p>
<h3>Fast Mode</h3>
<p>Fast mode is optimized for speed when JavaScript rendering is not needed, making it significantly faster and more resource-efficient. Use this for:</p>
<ul>
<li>Static HTML pages that do not rely on JavaScript</li>
<li>API responses and JSON endpoints</li>
<li>Pages where you only need text or HTML content</li>
<li>High-frequency monitoring where speed matters</li>
</ul>
<p>Fast mode supports Full Page, Text, HTML, Number, Price, Boolean, Availability, Links, and PDF element types. It does not support Visual comparison, screenshots, or actions (click, scroll, type).</p>
<h3>Choosing the Right Engine</h3>
<table>
<thead>
<tr>
<th>Scenario</th>
<th>Recommended Engine</th>
</tr>
</thead>
<tbody>
<tr>
<td>Standard website</td>
<td>Default</td>
</tr>
<tr>
<td>JavaScript-heavy SPA</td>
<td>Default</td>
</tr>
<tr>
<td>Bot-protected page</td>
<td>Stealth</td>
</tr>
<tr>
<td>Page returning 403 or timeouts</td>
<td>Stealth</td>
</tr>
<tr>
<td>Static HTML page</td>
<td>Fast</td>
</tr>
<tr>
<td>API or JSON endpoint</td>
<td>Fast</td>
</tr>
<tr>
<td>Need screenshots or visual diff</td>
<td>Default or Stealth</td>
</tr>
<tr>
<td>High-frequency checks (every 5 min)</td>
<td>Fast (if page allows)</td>
</tr>
</tbody>
</table>
<h3>Configuration</h3>
<p>Set the engine per page in the page editor under <strong>Power User</strong> settings, or apply it in bulk via <a href="/help/features/article/bulk-edit-pages">Bulk Edit</a>.</p>
<h3>Related Articles</h3>
<ul>
<li><a href="/help/features/article/monitoring-pages-behind-cloudflare-bot-protection">Monitoring Pages Behind Bot Protection</a> - Handling bot-protected pages</li>
<li><a href="/help/features/article/custom-proxies">Custom Proxies</a> - Use your own proxy servers</li>
<li><a href="/help/features/article/advanced-configuration">Advanced Configuration</a> - Power User mode and engine selection</li>
</ul>]]>
            </summary>
                                    <updated>2026-03-26T05:33:22+00:00</updated>
        </entry>
            <entry>
            <title><![CDATA[Add to PageCrawl.io bookmark]]></title>
            <link rel="alternate" href="https://pagecrawl.io/help/tutorials/article/add-to-pagecrawl-bookmarklet" />
            <id>https://pagecrawl.io/62</id>
            <author>
                <name><![CDATA[PageCrawl.io]]></name>
            </author>
            <summary type="html">
                <![CDATA[<h1>"Add to PageCrawl.io" bookmark</h1>
<h3>What is This Bookmarklet?</h3>
<p>This bookmarklet is a quick tool for adding any webpage to your PageCrawl.io account in one click. By saving and clicking the bookmarklet while browsing, you’ll instantly open the PageCrawl.io "Track New Page" form with the URL and title of the current page already filled in for you.</p>
<h3>Why Use This?</h3>
<p>If you often add new pages to PageCrawl.io, this bookmarklet can save you time by:</p>
<ul>
<li>Skipping the need to copy-paste URLs and titles.</li>
<li>Reducing clicks to navigate through PageCrawl.io’s interface.</li>
<li>Allowing you to add new pages directly from the page you’re currently on.</li>
</ul>
<h3>How to Save the Bookmarklet</h3>
<p>To save, simply drag the link above to your bookmarks bar, or right-click and select "Bookmark This Link."</p>
<p><a href="javascript:(function()%7Bvar%20currentUrl%20%3D%20encodeURIComponent(window.location.href)%3Bvar%20pageTitle%20%3D%20encodeURIComponent(document.title)%3Bwindow.location.href%20%3D%20&#039;https%3A%2F%2FPageCrawl.io%2Fapp%2Fpages%2Fcreate%3Furl%3D&#039;%20%2B%20currentUrl%20%2B%20&#039;%26title%3D&#039;%20%2B%20pageTitle%3B%7D">Add to PageCrawl.io</a>()%3B)</p>
<h3>How to Use the Bookmarklet</h3>
<p>When you’re on a page you want to track in PageCrawl.io:</p>
<ul>
<li>Click the "Add to PageCrawl.io" bookmark in your bookmarks bar.</li>
<li>PageCrawl.io will open with the URL and title of the new page prefilled.</li>
<li>Review or edit the details as needed, then save the page to your account.</li>
</ul>]]>
            </summary>
                                    <updated>2026-03-05T10:31:13+00:00</updated>
        </entry>
            <entry>
            <title><![CDATA[Monitor Page Changes via RSS Feeds]]></title>
            <link rel="alternate" href="https://pagecrawl.io/help/features/article/page-monitoring-rss-feeds" />
            <id>https://pagecrawl.io/63</id>
            <author>
                <name><![CDATA[PageCrawl.io]]></name>
            </author>
            <summary type="html">
                <![CDATA[<h1>Monitor Page Changes via RSS Feeds</h1>
<p>PageCrawl can generate RSS feeds for your monitored pages, allowing you to follow detected changes from any RSS reader or automation tool.</p>
<h3>How RSS Feeds Work</h3>
<p>Each RSS feed has a unique URL with an access code. When a monitored page detects a change, the feed is updated with the new entry. Feeds follow the Atom format and can be consumed by any standard RSS reader.</p>
<p>You can create feeds for:</p>
<ul>
<li><strong>A specific page</strong> - Track changes on a single monitored page</li>
<li><strong>All pages in a workspace</strong> - Get a combined feed of all changes across the workspace</li>
</ul>
<h3>Setting Up an RSS Feed</h3>
<ol>
<li>Go to <strong>Account Preferences</strong> &gt; <strong>RSS Feeds</strong></li>
<li>Click <strong>Create Feed</strong></li>
<li>Optionally select a specific page (leave empty for all pages in the workspace)</li>
<li>Copy the generated feed URL</li>
</ol>
<p>The feed URL contains a unique access code, so anyone with the link can view the feed without logging in. Keep feed URLs private if the monitored content is sensitive.</p>
<h3>Using Your Feed</h3>
<p>Add the feed URL to any RSS-compatible tool:</p>
<table>
<thead>
<tr>
<th>Tool Type</th>
<th>Examples</th>
</tr>
</thead>
<tbody>
<tr>
<td><strong>RSS readers</strong></td>
<td>Feedly, Inoreader, NewsBlur</td>
</tr>
<tr>
<td><strong>Automation platforms</strong></td>
<td>n8n, Zapier, Make</td>
</tr>
<tr>
<td><strong>Dashboards</strong></td>
<td>Custom widgets, internal portals</td>
</tr>
<tr>
<td><strong>Browser extensions</strong></td>
<td>RSS reader extensions for Chrome or Firefox</td>
</tr>
</tbody>
</table>
<h3>Managing Feeds</h3>
<table>
<thead>
<tr>
<th>Action</th>
<th>How</th>
</tr>
</thead>
<tbody>
<tr>
<td><strong>List feeds</strong></td>
<td>Go to Account Preferences &gt; RSS Feeds</td>
</tr>
<tr>
<td><strong>Create feed</strong></td>
<td>Click Create Feed and select options</td>
</tr>
<tr>
<td><strong>Delete feed</strong></td>
<td>Click the delete button next to the feed</td>
</tr>
</tbody>
</table>
<h3>Related Articles</h3>
<ul>
<li><a href="/help/features/article/api-webhooks-for-custom-integrations">API &amp; Webhooks</a> - Programmatic access and real-time webhooks</li>
<li><a href="/help/integrations/article/webhook-integration">Webhook Integration</a> - HTTP POST notifications for changes</li>
<li><a href="/help/integrations/article/send-slack-notification-when-changes-detected">Slack Notifications</a> - Get change alerts in Slack</li>
</ul>]]>
            </summary>
                                    <updated>2026-04-09T04:59:35+00:00</updated>
        </entry>
            <entry>
            <title><![CDATA[API and Webhooks for Custom Integrations]]></title>
            <link rel="alternate" href="https://pagecrawl.io/help/features/article/api-webhooks-for-custom-integrations" />
            <id>https://pagecrawl.io/64</id>
            <author>
                <name><![CDATA[PageCrawl.io]]></name>
            </author>
            <summary type="html">
                <![CDATA[<h1>API and Webhooks for Custom Integrations</h1>
<p>PageCrawl provides a REST API and webhook system for integrating page monitoring into your own applications and workflows. Use the API to manage monitors programmatically and webhooks to receive real-time notifications when changes are detected.</p>
<p><em>Available on paid plans.</em></p>
<h3>Authentication</h3>
<p>All API requests require a Bearer token. Find your API key in <strong>Settings</strong> &gt; <strong>API</strong>.</p>
<p>Include it in the <code>Authorization</code> header:</p>
<pre><code>Authorization: Bearer YOUR_API_KEY</code></pre>
<h3>API Endpoints</h3>
<table>
<thead>
<tr>
<th>Method</th>
<th>Endpoint</th>
<th>Description</th>
</tr>
</thead>
<tbody>
<tr>
<td><code>GET</code></td>
<td><code>/api/pages</code></td>
<td>List all monitored pages</td>
</tr>
<tr>
<td><code>POST</code></td>
<td><code>/api/pages</code></td>
<td>Create a new monitored page</td>
</tr>
<tr>
<td><code>GET</code></td>
<td><code>/api/pages/{slug}</code></td>
<td>Get page details and latest values</td>
</tr>
<tr>
<td><code>PUT</code></td>
<td><code>/api/pages/{id}</code></td>
<td>Update page settings</td>
</tr>
<tr>
<td><code>DELETE</code></td>
<td><code>/api/pages/{id}</code></td>
<td>Delete a monitored page</td>
</tr>
<tr>
<td><code>PUT</code></td>
<td><code>/api/pages/{id}/check</code></td>
<td>Trigger an immediate check</td>
</tr>
<tr>
<td><code>PUT</code></td>
<td><code>/api/pages/{id}/status</code></td>
<td>Enable or disable a page</td>
</tr>
<tr>
<td><code>GET</code></td>
<td><code>/api/pages/{id}/history</code></td>
<td>Get check history for a page</td>
</tr>
</tbody>
</table>
<p>Additional endpoints are available for folders, tags, webhooks, and RSS feeds.</p>
<h3>Webhooks</h3>
<p>Webhooks send HTTP POST requests with a JSON body to your endpoint whenever a page change is detected or an error occurs. Configure webhooks in <strong>Settings</strong> &gt; <strong>Workspace</strong> &gt; <strong>Integrations</strong> &gt; <strong>Webhooks</strong>.</p>
<table>
<thead>
<tr>
<th>Setting</th>
<th>Description</th>
</tr>
</thead>
<tbody>
<tr>
<td><strong>Target URL</strong></td>
<td>The HTTP endpoint that receives the POST request</td>
</tr>
<tr>
<td><strong>Event triggers</strong></td>
<td>Change detected, error, or both</td>
</tr>
<tr>
<td><strong>Page filter</strong></td>
<td>Limit to a specific page, or fire for all pages in the workspace</td>
</tr>
<tr>
<td><strong>Payload fields</strong></td>
<td>Select which fields to include (all by default)</td>
</tr>
</tbody>
</table>
<p>Available payload fields include page ID, title, change summary, diff data, screenshots, AI summary, AI priority score, and more. See the <a href="/help/integrations/article/webhook-integration">Webhook Integration guide</a> for the full field reference and example payloads.</p>
<h3>Common Use Cases</h3>
<ul>
<li><strong>Custom dashboards</strong> - Pull change data into your own monitoring dashboard via API</li>
<li><strong>Automation workflows</strong> - Trigger actions in n8n, Make, Zapier, or custom scripts via webhooks</li>
<li><strong>Database logging</strong> - Store all detected changes in your own database</li>
<li><strong>Alerting systems</strong> - Forward high-priority changes to PagerDuty, Opsgenie, or similar</li>
</ul>
<h3>Related Articles</h3>
<ul>
<li><a href="/help/integrations/article/webhook-integration">Webhook Integration</a> - Detailed webhook setup, payload reference, and testing</li>
<li><a href="/help/integrations/article/pagecrawl-zapier-integration">Zapier Integration</a> - Connect PageCrawl to 5,000+ apps</li>
<li><a href="/help/integrations/article/pagecrawl-n8n-integration">n8n Integration</a> - Open-source workflow automation</li>
<li><a href="/help/features/article/page-monitoring-rss-feeds">RSS Feeds</a> - Subscribe to changes via RSS</li>
</ul>]]>
            </summary>
                                    <updated>2026-03-05T10:31:12+00:00</updated>
        </entry>
            <entry>
            <title><![CDATA[How to Monitor Pages That Require OS Selection]]></title>
            <link rel="alternate" href="https://pagecrawl.io/help/tutorials/article/monitor-pages-with-automatic0os-detection" />
            <id>https://pagecrawl.io/65</id>
            <author>
                <name><![CDATA[PageCrawl.io]]></name>
            </author>
            <summary type="html">
                <![CDATA[<h1>How to Monitor Pages That Require OS Selection</h1>
<p>When monitoring pages that adjust their content based on the user's operating system, like those displaying OS-specific downloads or drivers, you might encounter challenges. Some sites perform OS detection and require interaction to display the desired information. Here's how you can effectively monitor such pages using PageCrawl.io.</p>
<h2>Two Approaches to Handle OS Detection</h2>
<p>There are two main ways to handle pages that require OS selection:</p>
<h3>1. Set a Custom User Agent</h3>
<p>You can configure PageCrawl to use a specific User Agent string that mimics a Windows browser. This approach is simple and works for most basic OS detection scenarios.</p>
<div style="background: #f5f5f5; padding: 30px; border-radius: 8px; text-align: center; margin: 20px 0; border: 1px solid #e0e0e0;">
  <img src="/images/blog/user-agent-setting.png" alt="User Agent setting in page advanced preferences" style="max-width: 100%; border-radius: 6px; box-shadow: 0 4px 12px rgba(0,0,0,0.15);">
</div>
<p><strong>How to set it up:</strong></p>
<ul>
<li>Navigate to your page's Advanced Preferences</li>
<li>Set the User Agent to a Windows 10/11 browser string, for example:<pre><code>Mozilla/5.0 (Windows NT 10.0; Win64; x64) AppleWebKit/537.36 (KHTML, like Gecko) Chrome/114.0.5735.199 Safari/537.36</code></pre>
</li>
</ul>
<p><strong>Advantages:</strong></p>
<ul>
<li>Quick and easy to implement</li>
<li>Works reliably for basic OS detection</li>
<li>No complex configuration required</li>
</ul>
<p><strong>Limitations:</strong></p>
<ul>
<li>Cannot distinguish between Windows 10 and Windows 11</li>
<li>May not work with sophisticated detection methods</li>
<li>Limited control over specific OS version selection</li>
<li>Older User Agent versions may be blocked by security/bot detection tools used by websites</li>
</ul>
<h3>2. Use Actions to Interact with OS Selection Forms</h3>
<p>For pages with dropdown menus or forms where you need to select a specific OS version, you can use PageCrawl's Actions feature to automate the selection process.</p>
<p><strong>How to set it up:</strong></p>
<ol>
<li>Navigate to your page's Actions settings</li>
<li>Create click actions on the appropriate selectors</li>
<li>Configure the sequence to:<ul>
<li>Click on the OS dropdown/selector</li>
<li>Select your specific OS version</li>
<li>Submit the form if required</li>
</ul>
</li>
</ol>
<p><strong>Example scenario:</strong>
If a driver download page has a form with OS selection dropdown, you can:</p>
<ol>
<li>Add an action to click on the OS dropdown selector</li>
<li>Add an action to click on "Windows 11" option</li>
<li>Add an action to click the submit button</li>
</ol>
<p><strong>Advantages:</strong></p>
<ul>
<li>Precise control over OS version selection</li>
<li>Can handle complex multi-step forms</li>
<li>Works with any type of OS selection interface</li>
</ul>
<p><strong>Limitations:</strong></p>
<ul>
<li>More complex to set up initially</li>
<li>May need adjustments if the page structure changes</li>
<li>Requires identifying the correct CSS selectors</li>
</ul>
<h2>Which Method Should You Choose?</h2>
<ul>
<li>
<p><strong>Use the User Agent method</strong> if:</p>
<ul>
<li>The site only needs basic OS detection</li>
<li>You don't need to distinguish between specific OS versions</li>
<li>You want a quick, maintenance-free solution</li>
</ul>
</li>
<li>
<p><strong>Use the Actions method</strong> if:</p>
<ul>
<li>You need to select a specific OS version (e.g., Windows 11 vs Windows 10)</li>
<li>The page has a form or dropdown for OS selection</li>
<li>The User Agent method doesn't work for your specific page</li>
</ul>
</li>
</ul>]]>
            </summary>
                                    <updated>2026-03-05T10:31:13+00:00</updated>
        </entry>
            <entry>
            <title><![CDATA[Available Tracked Element Types]]></title>
            <link rel="alternate" href="https://pagecrawl.io/help/features/article/available-tracked-monitoring-types" />
            <id>https://pagecrawl.io/66</id>
            <author>
                <name><![CDATA[PageCrawl.io]]></name>
            </author>
            <summary type="html">
                <![CDATA[<h1>Available Tracked Element Types</h1>
<div style="background: #f5f5f5; padding: 30px; border-radius: 8px; text-align: center; margin: 20px 0; border: 1px solid #e0e0e0;">
  <img src="/images/blog/monitor-full-page.png" alt="Tracked Element types for monitored pages" style="max-width: 100%; border-radius: 6px; box-shadow: 0 4px 12px rgba(0,0,0,0.15);">
</div>
<p>When monitoring changes on a webpage, the type of tracked element selected defines what kind of content will be tracked and how updates are detected. You may use multiple tracked elements for each monitored page to monitor different areas of the page. Below is a detailed breakdown of the different tracked element types:</p>
<h3>Commonly Used Tracked Element Types</h3>
<h4>1. Full Page Text</h4>
<ul>
<li><strong>Description:</strong> Tracks all visible text on the entire webpage.</li>
<li><strong>Use Case:</strong> Useful for capturing comprehensive textual content.</li>
</ul>
<h4>2. Text</h4>
<ul>
<li><strong>Description:</strong> Monitors text changes in a specified area of a webpage.</li>
<li><strong>Important Note:</strong> Only the first element matching the selector is tracked.</li>
<li><strong>Use Case:</strong> Ideal for tracking text in specific areas, like headlines or descriptions.</li>
</ul>
<h4>3. Number</h4>
<ul>
<li><strong>Description:</strong> Extracts and monitors numeric values in a specific webpage area.</li>
<li><strong>Features:</strong> Provides basic statistical analysis and visual graphs.</li>
<li><strong>Use Case:</strong> Useful for tracking numbers, such as stock levels or scores.</li>
</ul>
<h4>4. Visual</h4>
<ul>
<li><strong>Description:</strong> Monitors and alerts on visual changes in a specified area.</li>
<li><strong>Note:</strong> This is a beta feature; report any issues encountered.</li>
<li><strong>Use Case:</strong> Ideal for tracking visual changes like layout updates or style changes.</li>
</ul>
<h3>Page Areas</h3>
<h4>1. Price</h4>
<ul>
<li><strong>Description:</strong> Detects and extracts the first price found on the page.</li>
<li><strong>Limitation:</strong> May not work well on pages with multiple prices.</li>
<li><strong>Use Case:</strong> Monitoring product prices on e-commerce websites.</li>
</ul>
<h4>2. Links</h4>
<ul>
<li><strong>Description:</strong> Tracks internal and external links originating from a webpage.</li>
<li><strong>Use Case:</strong> Ideal for monitoring link changes on resource-heavy websites.</li>
</ul>
<h4>3. Iframes</h4>
<ul>
<li><strong>Description:</strong> Monitors embedded content within <code>&lt;iframe&gt;</code> elements.</li>
<li><strong>Important Note:</strong> Does not work if “Hide cookie banners &amp; block ads” is enabled.</li>
<li><strong>Use Case:</strong> Useful for monitoring third-party embedded content.</li>
</ul>
<h3>Files</h3>
<h4>1. PDF File</h4>
<ul>
<li><strong>Description:</strong> Tracks text content within PDF files.</li>
<li><strong>Limitation:</strong> Use "File Checksum" if text extraction is not possible.</li>
<li><strong>Use Case:</strong> Monitoring changes in documents like manuals or policies.</li>
</ul>
<h4>2. Word File</h4>
<ul>
<li><strong>Description:</strong> Tracks text content within Word documents.</li>
<li><strong>Use Case:</strong> Ideal for tracking updates in editable text documents.</li>
</ul>
<h4>3. Excel and CSV Files</h4>
<ul>
<li><strong>Description:</strong> Monitors content within spreadsheets.</li>
<li><strong>Use Case:</strong> Useful for tracking data changes in structured formats.</li>
</ul>
<h4>4. File Checksum</h4>
<ul>
<li><strong>Description:</strong> Computes and compares SHA-256 checksums to detect file changes.</li>
<li><strong>Limitation:</strong> Does not preview specific changes; manual review required.</li>
<li><strong>Use Case:</strong> Best for unsupported file formats or non-readable PDFs.</li>
</ul>
<h3>Multiple Matching Elements</h3>
<h4>1. Text (All Matches)</h4>
<ul>
<li><strong>Description:</strong> Tracks all elements matching the selector (not just the first).</li>
<li><strong>Use Case:</strong> Useful for tracking lists, tables, or repeated content blocks.</li>
</ul>
<h4>2. Text (All Matches, Sorted)</h4>
<ul>
<li><strong>Description:</strong> Similar to “Text (All Matches)” but sorts results alphabetically.</li>
<li><strong>Use Case:</strong> Reduces false positives for frequently reordered elements like product listings.</li>
</ul>
<h4>3. HTML (All Matches)</h4>
<ul>
<li><strong>Description:</strong> Tracks all matching HTML elements on the page.</li>
<li><strong>Use Case:</strong> Ideal for monitoring multiple dynamic sections.</li>
</ul>
<h3>Advanced Tracked Element Types</h3>
<h4>1. Text Presence</h4>
<ul>
<li><strong>Description:</strong> Searches the full page for specific keywords and returns a simple Yes/No result.</li>
<li><strong>How it Works:</strong> Enter comma-separated keywords. Returns "Yes" if ANY keyword is found on the page, "No" otherwise. The search is case-insensitive.</li>
<li><strong>Invert Option:</strong> Enable "Invert" to reverse the logic - returns "Yes" when NONE of the keywords are found.</li>
<li><strong>Use Cases:</strong><ul>
<li><strong>Stock Availability:</strong> Monitor for "sold out", "out of stock" keywords</li>
<li><strong>Product Status:</strong> Track "discontinued", "pre-order", "coming soon" status</li>
<li><strong>Content Monitoring:</strong> Detect when specific text appears or disappears</li>
<li><strong>Back in Stock Alerts:</strong> Invert "sold out" to detect when product becomes available</li>
<li><strong>Compliance:</strong> Check for required disclaimers or legal text</li>
</ul>
</li>
<li><strong>Best Practice:</strong> Combine with other tracked elements (like Price or Text) to get both the status and the content.</li>
</ul>
<h4>2. HTML</h4>
<ul>
<li><strong>Description:</strong> Monitors changes in the HTML content of a specific section.</li>
<li><strong>Important Note:</strong> Focus on narrowly defined areas to avoid false positives.</li>
<li><strong>Use Case:</strong> Useful for tracking changes in webpage structure or layout.</li>
</ul>
<h4>3. JavaScript</h4>
<ul>
<li><strong>Description:</strong> Executes a JavaScript function to return results.</li>
<li><strong>Skill Level:</strong> Requires programming expertise.</li>
<li><strong>Use Case:</strong> Ideal for advanced users needing custom tracking logic.</li>
</ul>
<hr />
<p>Each tracked element type serves a unique purpose. Understanding these differences helps select the right type for specific monitoring needs, ensuring accuracy and reducing false positives. For more detailed guidance, refer to the tooltips within the interface or contact support for assistance.</p>]]>
            </summary>
                                    <updated>2026-03-05T10:31:12+00:00</updated>
        </entry>
            <entry>
            <title><![CDATA[AI-Powered Change Detection and Smart Filtering]]></title>
            <link rel="alternate" href="https://pagecrawl.io/help/features/article/ai-powered-change-detection" />
            <id>https://pagecrawl.io/69</id>
            <author>
                <name><![CDATA[PageCrawl.io]]></name>
            </author>
            <summary type="html">
                <![CDATA[<h1>AI-Powered Change Detection and Smart Filtering</h1>
<p>PageCrawl.io includes AI-powered analysis for all users. Every plan comes with monthly AI credits that work automatically with zero setup. When a page changes, AI summarizes what happened and scores how important the change is, so you only get notified about what matters.</p>
<p>For users who need more, you can also bring your own API key (BYOK) for unlimited AI usage and full model control.</p>
<h2>AI Credits</h2>
<p>Every plan includes monthly AI credits:</p>
<table>
<thead>
<tr>
<th>Plan</th>
<th>Monthly Credits</th>
</tr>
</thead>
<tbody>
<tr>
<td><strong>Free</strong></td>
<td>10</td>
</tr>
<tr>
<td><strong>Standard</strong></td>
<td>100 (scales with quantity)</td>
</tr>
<tr>
<td><strong>Enterprise</strong></td>
<td>1,000 (scales with quantity)</td>
</tr>
<tr>
<td><strong>Ultimate</strong></td>
<td>5,000 (scales with quantity, includes Pro tier)</td>
</tr>
</tbody>
</table>
<p>Credits are based on page size. Each 4,000-token block costs 1 credit on Basic tier or 10 credits on Pro tier (Ultimate plan only). A typical blog post uses 1-2 credits. Credits reset monthly.</p>
<p>When credits run out, page monitoring continues normally, but AI summaries and importance filtering pause until the next billing cycle. You can also switch to BYOK at any time for unlimited usage.</p>
<h2>Getting Started</h2>
<p>No setup is required. AI features are enabled by default for all workspaces:</p>
<ol>
<li>Add pages to monitor as usual</li>
<li>When changes are detected, AI automatically summarizes them and assigns importance scores</li>
<li>View your credit usage in <strong>Settings &gt; Workspace &gt; Integrations &gt; AI</strong></li>
</ol>
<p><strong>Workspace-specific</strong>: AI features are configured per workspace. You can have some workspaces with AI enabled and others without.</p>
<h2>How AI Features Work</h2>
<table>
<thead>
<tr>
<th>Feature</th>
<th>Process</th>
</tr>
</thead>
<tbody>
<tr>
<td><strong>Summarization</strong></td>
<td>Change detected &gt; Content sent to AI &gt; Human-readable summary generated &gt; Included in notification</td>
</tr>
<tr>
<td><strong>Importance Scoring</strong></td>
<td>Change detected &gt; AI analyzes content &gt; Priority score assigned (0-100) &gt; Low-priority changes filtered</td>
</tr>
<tr>
<td><strong><a href="#ai-label-automation">Label Automation</a></strong></td>
<td>Change detected &gt; AI evaluates your label rules &gt; Labels automatically added or removed</td>
</tr>
</tbody>
</table>
<h2>Configuration</h2>
<h3>Available for All Users</h3>
<table>
<thead>
<tr>
<th>Setting</th>
<th>Description</th>
</tr>
</thead>
<tbody>
<tr>
<td><strong>Custom Instructions</strong></td>
<td>Teach AI what matters for your monitoring (max 2,000 chars)</td>
</tr>
<tr>
<td><strong>Summary Language</strong></td>
<td>Generate summaries in 35+ languages</td>
</tr>
<tr>
<td><strong>Notification Threshold</strong></td>
<td>Set threshold (0-100) for Importance Scoring. Changes scoring below this still get tracked but do not trigger notifications.</td>
</tr>
</tbody>
</table>
<h3>Additional BYOK Settings</h3>
<p>These settings are available when using your own API key:</p>
<table>
<thead>
<tr>
<th>Setting</th>
<th>Description</th>
</tr>
</thead>
<tbody>
<tr>
<td><strong>Deep Analysis</strong></td>
<td>Send full page content to AI for better context. Uses more tokens but provides more accurate analysis. When disabled, only the changed text (diff) is sent.</td>
</tr>
<tr>
<td><strong>Run on First Check</strong></td>
<td>Get AI analysis on the initial page check, before any changes are detected</td>
</tr>
<tr>
<td><strong>AI Requests Per Month</strong></td>
<td>Set a monthly cap to control costs. When the limit is reached, AI features pause until the next month. Leave empty for unlimited.</td>
</tr>
<tr>
<td><strong>Per Page Per Day</strong></td>
<td>Limit how many AI analyses a single page can trigger in 24 hours. Prevents noisy pages from consuming your entire budget. Default: 10.</td>
</tr>
<tr>
<td><strong>Max Tokens</strong></td>
<td>Limit content size per request. If content exceeds this limit, AI analysis is skipped for that change.</td>
</tr>
</tbody>
</table>
<h3>Understanding Tokens</h3>
<p>A <strong>token</strong> is roughly 4 characters or about 3/4 of a word. With included credits, each 4,000-token block counts as 1 credit.</p>
<table>
<thead>
<tr>
<th>Page Type</th>
<th>Typical Tokens</th>
</tr>
</thead>
<tbody>
<tr>
<td>Simple (blog, article)</td>
<td>~1,000-2,000</td>
</tr>
<tr>
<td>Medium (product, news)</td>
<td>~2,000-5,000</td>
</tr>
<tr>
<td>Large (documentation)</td>
<td>~5,000-10,000</td>
</tr>
</tbody>
</table>
<h2>Using Your Own API Key (BYOK)</h2>
<p>If your included credits are not enough, or you want full control over model selection, you can connect your own API key from OpenAI, Google Gemini, Anthropic, or OpenRouter.</p>
<ol>
<li>Go to <strong>Settings &gt; Workspace &gt; Integrations &gt; AI</strong></li>
<li>Select your AI provider and enter your API key</li>
<li>Click <strong>Test Connection</strong> to verify</li>
<li>Choose your preferred model and save</li>
</ol>
<p>When using BYOK, AI credits are not consumed and you pay your AI provider directly. See the <a href="/help/integrations/article/ai-byok-setup-guide">BYOK Setup Guide</a> for detailed instructions.</p>
<h2>Best Practices</h2>
<h3>Start Small</h3>
<ul>
<li>AI is enabled by default, so monitor your credit usage for the first few weeks</li>
<li>Check usage statistics in <strong>Settings &gt; Workspace &gt; Integrations &gt; AI</strong></li>
<li>If you need more credits, upgrade your plan or connect your own API key</li>
</ul>
<h3>Optimize Credit Usage</h3>
<ul>
<li>Use Custom Instructions to help AI focus on what matters</li>
<li>A daily cap of 10 analyses per page prevents noisy pages from consuming your budget</li>
<li>For high-volume monitoring, consider BYOK with a budget model like Gemini Flash-Lite</li>
</ul>
<h3>Choose the Right Mode</h3>
<table>
<thead>
<tr>
<th>Scenario</th>
<th>Recommendation</th>
</tr>
</thead>
<tbody>
<tr>
<td>Getting started</td>
<td>Use included credits (no setup needed)</td>
</tr>
<tr>
<td>High-volume pages</td>
<td>Enable Importance Scoring to filter noise</td>
</tr>
<tr>
<td>Technical pages</td>
<td>Enable Summarization for readable changes</td>
</tr>
<tr>
<td>Need unlimited AI</td>
<td>Connect your own API key (BYOK)</td>
</tr>
<tr>
<td>Critical pages</td>
<td>Use BYOK with premium models (GPT-4.1, Claude Sonnet)</td>
</tr>
</tbody>
</table>
<h2>AI Label Automation</h2>
<p>AI can automatically apply or remove labels on detected changes based on rules you define. Instead of manually categorizing changes, the AI reads each change and decides which labels to add or remove according to your instructions.</p>
<h3>How to Set It Up</h3>
<ol>
<li>Go to <strong>Settings &gt; Workspace &gt; Labels</strong></li>
<li>Scroll to the <strong>AI Label Automation</strong> section</li>
<li>Click <strong>Add Rule</strong> to create a label/instruction pair</li>
<li>For each rule, choose a label name and write a plain-language instruction explaining when the AI should apply it</li>
<li>Click <strong>Save Changes</strong></li>
</ol>
<p>You can configure up to 10 label rules per workspace.</p>
<h3>How It Works</h3>
<p>Each time a change is detected and AI analysis runs, the AI evaluates the change against your label rules and decides which labels to add or remove. The AI receives the current labels on the page, so it can remove labels that no longer apply (e.g., removing "Out of Stock" when a product is back in stock).</p>
<p>Labels are applied to the change record, making them available for filtering on the <a href="/help/features/article/review-board">Review Board</a> and in your page list.</p>
<h3>Example Rules</h3>
<table>
<thead>
<tr>
<th>Label</th>
<th>Instruction</th>
</tr>
</thead>
<tbody>
<tr>
<td>Breaking News</td>
<td>Apply when urgent or breaking news appears</td>
</tr>
<tr>
<td>Policy Update</td>
<td>Apply when terms, policies, or legal text changes</td>
</tr>
<tr>
<td>New Event</td>
<td>Apply when a new conference or event is announced</td>
</tr>
<tr>
<td>Job Posted</td>
<td>Apply when new job listings are added</td>
</tr>
<tr>
<td>Content Removed</td>
<td>Apply when significant content is deleted from the page</td>
</tr>
</tbody>
</table>
<h3>Important Notes</h3>
<ul>
<li>AI can only manage labels defined in your automation rules. Manually applied labels are never touched.</li>
<li>Label names have a maximum of 50 characters; instructions have a maximum of 500 characters.</li>
<li>Labels are created automatically if they do not already exist in your workspace.</li>
<li>AI Label Automation requires AI to be configured for the workspace (either included credits or BYOK).</li>
<li>Label decisions run as part of the standard AI analysis, so no additional credits are used beyond the normal change analysis.</li>
</ul>
<h2>Security and Privacy</h2>
<table>
<thead>
<tr>
<th>Aspect</th>
<th>Details</th>
</tr>
</thead>
<tbody>
<tr>
<td><strong>Included credits</strong></td>
<td>Content is processed through PageCrawl's managed AI infrastructure</td>
</tr>
<tr>
<td><strong>BYOK mode</strong></td>
<td>Content is sent directly to your chosen AI provider</td>
</tr>
<tr>
<td><strong>Storage</strong></td>
<td>AI summaries stored in PageCrawl.io for your reference</td>
</tr>
<tr>
<td><strong>Security</strong></td>
<td>All transmission via HTTPS, API keys encrypted at rest</td>
</tr>
<tr>
<td><strong>Provider policies</strong></td>
<td>Review your AI provider's data usage and retention policies when using BYOK</td>
</tr>
</tbody>
</table>
<h2>Related Articles</h2>
<ul>
<li><a href="/help/integrations/article/ai-byok-setup-guide">AI Integration Setup Guide (BYOK)</a> - Step-by-step guide to configure your own API keys for unlimited AI usage</li>
<li><a href="/help/tutorials/article/choosing-best-ai-model-website-monitoring">Choosing the Right AI Model for Website Monitoring</a> - Compare models and pricing for BYOK users</li>
</ul>]]>
            </summary>
                                    <updated>2026-03-05T10:31:12+00:00</updated>
        </entry>
            <entry>
            <title><![CDATA[AI Integration Setup Guide - Bring Your Own Key (BYOK)]]></title>
            <link rel="alternate" href="https://pagecrawl.io/help/integrations/article/ai-byok-setup-guide" />
            <id>https://pagecrawl.io/70</id>
            <author>
                <name><![CDATA[PageCrawl.io]]></name>
            </author>
            <summary type="html">
                <![CDATA[<h1>AI Integration Setup Guide - Bring Your Own Key (BYOK)</h1>
<p>All PageCrawl.io plans include AI credits that work automatically with no setup required. This guide is for users who want to go beyond their included credits by connecting their own API key for unlimited AI usage, full model choice, and advanced features like Deep Analysis.</p>
<h2>When to Use BYOK</h2>
<p>Most users won't need BYOK since all plans include AI credits. Consider BYOK if you:</p>
<ul>
<li>Run out of credits regularly and need unlimited AI analyses</li>
<li>Want to choose a specific AI model for different page types</li>
<li>Need Deep Analysis mode (sends full page content for better context)</li>
<li>Want to use premium models like GPT-5.3 or Claude Opus 4.6 for critical pages</li>
<li>Monitor sensitive content and need a specific provider's data policies</li>
</ul>
<p>You can switch between credits and BYOK at any time in your settings.</p>
<h2>Supported Providers and Models</h2>
<table>
<thead>
<tr>
<th>Provider</th>
<th>Recommended Model</th>
<th>Best For</th>
<th>Get API Key</th>
</tr>
</thead>
<tbody>
<tr>
<td><strong>OpenAI</strong></td>
<td>GPT-4o Mini</td>
<td>Best value for most users</td>
<td><a href="https://platform.openai.com/api-keys">platform.openai.com</a></td>
</tr>
<tr>
<td><strong>Google Gemini</strong></td>
<td>Gemini 2.5 Flash</td>
<td>Balance of quality and cost</td>
<td><a href="https://ai.google.dev">ai.google.dev</a></td>
</tr>
<tr>
<td><strong>Anthropic</strong></td>
<td>Claude Haiku 4.5</td>
<td>Fast and accurate</td>
<td><a href="https://console.anthropic.com">console.anthropic.com</a></td>
</tr>
<tr>
<td><strong>OpenRouter</strong></td>
<td>Any model</td>
<td>Access 200+ models via single API</td>
<td><a href="https://openrouter.ai">openrouter.ai</a></td>
</tr>
</tbody>
</table>
<h3>OpenAI Models</h3>
<table>
<thead>
<tr>
<th>Model</th>
<th>Use Case</th>
<th>Notes</th>
</tr>
</thead>
<tbody>
<tr>
<td>GPT-4o Mini</td>
<td>Most users</td>
<td>Best balance of cost and quality</td>
</tr>
<tr>
<td>GPT-4.1</td>
<td>Complex analysis</td>
<td>Most capable, higher cost</td>
</tr>
<tr>
<td>GPT-4.1 Nano</td>
<td>High volume</td>
<td>Fastest and cheapest</td>
</tr>
</tbody>
</table>
<h3>Google Gemini Models</h3>
<table>
<thead>
<tr>
<th>Model</th>
<th>Use Case</th>
<th>Notes</th>
</tr>
</thead>
<tbody>
<tr>
<td>Gemini 2.5 Flash-Lite</td>
<td>Budget monitoring</td>
<td>Most affordable option</td>
</tr>
<tr>
<td>Gemini 2.5 Flash</td>
<td>General use</td>
<td>Good balance</td>
</tr>
<tr>
<td>Gemini 2.5 Pro</td>
<td>Complex tasks</td>
<td>Premium quality</td>
</tr>
</tbody>
</table>
<h3>Anthropic Claude Models</h3>
<table>
<thead>
<tr>
<th>Model</th>
<th>Use Case</th>
<th>Notes</th>
</tr>
</thead>
<tbody>
<tr>
<td>Claude Haiku 4.5</td>
<td>Most users</td>
<td>Fast and cost-effective</td>
</tr>
<tr>
<td>Claude Sonnet 4.5</td>
<td>Complex tasks</td>
<td>Better quality, higher cost</td>
</tr>
<tr>
<td>Claude Opus 4.5</td>
<td>Critical apps</td>
<td>Highest accuracy</td>
</tr>
</tbody>
</table>
<h3>OpenRouter</h3>
<p>OpenRouter provides unified access to 200+ AI models from multiple providers through a single API key.</p>
<table>
<thead>
<tr>
<th>Feature</th>
<th>Description</th>
</tr>
</thead>
<tbody>
<tr>
<td><strong>Unified billing</strong></td>
<td>One account for all models</td>
</tr>
<tr>
<td><strong>Automatic fallbacks</strong></td>
<td>Switches models if one is unavailable</td>
</tr>
<tr>
<td><strong>Free models</strong></td>
<td>Access to Llama, Mistral, Qwen community models</td>
</tr>
<tr>
<td><strong>Pricing</strong></td>
<td>5.5% platform fee on top of base model costs</td>
</tr>
</tbody>
</table>
<p><strong>Recommended models</strong>: <code>openai/gpt-4o-mini</code>, <code>anthropic/claude-haiku-4-5</code>, <code>google/gemini-2.5-flash</code></p>
<h2>Step-by-Step Setup</h2>
<h3>Step 1: Get Your API Key</h3>
<table>
<thead>
<tr>
<th>Provider</th>
<th>Steps</th>
</tr>
</thead>
<tbody>
<tr>
<td><strong>OpenAI</strong></td>
<td>Visit <a href="https://platform.openai.com/api-keys">platform.openai.com</a> &gt; Create account &gt; API Keys &gt; Create new secret key &gt; Add billing</td>
</tr>
<tr>
<td><strong>Google Gemini</strong></td>
<td>Visit <a href="https://ai.google.dev">ai.google.dev</a> &gt; Sign in with Google &gt; Create project &gt; Enable Gemini API &gt; Generate API key</td>
</tr>
<tr>
<td><strong>Anthropic</strong></td>
<td>Visit <a href="https://console.anthropic.com">console.anthropic.com</a> &gt; Create account &gt; API Keys &gt; Create new key &gt; Add credits</td>
</tr>
<tr>
<td><strong>OpenRouter</strong></td>
<td>Visit <a href="https://openrouter.ai">openrouter.ai</a> &gt; Create account &gt; Settings &gt; API Key &gt; Add credits</td>
</tr>
</tbody>
</table>
<h3>Step 2: Configure in PageCrawl.io</h3>
<div style="background: #f5f5f5; padding: 30px; border-radius: 8px; text-align: center; margin: 20px 0; border: 1px solid #e0e0e0;">
  <img src="/images/blog/ai-byok-config.png" alt="AI API key configuration form in workspace settings" style="max-width: 100%; border-radius: 6px; box-shadow: 0 4px 12px rgba(0,0,0,0.15);">
</div>
<ol>
<li>Go to <strong>Settings &gt; Integrations &gt; AI</strong></li>
<li>Select your AI provider</li>
<li>Paste your API key</li>
<li>Choose your preferred model</li>
<li>Click <strong>Test Connection</strong> to verify</li>
<li>Save your configuration</li>
</ol>
<p>Your workspace will automatically switch to BYOK mode and AI credits will no longer be consumed.</p>
<h3>Step 3: Enable AI Features</h3>
<p>Toggle the features you want:</p>
<table>
<thead>
<tr>
<th>Feature</th>
<th>Description</th>
</tr>
</thead>
<tbody>
<tr>
<td><strong>AI Summarization</strong></td>
<td>Get intelligent summaries of page changes</td>
</tr>
<tr>
<td><strong>Importance Scoring</strong></td>
<td>AI scores each change from 0-100, filtering out low-priority noise</td>
</tr>
<tr>
<td><strong>Custom Instructions</strong></td>
<td>Add context for better analysis</td>
</tr>
<tr>
<td><strong>Deep Analysis</strong></td>
<td>Send full page content for better context (BYOK only)</td>
</tr>
<tr>
<td><strong>Run on First Check</strong></td>
<td>Get AI analysis on initial page check (BYOK only)</td>
</tr>
</tbody>
</table>
<h2>Switching Back to Credits</h2>
<p>If you want to stop using your own key and return to included credits:</p>
<ol>
<li>Go to <strong>Settings &gt; Workspace &gt; Integrations &gt; AI</strong></li>
<li>Click <strong>Switch to included credits</strong></li>
<li>Your API key configuration is preserved in case you want to switch back later</li>
</ol>
<h2>Page-Level Configuration</h2>
<p>You can customize AI settings at three levels:</p>
<table>
<thead>
<tr>
<th>Level</th>
<th>Applies To</th>
<th>Best For</th>
</tr>
</thead>
<tbody>
<tr>
<td><strong>Workspace default</strong></td>
<td>All pages</td>
<td>General settings</td>
</tr>
<tr>
<td><strong>Template override</strong></td>
<td>Pages using that template</td>
<td>Grouped pages (e.g., all product pages)</td>
</tr>
<tr>
<td><strong>Page override</strong></td>
<td>Individual pages</td>
<td>Critical or special pages</td>
</tr>
</tbody>
</table>
<p><strong>Example strategy</strong>:</p>
<ul>
<li>Workspace default: Gemini Flash-Lite (cheapest)</li>
<li>E-commerce template: GPT-4o Mini (best value)</li>
<li>Legal/ToS template: Claude Haiku 4.5 (high accuracy)</li>
<li>Critical contracts: Claude Sonnet 4.5 (premium)</li>
</ul>
<h2>Model Selection Guidelines</h2>
<h3>By Priority</h3>
<table>
<thead>
<tr>
<th>Priority</th>
<th>Recommended Models</th>
</tr>
</thead>
<tbody>
<tr>
<td><strong>Cost optimization</strong></td>
<td>Gemini 2.5 Flash-Lite, GPT-4o Mini</td>
</tr>
<tr>
<td><strong>Accuracy</strong></td>
<td>GPT-4.1, Claude Sonnet 4.5</td>
</tr>
<tr>
<td><strong>Speed</strong></td>
<td>Claude Haiku 4.5, GPT-4o Mini</td>
</tr>
<tr>
<td><strong>Complex content</strong></td>
<td>Claude Sonnet 4.5, GPT-4.1</td>
</tr>
</tbody>
</table>
<h3>By Page Complexity</h3>
<p>For most pages, a <strong>general-purpose model</strong> provides excellent results at a lower cost:</p>
<table>
<thead>
<tr>
<th>Model</th>
<th>Provider</th>
<th>Best For</th>
</tr>
</thead>
<tbody>
<tr>
<td>Gemini 2.5 Flash</td>
<td>Google</td>
<td>General monitoring, good balance of speed and quality</td>
</tr>
<tr>
<td>GPT-4o Mini</td>
<td>OpenAI</td>
<td>Reliable all-around performance</td>
</tr>
</tbody>
</table>
<p>For <strong>complex pages</strong> that require deeper analysis or more reasoning (e.g., dense legal documents, technical specifications, multi-section reports), choose a more powerful model:</p>
<table>
<thead>
<tr>
<th>Model</th>
<th>Provider</th>
<th>Best For</th>
</tr>
</thead>
<tbody>
<tr>
<td>Gemini 2.5 Pro</td>
<td>Google</td>
<td>Complex documents requiring extended reasoning</td>
</tr>
<tr>
<td>GPT-4.1</td>
<td>OpenAI</td>
<td>Nuanced analysis and detailed comparisons</td>
</tr>
<tr>
<td>Claude Opus 4.5</td>
<td>Anthropic</td>
<td>Critical documents requiring highest accuracy</td>
</tr>
</tbody>
</table>
<p><strong>Tip</strong>: Start with a general-purpose model and upgrade to a more powerful one if you notice the AI missing important changes or providing superficial summaries.</p>
<h3>By Content Type</h3>
<table>
<thead>
<tr>
<th>Content Type</th>
<th>Budget</th>
<th>Recommended</th>
<th>Premium</th>
</tr>
</thead>
<tbody>
<tr>
<td>Blogs, News</td>
<td>Gemini Flash-Lite</td>
<td>GPT-4o Mini</td>
<td>-</td>
</tr>
<tr>
<td>E-commerce</td>
<td>Gemini Flash-Lite</td>
<td>GPT-4o Mini</td>
<td>Claude Haiku 4.5</td>
</tr>
<tr>
<td>Legal, ToS</td>
<td>Claude Haiku 4.5</td>
<td>Claude Sonnet 4.5</td>
</tr>
<tr>
<td>API Docs</td>
<td>Gemini Flash-Lite</td>
<td>GPT-4o Mini</td>
<td>-</td>
</tr>
</tbody>
</table>
<h2>Related Articles</h2>
<ul>
<li><a href="/help/features/article/ai-powered-change-detection">AI-Powered Change Detection and Smart Filtering</a> - Learn how AI summarization and Importance Scoring work</li>
<li><a href="/help/tutorials/article/choosing-best-ai-model-website-monitoring">Choosing the Right AI Model for Website Monitoring</a> - Compare models and pricing to find the best fit</li>
</ul>]]>
            </summary>
                                    <updated>2026-03-05T10:31:12+00:00</updated>
        </entry>
            <entry>
            <title><![CDATA[How to Monitor Terms of Service and Privacy Policy Pages for Compliance]]></title>
            <link rel="alternate" href="https://pagecrawl.io/help/tutorials/article/monitoring-terms-of-service-privacy-policy-compliance" />
            <id>https://pagecrawl.io/71</id>
            <author>
                <name><![CDATA[PageCrawl.io]]></name>
            </author>
            <summary type="html">
                <![CDATA[<h1>How to Monitor Terms of Service and Privacy Policy Pages for Compliance</h1>
<div style="background: #f5f5f5; padding: 30px; border-radius: 8px; text-align: center; margin: 20px 0; border: 1px solid #e0e0e0;">
  <img src="/images/blog/simple-create-tos.png" alt="setting up monitoring for Microsoft Services Agreement with Reader mode" style="max-width: 100%; border-radius: 6px; box-shadow: 0 4px 12px rgba(0,0,0,0.15);">
</div>
<p>Businesses rely on numerous third-party services, each with their own Terms of Service and Privacy Policy that can change at any time. These changes might affect your compliance status, operational procedures, or legal obligations. PageCrawl.io provides an automated way to track these critical documents, ensuring you're always informed when important updates occur.</p>
<p>This guide will show you how to set up automated monitoring for legal documents using PageCrawl.io's features.</p>
<h3>Why Monitor Legal Documents</h3>
<p>When vendors update their terms without direct notification, it can impact your business in several ways. Payment processors might change their fee structures, cloud providers could modify data processing agreements, or analytics tools might update their data retention policies. Manual checking of these documents is time-consuming and prone to missing important updates.</p>
<h3>Understanding What to Monitor</h3>
<p>Legal document monitoring typically focuses on tracking changes in Terms of Service, Privacy Policies, Data Processing Agreements, and Service Level Agreements from your vendors and partners.</p>
<h3>Setting Up Compliance Monitoring in PageCrawl.io</h3>
<p>The process of setting up monitoring for legal documents is straightforward and can be completed in a few minutes per page.</p>
<h4>Step 1: Add the Legal Document Page</h4>
<ol>
<li>Log in to your PageCrawl.io dashboard</li>
<li>Click the "Track New Page" button</li>
<li>Enter the URL of the Terms of Service or Privacy Policy you want to monitor</li>
<li>Provide a descriptive name for the monitoring task (e.g., "Stripe Terms of Service" or "AWS Privacy Policy")</li>
</ol>
<h4>Step 2: Configure Detection Settings</h4>
<ol>
<li>Select "Full page text" as your detection method and enable "Reader mode" - this captures only the main text content, automatically ignoring irrelevant changes in page footers, headers, or sidebar areas</li>
<li>Set how frequently the page should be checked - daily is sufficient for most legal documents, but you can adjust based on your needs (hourly for critical vendors, weekly for stable documents)</li>
</ol>
<h4>Step 3: Set Up Notifications</h4>
<ol>
<li>Choose when to receive notifications: Instantly when changes are detected, or as a daily/weekly digest that summarizes all changes across your monitored pages</li>
<li>Select notification channels: Email, Slack, Discord, Microsoft Teams, Telegram, or Webhooks for system integration</li>
<li>Configure team notifications by adding relevant team members to receive alerts</li>
</ol>
<h3>Practical Implementation Tips</h3>
<p>Start by monitoring your most critical vendor agreements first, then gradually expand to include other services. Use clear naming conventions for your monitoring tasks to easily identify which document changed when you receive an alert.</p>
<h3>Organizing Your Monitoring Portfolio</h3>
<p>Create a structured approach to monitoring by categorizing your tracked pages. Group them into critical vendors (payment processors, infrastructure providers), data processors (analytics tools, CRM systems), and regulatory pages (government compliance guidelines).</p>
<h3>Using Tags for Better Organization</h3>
<p>Implement a tagging system from the start. Use tags like #vendor, #competitor, #gdpr, or #payment to quickly filter and manage your monitored pages. This becomes especially useful as your monitoring portfolio grows.</p>
<h3>Handling Different Types of Changes</h3>
<p>Not all changes are equal. Some updates might be minor formatting adjustments, while others could be significant legal modifications. PageCrawl.io helps you distinguish between these by highlighting exactly what changed, showing removed text in red and new text in green.</p>
<p>For each detected change, PageCrawl.io stores:</p>
<ul>
<li><strong>Screenshots</strong> of the page before and after the change</li>
<li><strong>Text differences</strong> with clear highlighting of additions and removals</li>
<li><strong>AI summaries</strong> explaining what changed in plain language (when enabled)</li>
<li><strong>Historical versions</strong> for complete audit trails</li>
</ul>
<p>This comprehensive record ensures you have all the evidence needed for compliance audits and legal reviews.</p>
<h3>Troubleshooting Common Issues</h3>
<p>If you're receiving too many alerts about minor changes, check that Reader mode is enabled to filter out navigation and footer updates. For more strategies on reducing false positives, see our guide on <a href="https://pagecrawl.io/help/reduce-false-positives/article/reduce-false-positives-monitoring-website-for-changes">reducing false positives when monitoring websites</a>.</p>
<p>If you're missing important changes, verify that the correct URL is being monitored and that the page is accessible.</p>
<h3>Next Steps</h3>
<p>Once you've set up basic monitoring, consider implementing advanced strategies such as keyword-based alerts for critical terms like "price increase" or "data breach", or comparison monitoring to track how your policies compare to competitors.</p>
<h3>Getting Started Today</h3>
<p>Begin with your most important vendor agreements. Setup takes just a minute or two per page, or you can save time by importing multiple URLs at once - simply copy and paste a list of URLs or upload an Excel file for bulk import.</p>
<p>PageCrawl.io handles the monitoring automatically once configured. You'll receive clear notifications when changes occur, allowing you to review and respond promptly to maintain compliance.</p>
<p>For businesses monitoring multiple vendors, check our <a href="https://pagecrawl.io/pricing">pricing page</a> - monitoring 500 URLs costs just $30/month, making enterprise-wide compliance monitoring affordable and efficient.</p>]]>
            </summary>
                                    <updated>2026-03-05T10:31:13+00:00</updated>
        </entry>
            <entry>
            <title><![CDATA[Monitoring Numeric Values for Changes to Spot Trends]]></title>
            <link rel="alternate" href="https://pagecrawl.io/help/tutorials/article/monitor-numeric-values-with-number-tracker" />
            <id>https://pagecrawl.io/72</id>
            <author>
                <name><![CDATA[PageCrawl.io]]></name>
            </author>
            <summary type="html">
                <![CDATA[<h1>Monitoring Numeric Values for Changes to Spot Trends</h1>
<div style="background: #f5f5f5; padding: 30px; border-radius: 8px; text-align: center; margin: 20px 0; border: 1px solid #e0e0e0;">
  <img src="/images/blog/number-tracker.png" alt="number tracker" style="max-width: 100%; border-radius: 6px; box-shadow: 0 4px 12px rgba(0,0,0,0.15);">
</div>
<p>You can track numeric values on a page using the "Number" tracked element type. This extracts numbers from a selected area on the page and displays them in a chart so you can quickly see the history of values and spot trends. Instead of manually checking a number every day, PageCrawl monitors it for you and builds a visual record over time.</p>
<h3>What You Can Track</h3>
<p>Common things to monitor with the Number tracker:</p>
<ul>
<li><strong>E-commerce</strong>: Product prices, discounts, stock quantities available</li>
<li><strong>Finance</strong>: Stock prices, cryptocurrency values, exchange rates</li>
<li><strong>Analytics</strong>: Page views, visitor counts, conversion rates</li>
<li><strong>Ratings</strong>: Product ratings, review scores, customer satisfaction metrics</li>
<li><strong>Inventory</strong>: Stock levels, warehouse quantities, supply counts</li>
</ul>
<h3>Set Up on PageCrawl.io</h3>
<ol>
<li>Log in to your <a href="https://pagecrawl.io">pagecrawl.io</a> account</li>
<li>Click <strong>Track New Page</strong> and enter the URL of the page containing the number you want to monitor</li>
<li>Click <strong>Tracked Elements</strong> to add what you want to monitor</li>
<li>Select "Number" as the tracked element type</li>
<li>Use the visual selector to click directly on the number on the page, or manually enter an XPath/CSS selector if you prefer</li>
</ol>
<p>The visual selector is the easiest way - just point and click on the number you want to track. PageCrawl will figure out the selector for you automatically.</p>
<h3>Using Selectors Manually</h3>
<p>If you prefer to manually write selectors by analyzing HTML source, here are some examples:</p>
<p>For a price like this:</p>
<pre><code class="language-html">&lt;span class="price"&gt;$49.99&lt;/span&gt;</code></pre>
<p>Use: <code>//span[@class="price"]</code> or <code>.price</code></p>
<p>For an inventory count:</p>
<pre><code class="language-html">&lt;div class="stock"&gt;150 items available&lt;/div&gt;</code></pre>
<p>Use: <code>//div[@class="stock"]</code> or <code>div.stock</code></p>
<p>For a specific ID:</p>
<pre><code class="language-html">&lt;p id="total-views"&gt;2,543 views&lt;/p&gt;</code></pre>
<p>Use: <code>//p[@id="total-views"]</code> or <code>#total-views</code></p>
<p>For a rating or score:</p>
<pre><code class="language-html">&lt;span class="rating"&gt;4.5&lt;/span&gt;</code></pre>
<p>Use: <code>//span[@class="rating"]</code> or <code>.rating</code></p>
<h3>How It Works</h3>
<p>Once you've set up your number tracker, PageCrawl will:</p>
<ul>
<li>Extract the numeric value each time it checks the page</li>
<li>Store the values over time and build a historical record</li>
<li>Display all values in a chart so you can see trends at a glance</li>
<li>Show you when values go up or down and by how much</li>
<li>Alert you if the number changes by a certain amount (if you configure notification conditions)</li>
</ul>
<p>The chart displays your complete history, making it easy to spot patterns and see how values change over different time periods. You can see exactly when changes happened and track the progression of any number over days, weeks, or months.</p>
<h3>Understanding the Chart</h3>
<p>Your number tracking chart shows:</p>
<ul>
<li>All previous values recorded over time</li>
<li>Exact dates and times when each value was captured</li>
<li>Trends and patterns in how the number changes</li>
<li>Peaks (highest values) and valleys (lowest values)</li>
<li>How much the number changed between each check</li>
</ul>
<p>This gives you a clear visual picture of what's happening with the metric you're tracking.</p>
<h3>Statistics Overview</h3>
<p>PageCrawl displays comprehensive statistics about your tracked number:</p>
<ul>
<li><strong>Data Points</strong>: Total number of checks performed and days tracked</li>
<li><strong>Average</strong>: The mean of all recorded values over time</li>
<li><strong>Median</strong>: The middle value, useful for understanding typical values when outliers exist</li>
<li><strong>First Recorded</strong>: The initial value and when tracking began</li>
<li><strong>Current Value</strong>: Your most recent reading with:<ul>
<li>90-day change comparison</li>
<li>Distance from average (shows if current value is higher or lower than typical)</li>
</ul>
</li>
<li><strong>Highest Value</strong>: The maximum value ever recorded and when it occurred</li>
<li><strong>Lowest Value</strong>: The minimum value ever recorded and when it occurred</li>
<li><strong>Total Change</strong>: How much the value has changed since you started tracking (absolute and percentage)</li>
<li><strong>Trend</strong>: Overall direction indicator (📈 Up, 📉 Down, or ➡️ Stable)</li>
<li><strong>Last Changed</strong>: When the value actually changed (not just checked)</li>
</ul>
<p>These statistics are color-coded:</p>
<ul>
<li>Green indicates increases or positive changes</li>
<li>Red indicates decreases or negative changes</li>
<li>Gray indicates neutral or stable values</li>
</ul>
<p>This helps you quickly understand the overall behavior of your metric without manually analyzing the chart.</p>
<h3>Chart</h3>
<p>The chart visualization includes powerful interactive features to help you analyze your data:</p>
<p><strong>Date Range Filters:</strong></p>
<ul>
<li>Use the quick filter buttons to view specific time periods:<ul>
<li>Last 7 Days - Recent short-term trends</li>
<li>Last 30 Days - Monthly patterns</li>
<li>Last 90 Days - Quarterly trends</li>
<li>All Time - Complete history</li>
</ul>
</li>
</ul>
<p><strong>Chart Controls:</strong></p>
<ul>
<li><strong>Avg Line</strong>: Toggle the average reference line on/off</li>
<li><strong>Moving Avg</strong>: Toggle moving average lines on/off to smooth out short-term fluctuations<ul>
<li>Choose between 7-day or 30-day moving averages</li>
<li>The moving average line appears as a dashed line in the same color as your data</li>
<li>Helps identify underlying trends by filtering out daily noise</li>
<li>Hover over any point to see both the actual value and the moving average</li>
</ul>
</li>
</ul>
<p><strong>Visual Annotations:</strong></p>
<ul>
<li><strong>Average Line</strong>: A dashed horizontal line shows the overall average value</li>
<li><strong>Highest Point</strong>: Marked with a red dot and label showing the peak value</li>
<li><strong>Lowest Point</strong>: Marked with a green dot and label showing the minimum value</li>
<li><strong>Color-Coded Dots</strong>: Each data point is colored based on change direction:<ul>
<li>Green dots indicate the value increased from the previous check</li>
<li>Red dots indicate the value decreased</li>
<li>Standard color means no change</li>
</ul>
</li>
<li><strong>Zoom Brush</strong>: On desktop, use the brush tool at the bottom to zoom into specific date ranges</li>
</ul>
<p><strong>Legend:</strong></p>
<ul>
<li>Click on any metric name in the legend to show/hide that line</li>
<li>Disabled lines appear grayed out with a strikethrough</li>
<li>Perfect for focusing on specific metrics when tracking multiple values</li>
<li>Click again to re-enable the line</li>
<li>All reference lines (average, annotations) update based on visible lines</li>
</ul>
<p><strong>Tooltips:</strong>
When you hover over any point on the chart, you'll see:</p>
<ul>
<li>The exact date and time of the check</li>
<li>The current value at that point</li>
<li>Change from the previous check with up/down arrows (▲ ▼)</li>
<li>The moving average value at that point (if enabled)</li>
<li>All values are clearly labeled so you know what each number means</li>
</ul>
<p><strong>Performance Optimizations:</strong>
For long tracking periods with thousands of data points:</p>
<ul>
<li>The chart automatically samples data when viewing "All Time" to maintain smooth performance</li>
<li>You'll see a note indicating how many points are shown (e.g., "Showing 150 of 500 points")</li>
<li>This ensures fast, responsive charts even with years of historical data</li>
</ul>
<p>These features make it easy to spot trends, identify when significant changes occurred, and understand your data at a glance.</p>
<h3>Tips for Best Results</h3>
<ul>
<li><strong>Use the visual selector</strong>: Click directly on the number you want to track rather than writing selectors manually</li>
<li><strong>Check your selector works</strong>: Make sure the selector is targeting the right element on the page</li>
<li><strong>Set reasonable check frequency</strong>: How often PageCrawl checks depends on how fast you expect the number to change</li>
<li><strong>Use templates for multiple pages</strong>: If you're tracking the same metric on different pages (like product prices), create a template and apply it to all pages. If you need to update the monitored pages, you will only need to make one change.</li>
</ul>
<h3>Using Templates</h3>
<p>If you need to monitor the same numeric value across multiple pages on a website, you can:</p>
<ol>
<li>Create a template with your Number tracker configuration</li>
<li>Apply that template to all the pages you want to monitor</li>
<li>Compare how the value changes across different pages</li>
</ol>
<p>This saves you time and makes it easy to track metrics across your entire site.</p>
<h3>Comparing Multiple Monitors on One Chart</h3>
<p>If you're tracking the same type of number across different pages (for example, the price of a product on multiple retailers), you can overlay them all on a single chart to compare side by side.</p>
<p><strong>How to set it up:</strong></p>
<ol>
<li>Open any monitor that has a Number or Price tracked element</li>
<li>Above the chart, you'll see a <strong>"Compare with..."</strong> dropdown</li>
<li>Click it and search for other monitors you want to add by name or URL</li>
<li>Select the monitors you want to compare. You can add up to 5 monitors on the same chart</li>
</ol>
<p>PageCrawl will suggest relevant monitors automatically, prioritizing monitors in the same folder, on the same domain, or tracking similar products.</p>
<p><strong>What the combined chart shows:</strong></p>
<ul>
<li>Each monitor appears as a separate line in a distinct color</li>
<li>All data points are merged onto a shared timeline so you can see how values move relative to each other</li>
<li>The chart legend lists every line. Click any line in the legend to show or hide it</li>
<li>Hovering over the chart shows a tooltip with the values from all monitors at that point in time</li>
<li>Date filters, moving averages, and zoom all apply to every line at once</li>
</ul>
<p><strong>Reading the comparison:</strong></p>
<ul>
<li>The Y-axis adjusts automatically to fit all values</li>
<li>The average, highest, and lowest annotations still apply to the primary monitor</li>
<li>Comparison data in tooltips is marked with a bullet (●) so you can tell which values belong to the primary monitor and which are from compared monitors</li>
</ul>
<p>This is especially useful for:</p>
<ul>
<li><strong>Competitive price tracking</strong>: See how your price compares to competitors over time on one chart</li>
<li><strong>Cross-retailer monitoring</strong>: Track the same product on Amazon, Walmart, and other stores and see price differences instantly</li>
<li><strong>Regional comparisons</strong>: Compare the same metric across different regional pages</li>
<li><strong>Benchmarking</strong>: Overlay your metric against an industry reference point</li>
</ul>
<p>Your comparison selections are saved, so the next time you open the monitor the same comparison lines will appear on the chart.</p>
<h3>Common Examples</h3>
<p><strong>E-commerce Store</strong>: Track product prices across listings. When prices drop or go on sale, you'll see it immediately in the chart. Compare pricing across multiple product pages to spot trends.</p>
<p><strong>Real Estate Pricing</strong>: Track property prices on listing sites. Monitor how prices change over time, identify when properties go on sale, or track pricing trends in your area of interest.</p>
<p><strong>Competitor Pricing</strong>: Monitor competitor product prices, discount percentages, or pricing changes. The chart gives you a clear view of when they adjust their prices.</p>
<p><strong>Job Postings</strong>: Track how many open positions a company has posted. The chart shows when they're actively hiring and when positions get filled.</p>
<p><strong>Education Programs</strong>: Monitor tuition costs, enrollment numbers for programs, or available spots in courses. Track how these metrics change throughout the year.</p>
<p><strong>Government Fees &amp; Services</strong>: Monitor permit costs, license fees, visa application prices, or other government service charges that may be subject to change.</p>
<p><strong>Stock Price Monitoring</strong>: Monitor the current price of a stock or cryptocurrency. The chart shows you exactly when the price changed and by how much.</p>]]>
            </summary>
                                    <updated>2026-04-15T07:18:16+00:00</updated>
        </entry>
            <entry>
            <title><![CDATA[SAML SSO Configuration in PageCrawl]]></title>
            <link rel="alternate" href="https://pagecrawl.io/help/account-settings/article/saml-sso-configuration" />
            <id>https://pagecrawl.io/73</id>
            <author>
                <name><![CDATA[PageCrawl.io]]></name>
            </author>
            <summary type="html">
                <![CDATA[<h1>SAML SSO Configuration in PageCrawl</h1>
<p>This guide covers the PageCrawl side of SSO setup: importing your identity provider's metadata, enabling SSO, configuring enforcement and user provisioning. For step-by-step instructions on configuring your identity provider (Azure AD, Google Workspace, Okta, etc.), see the <a href="/help/account-settings/article/set-up-identity-provider-for-saml-sso">Identity Provider Setup Guide</a>.</p>
<p>Single Sign-On (SSO) allows your team members to securely access PageCrawl using your organization's identity provider, such as Azure AD, Google Workspace, Okta, or OneLogin.</p>
<h2>Requirements</h2>
<p>To use SAML SSO, your team must meet the following requirements:</p>
<ul>
<li><strong>Enterprise Plan</strong> subscription</li>
<li><strong>Corporate email domain</strong> - The team owner must use a verified corporate email address (free email providers like Gmail, Yahoo, Outlook, and iCloud are not supported)</li>
<li><strong>Identity Provider</strong> that supports SAML 2.0 standard</li>
</ul>
<h2>How to Configure SAML SSO</h2>
<h3>1. Access SSO Settings</h3>
<p>Navigate to <strong>Settings → Team → Auth &amp; SSO</strong> in your PageCrawl account. You must be a team administrator to access these settings.</p>
<p>When you first access the SSO settings page, PageCrawl automatically generates a unique identifier (UUID) and creates an initial SSO configuration for your team. This UUID is immediately available and used to create your Entity ID and Metadata URL.</p>
<h3>2. Get Service Provider Information</h3>
<p>Before configuring your Identity Provider, copy the <strong>Metadata URL</strong> displayed in the blue information box at the top of the SSO settings page.</p>
<p>The URL will look like: <code>https://pagecrawl.io/sso/saml/abc-123-def-456/metadata</code></p>
<p><strong>Important:</strong> Copy the actual URL shown in PageCrawl, not this example.</p>
<p>Most Identity Providers can automatically import all necessary configuration (Entity ID, ACS URL, Logout URL, etc.) from this metadata URL.</p>
<p><strong>Note:</strong> If your IdP requires manual entry, the individual URLs are also displayed in the same box:</p>
<ul>
<li>Reply URL (Assertion Consumer Service URL)</li>
<li>Sign on URL</li>
<li>Logout URL</li>
</ul>
<h3>3. Configure Your Identity Provider</h3>
<p>Follow the instructions in our <a href="./set-up-identity-provider-for-saml-sso">Identity Provider Setup Guide</a> for your specific IdP (Azure AD, Google Workspace, Okta, etc.).</p>
<p>You'll need to create a SAML application in your IdP and provide the ACS URL and Entity ID from step 2.</p>
<h3>4. Import Identity Provider Metadata into PageCrawl</h3>
<p>You have three options to configure your IdP:</p>
<p><strong>Option A: Metadata URL</strong> (Recommended)</p>
<ul>
<li>Enter your IdP's metadata URL</li>
<li>Click "Parse Metadata from URL"</li>
<li>PageCrawl will automatically extract all required settings</li>
</ul>
<p><strong>Option B: Metadata XML</strong></p>
<ul>
<li>Copy your IdP's metadata XML</li>
<li>Paste it into the metadata XML field</li>
<li>Click "Parse Metadata XML"</li>
</ul>
<p><strong>Option C: Manual Entry</strong></p>
<ul>
<li>Manually enter Entity ID, SSO URL, SLO URL, and X.509 Certificate</li>
<li>This option is useful for custom configurations</li>
</ul>
<h3>5. Enable SSO Features</h3>
<p>Configure the following settings based on your needs:</p>
<h4>Enable SSO</h4>
<p>Turn on SAML authentication for your domain.</p>
<h4>Enforce SSO</h4>
<p>When enabled, password login will be disabled for users with your email domain. Users must authenticate via your identity provider.</p>
<h4>Just-in-Time (JIT) Provisioning</h4>
<p><strong>Enable Automatic Account Creation</strong></p>
<ul>
<li><strong>Enabled</strong>: New users logging in via SSO will automatically get accounts created</li>
<li><strong>Disabled</strong>: Only existing users can log in via SSO. New users must be manually added first.</li>
</ul>
<p>When JIT provisioning is enabled, you can configure:</p>
<p><strong>Default Role for New SSO Users</strong></p>
<ul>
<li>Administrator</li>
<li>Standard User</li>
<li>Viewer</li>
<li>Member</li>
</ul>
<p><strong>Default Workspaces</strong></p>
<ul>
<li>Leave empty to assign all workspaces</li>
<li>Select specific workspaces to limit access</li>
</ul>
<p><strong>Auto-Create Personal Workspace</strong></p>
<ul>
<li>When enabled, each new SSO user gets a personal workspace</li>
<li>Note: Your account has a workspace limit based on your subscription</li>
<li>If the limit is reached, no personal workspaces will be created</li>
</ul>
<h2>Workspace Limits</h2>
<p>Personal workspace creation depends on your <a href="/pricing">subscription plan</a>:</p>
<p>If you enable "Auto-Create Personal Workspace" and have reached your limit, new SSO users will be assigned to default workspaces instead of creating personal workspaces.</p>
<h2>SSO Login Flow</h2>
<p>Once configured, users with your email domain will:</p>
<ol>
<li>Go to PageCrawl login page</li>
<li>Enter their email address</li>
<li>Be redirected to your identity provider</li>
<li>Authenticate with their corporate credentials</li>
<li>Be redirected back to PageCrawl and logged in automatically</li>
</ol>
<p>If JIT provisioning is enabled and they're a new user, an account will be created automatically with the configured role and workspace assignments.</p>
<h2>Troubleshooting Common Issues</h2>
<h3>"Team has reached member limit"</h3>
<p><strong>Error:</strong> "Unable to provision SSO user: Team has reached its member limit."</p>
<p><strong>Solution:</strong></p>
<ul>
<li>Check your subscription plan in <strong>Settings → Team → Subscription</strong></li>
<li>Either upgrade to a plan with more seats or remove inactive members</li>
<li>Once you have available seats, the user can try logging in again</li>
</ul>
<h3>"Automatic account creation is disabled"</h3>
<p><strong>Error:</strong> "Automatic account creation is disabled. Please ask your team administrator to enable JIT provisioning."</p>
<p><strong>Solution:</strong></p>
<ul>
<li>Enable <strong>"Enable Automatic Account Creation"</strong> in <strong>Settings → Team → Auth &amp; SSO</strong></li>
<li>Or manually add the user in <strong>Settings → Team → Members</strong> before they log in</li>
</ul>
<h3>User Not Assigned in Identity Provider</h3>
<p><strong>Symptoms:</strong> User gets error after authenticating at IdP.</p>
<p><strong>Solution:</strong></p>
<ul>
<li><strong>Azure AD:</strong> Go to Enterprise Applications → PageCrawl → Users and groups → Add user/group</li>
<li><strong>Google Workspace:</strong> Admin Console → PageCrawl app → User access → Enable for user's org unit</li>
<li><strong>Okta:</strong> Applications → PageCrawl → Assignments → Assign to People</li>
</ul>
<h3>Certificate Expired or Invalid</h3>
<p><strong>Symptoms:</strong> "Invalid signature" or authentication fails at final step.</p>
<p><strong>Solution:</strong></p>
<ol>
<li>In PageCrawl SSO settings, update the metadata:<ul>
<li>Click <strong>Parse Metadata from URL</strong> to refresh, or</li>
<li>Download fresh XML from IdP and paste it, then click <strong>Parse Metadata XML</strong></li>
</ul>
</li>
<li>Most IdPs rotate certificates every 1-3 years</li>
</ol>
<h3>Metadata Import Errors</h3>
<p><strong>Common Issues:</strong></p>
<ul>
<li><strong>EntitiesDescriptor Format:</strong> PageCrawl requires <code>EntityDescriptor</code> format, not <code>EntitiesDescriptor</code></li>
<li><strong>Invalid XML:</strong> Ensure you copied the entire XML including <code>&lt;?xml</code> declaration</li>
<li><strong>URL Not Accessible:</strong> Ensure metadata URL is publicly accessible</li>
</ul>
<h3>Personal Workspace Not Created</h3>
<p><strong>Cause:</strong> Team has reached workspace limit for subscription plan.</p>
<p><strong>Solution:</strong></p>
<ul>
<li>Delete unused workspaces in <strong>Settings → Team → Workspaces</strong></li>
<li>Or upgrade to a plan with more workspaces</li>
<li>New users will still be assigned to default workspaces</li>
</ul>
<h2>Testing Your SSO Configuration</h2>
<ol>
<li><strong>Use Incognito/Private Window</strong> to test fresh user experience</li>
<li><strong>Test with Assigned User</strong> who has access in your IdP</li>
<li><strong>Verify Each Step:</strong><ul>
<li>Enter email at PageCrawl login</li>
<li>Verify redirect to IdP</li>
<li>Authenticate at IdP</li>
<li>Verify redirect back to PageCrawl</li>
<li>Confirm successful login</li>
</ul>
</li>
<li><strong>Test Different Scenarios:</strong><ul>
<li>New user (if JIT enabled)</li>
<li>Existing user</li>
<li>User with wrong domain (should fail correctly)</li>
</ul>
</li>
</ol>
<h2>Security Best Practices</h2>
<ul>
<li>Monitor certificate expiration dates and update before they expire</li>
<li>Only assign necessary users in your IdP</li>
<li>Set appropriate default role (usually "Member" or "Viewer")</li>
<li>Enable "Enforce SSO" only after thorough testing with all users</li>
<li>Review authentication logs regularly in <strong>Settings → Team → Security</strong></li>
</ul>
<h2>Frequently Asked Questions</h2>
<p><strong>Q: Can I have multiple identity providers?</strong>
A: No, PageCrawl supports one identity provider per team.</p>
<p><strong>Q: What happens to existing users when I enable SSO?</strong>
A: Existing users can continue using password login unless you enable "Enforce SSO". With JIT provisioning enabled, their accounts will be automatically linked to SSO on first SSO login.</p>
<p><strong>Q: Can I disable SSO after enabling it?</strong>
A: Yes, you can disable SSO anytime in the settings. Users will revert to password-based login.</p>
<p><strong>Q: What if my IdP certificate expires?</strong>
A: Users won't be able to log in until you update the certificate. Update metadata in PageCrawl SSO settings as soon as your IdP rotates certificates.</p>
<p><strong>Q: Why can't I use Gmail or other free email providers?</strong>
A: SSO requires corporate email domains for security. Free email providers don't provide the organizational control needed for enterprise SSO.</p>
<p><strong>Q: How do I migrate all users to SSO?</strong>
A: Enable SSO with JIT provisioning first. Test with a few users. Once confirmed working, enable "Enforce SSO" to require all users to use SSO.</p>
<p><strong>Q: What happens if we reach our member or workspace limit?</strong>
A: New SSO users won't be able to log in if member limit is reached. If workspace limit is reached, personal workspaces won't be created, but users will still be assigned to default workspaces.</p>
<h2>Support</h2>
<p>For assistance with SSO configuration or to request early access, contact <a href="mailto:support@pagecrawl.io">support@pagecrawl.io</a>.</p>]]>
            </summary>
                                    <updated>2026-03-05T10:31:11+00:00</updated>
        </entry>
            <entry>
            <title><![CDATA[Set Up Your Identity Provider for SAML SSO]]></title>
            <link rel="alternate" href="https://pagecrawl.io/help/account-settings/article/set-up-identity-provider-for-saml-sso" />
            <id>https://pagecrawl.io/74</id>
            <author>
                <name><![CDATA[PageCrawl.io]]></name>
            </author>
            <summary type="html">
                <![CDATA[<h1>Set Up Your Identity Provider for SAML SSO</h1>
<p>This guide covers the identity provider (IdP) side of SSO setup with step-by-step instructions for Azure AD, Google Workspace, Okta, OneLogin, and custom SAML providers. For PageCrawl-side settings (enabling SSO, enforcement, JIT provisioning), see the <a href="/help/account-settings/article/saml-sso-configuration">SSO Configuration Guide</a>.</p>
<p>Before you begin, ensure you have:</p>
<ul>
<li>Access to your identity provider's admin console</li>
<li>PageCrawl Enterprise plan with SSO enabled</li>
<li>Team owner's verified corporate email address</li>
</ul>
<h2>Get Your Service Provider Information</h2>
<p><strong>IMPORTANT: Complete this step first before configuring your Identity Provider</strong></p>
<ol>
<li>
<p>Navigate to <strong>Settings → Team → Auth &amp; SSO</strong> in PageCrawl</p>
</li>
<li>
<p>Copy the <strong>Metadata URL</strong> shown in the blue Service Provider information box</p>
<ul>
<li>It will look like: <code>https://pagecrawl.io/sso/saml/abc-123-def-456/metadata</code></li>
<li><strong>Important:</strong> Copy the actual URL from PageCrawl, not this example</li>
</ul>
</li>
<li>
<p>Keep this URL handy - most Identity Providers can automatically import all configuration from this metadata URL</p>
</li>
</ol>
<p><strong>Note:</strong> If your IdP doesn't support metadata import, copy the individual URLs from PageCrawl (they will also be shown in the same box):</p>
<ul>
<li>Reply URL (Assertion Consumer Service URL)</li>
<li>Sign on URL</li>
<li>Logout URL</li>
</ul>
<p><strong>Additional information for reference:</strong></p>
<ul>
<li><strong>NameID Format</strong>: Email Address (<code>urn:oasis:names:tc:SAML:1.1:nameid-format:emailAddress</code>)</li>
<li><strong>Binding</strong>: HTTP-POST for ACS, HTTP-Redirect for Single Sign-On</li>
</ul>
<hr />
<h2>Azure AD / Microsoft Entra ID</h2>
<h3>Step 1: Create Enterprise Application</h3>
<ol>
<li>Sign in to the <a href="https://portal.azure.com">Azure Portal</a></li>
<li>Navigate to <strong>Azure Active Directory → Enterprise Applications</strong></li>
<li>Click <strong>New application</strong></li>
<li>Click <strong>Create your own application</strong></li>
<li>Name it "PageCrawl" and select <strong>Integrate any other application you don't find in the gallery (Non-gallery)</strong></li>
<li>Click <strong>Create</strong></li>
</ol>
<h3>Step 2: Configure SAML</h3>
<ol>
<li>In your PageCrawl application, click <strong>Single sign-on</strong> in the left menu</li>
<li>Select <strong>SAML</strong> as the single sign-on method</li>
<li>In section <strong>1. Basic SAML Configuration</strong>, click <strong>Edit</strong> and enter:<ul>
<li><strong>Identifier (Entity ID)</strong>: Paste your Entity ID from PageCrawl (e.g., <code>https://pagecrawl.io/sso/saml/abc-123.../metadata</code>)</li>
<li><strong>Reply URL (ACS URL)</strong>: Paste your Reply URL from PageCrawl (e.g., <code>https://pagecrawl.io/sso/saml/abc-123.../acs</code>)</li>
</ul>
</li>
<li>Click <strong>Save</strong></li>
</ol>
<h3>Step 3: Configure Attributes &amp; Claims</h3>
<p>The default Name ID (user.mail) is sufficient. No additional changes needed.</p>
<h3>Step 4: Download Metadata</h3>
<ol>
<li>In section <strong>3. SAML Signing Certificate</strong>, copy the <strong>App Federation Metadata Url</strong></li>
<li>In PageCrawl SSO settings, paste this URL in the <strong>Metadata URL</strong> field</li>
<li>Click <strong>Parse Metadata from URL</strong></li>
</ol>
<h3>Step 5: Assign Users</h3>
<ol>
<li>Navigate to <strong>Users and groups</strong></li>
<li>Click <strong>Add user/group</strong></li>
<li>Select users or groups who should have access to PageCrawl</li>
<li>Click <strong>Assign</strong></li>
</ol>
<hr />
<h2>Google Workspace</h2>
<h3>Step 1: Create Custom SAML Application</h3>
<ol>
<li>Sign in to your <a href="https://admin.google.com">Google Admin Console</a></li>
<li>Go to <strong>Apps → Web and mobile apps</strong></li>
<li>Click <strong>Add app → Add custom SAML app</strong></li>
<li>Enter "PageCrawl" as the app name</li>
<li>Click <strong>Continue</strong></li>
</ol>
<h3>Step 2: Download Google IdP Metadata</h3>
<ol>
<li>On the <strong>Google Identity Provider details</strong> page, click <strong>Download Metadata</strong></li>
<li>Save the XML file</li>
<li>Click <strong>Continue</strong></li>
</ol>
<h3>Step 3: Configure Service Provider Details</h3>
<ol>
<li>Enter the following values:<ul>
<li><strong>ACS URL</strong>: Paste your Reply URL from PageCrawl (e.g., <code>https://pagecrawl.io/sso/saml/abc-123.../acs</code>)</li>
<li><strong>Entity ID</strong>: Paste your Entity ID from PageCrawl (e.g., <code>https://pagecrawl.io/sso/saml/abc-123.../metadata</code>)</li>
<li><strong>Start URL</strong>: Leave empty</li>
<li><strong>Name ID format</strong>: EMAIL</li>
<li><strong>Name ID</strong>: Basic Information &gt; Primary email</li>
<li><strong>Signed response</strong>: Leave unchecked (PageCrawl requires signed assertions, which is the industry standard default)</li>
</ul>
</li>
<li>Click <strong>Continue</strong></li>
<li>Click <strong>Finish</strong> (skip attribute mapping)</li>
</ol>
<h3>Step 4: Import Metadata to PageCrawl</h3>
<ol>
<li>Open the downloaded metadata XML file</li>
<li>In PageCrawl SSO settings, paste the content into <strong>Metadata XML</strong> field</li>
<li>Click <strong>Parse Metadata XML</strong></li>
</ol>
<h3>Step 5: Turn On the App</h3>
<ol>
<li>In Google Admin, click on your PageCrawl app</li>
<li>Click <strong>User access</strong></li>
<li>Select <strong>ON for everyone</strong> or specific organizational units</li>
<li>Click <strong>Save</strong></li>
</ol>
<hr />
<h2>Okta</h2>
<h3>Step 1: Add Application</h3>
<ol>
<li>Sign in to your <a href="https://admin.okta.com">Okta Admin Console</a></li>
<li>Go to <strong>Applications → Applications</strong></li>
<li>Click <strong>Create App Integration</strong></li>
<li>Select <strong>SAML 2.0</strong> and click <strong>Next</strong></li>
</ol>
<h3>Step 2: General Settings</h3>
<ol>
<li>Enter "PageCrawl" as the <strong>App name</strong></li>
<li>(Optional) Upload a logo</li>
<li>Click <strong>Next</strong></li>
</ol>
<h3>Step 3: Configure SAML</h3>
<ol>
<li>In the <strong>SAML Settings</strong> section, enter:<ul>
<li><strong>Single sign-on URL</strong>: Paste your Reply URL from PageCrawl (e.g., <code>https://pagecrawl.io/sso/saml/abc-123.../acs</code>)</li>
<li><strong>Audience URI (SP Entity ID)</strong>: Paste your Entity ID from PageCrawl (e.g., <code>https://pagecrawl.io/sso/saml/abc-123.../metadata</code>)</li>
<li><strong>Name ID format</strong>: EmailAddress</li>
<li><strong>Application username</strong>: Email</li>
</ul>
</li>
<li>Leave other settings as default</li>
<li>Click <strong>Next</strong></li>
</ol>
<h3>Step 4: Feedback</h3>
<ol>
<li>Select <strong>I'm an Okta customer adding an internal app</strong></li>
<li>Click <strong>Finish</strong></li>
</ol>
<h3>Step 5: Get Metadata URL</h3>
<ol>
<li>On the <strong>Sign On</strong> tab, scroll to <strong>SAML Signing Certificates</strong></li>
<li>Click <strong>Actions</strong> next to the active certificate</li>
<li>Click <strong>View IdP metadata</strong></li>
<li>Copy the URL from your browser's address bar</li>
<li>In PageCrawl SSO settings, paste this URL in the <strong>Metadata URL</strong> field</li>
<li>Click <strong>Parse Metadata from URL</strong></li>
</ol>
<h3>Step 6: Assign Users</h3>
<ol>
<li>Go to the <strong>Assignments</strong> tab</li>
<li>Click <strong>Assign</strong> and select <strong>Assign to People</strong> or <strong>Assign to Groups</strong></li>
<li>Assign users who should have access to PageCrawl</li>
<li>Click <strong>Done</strong></li>
</ol>
<hr />
<h2>OneLogin</h2>
<h3>Step 1: Add Application</h3>
<ol>
<li>Sign in to your <a href="https://app.onelogin.com/admin">OneLogin Admin Console</a></li>
<li>Go to <strong>Applications → Applications</strong></li>
<li>Click <strong>Add App</strong></li>
<li>Search for "SAML Test Connector (Advanced)" and select it</li>
</ol>
<h3>Step 2: Configure Application</h3>
<ol>
<li>Enter "PageCrawl" as the <strong>Display Name</strong></li>
<li>Click <strong>Save</strong></li>
</ol>
<h3>Step 3: Configure SAML Settings</h3>
<ol>
<li>Go to the <strong>Configuration</strong> tab</li>
<li>Enter the following:<ul>
<li><strong>Audience (Entity ID)</strong>: Paste your Entity ID from PageCrawl (e.g., <code>https://pagecrawl.io/sso/saml/abc-123.../metadata</code>)</li>
<li><strong>Recipient</strong>: Paste your Reply URL from PageCrawl (e.g., <code>https://pagecrawl.io/sso/saml/abc-123.../acs</code>)</li>
<li><strong>ACS (Consumer) URL Validator</strong>: Use regex pattern <code>https://pagecrawl\.io/sso/saml/[^/]+/acs</code></li>
<li><strong>ACS (Consumer) URL</strong>: Paste your Reply URL from PageCrawl (e.g., <code>https://pagecrawl.io/sso/saml/abc-123.../acs</code>)</li>
</ul>
</li>
<li>Click <strong>Save</strong></li>
</ol>
<h3>Step 4: Get Metadata URL</h3>
<ol>
<li>Go to the <strong>More Actions</strong> menu</li>
<li>Select <strong>SAML Metadata</strong></li>
<li>Copy the metadata URL</li>
<li>In PageCrawl SSO settings, paste this URL in the <strong>Metadata URL</strong> field</li>
<li>Click <strong>Parse Metadata from URL</strong></li>
</ol>
<h3>Step 5: Assign Users</h3>
<ol>
<li>Go to the <strong>Users</strong> tab</li>
<li>Select users who should have access</li>
<li>Click <strong>Save</strong></li>
</ol>
<hr />
<h2>Custom SAML 2.0 Provider</h2>
<p>If your identity provider isn't listed above but supports SAML 2.0, you can configure it manually:</p>
<h3>Step 1: Configure Your Identity Provider</h3>
<p>In your IdP, create a new SAML application with these settings:</p>
<ul>
<li><strong>Entity ID</strong>: Paste your Entity ID from PageCrawl (you copied this in the first section above, e.g., <code>https://pagecrawl.io/sso/saml/abc-123.../metadata</code>)</li>
<li><strong>ACS URL</strong>: Paste your Reply URL from PageCrawl (e.g., <code>https://pagecrawl.io/sso/saml/abc-123.../acs</code>)</li>
<li><strong>NameID Format</strong>: Email Address</li>
<li><strong>Binding</strong>: HTTP-POST for ACS, HTTP-Redirect for SSO</li>
</ul>
<h3>Step 2: Get IdP Information</h3>
<p>From your identity provider, collect:</p>
<ul>
<li><strong>Entity ID</strong> (IdP Issuer)</li>
<li><strong>SSO URL</strong> (Sign-on URL)</li>
<li><strong>SLO URL</strong> (Sign-out URL) - Optional</li>
<li><strong>X.509 Certificate</strong></li>
</ul>
<h3>Step 3: Manual Configuration in PageCrawl</h3>
<ol>
<li>In PageCrawl SSO settings, select the <strong>Manual Entry</strong> tab</li>
<li>Enter the collected information:<ul>
<li>Entity ID</li>
<li>SSO URL</li>
<li>SLO URL (optional)</li>
<li>X.509 Certificate (paste the full certificate including BEGIN/END markers)</li>
</ul>
</li>
<li>Enable SSO and configure JIT provisioning settings</li>
<li>Click <strong>Save Changes</strong></li>
</ol>
<hr />
<h2>Validation</h2>
<p>After configuration, test your SSO:</p>
<ol>
<li>Open an incognito/private browser window</li>
<li>Go to PageCrawl login page</li>
<li>Enter a test user's email address with your domain</li>
<li>Verify you're redirected to your IdP</li>
<li>Complete authentication</li>
<li>Verify you're logged into PageCrawl successfully</li>
</ol>
<p>If you encounter issues, check:</p>
<ul>
<li>User is assigned to the PageCrawl application in your IdP</li>
<li>Email domain matches your configured domain</li>
<li>Metadata was imported correctly</li>
<li>X.509 certificate is valid and not expired</li>
</ul>
<hr />
<h2>Notes</h2>
<ul>
<li><strong>Metadata XML Format</strong>: PageCrawl does not support the <code>EntitiesDescriptor</code> element. Use <code>EntityDescriptor</code> format.</li>
<li><strong>Multiple IdPs</strong>: PageCrawl supports one identity provider per team.</li>
<li><strong>Certificate Rotation</strong>: When your IdP certificate expires, update the metadata in PageCrawl SSO settings.</li>
</ul>
<h2>Support</h2>
<p>For assistance with your specific identity provider, contact <a href="mailto:support@pagecrawl.io">support@pagecrawl.io</a>.</p>]]>
            </summary>
                                    <updated>2026-03-05T10:31:11+00:00</updated>
        </entry>
            <entry>
            <title><![CDATA[Choosing the Right AI Model for Website Change Monitoring in 2026]]></title>
            <link rel="alternate" href="https://pagecrawl.io/help/tutorials/article/choosing-best-ai-model-website-monitoring" />
            <id>https://pagecrawl.io/75</id>
            <author>
                <name><![CDATA[PageCrawl.io]]></name>
            </author>
            <summary type="html">
                <![CDATA[<h1>Choosing the Right AI Model for Website Change Monitoring in 2026</h1>
<p>Every PageCrawl.io plan includes AI credits that work automatically with no setup. For most users, the included credits are all you need. This guide is primarily for users who want to bring their own API key (BYOK) and choose a specific model, covering free options to premium models with cost comparisons based on 2026 pricing.</p>
<p><strong>Using included credits?</strong> You don't need to choose a model. PageCrawl automatically uses optimized models on your behalf. Each 4,000-token block costs 1 credit (Basic tier) or 10 credits (Pro tier, Ultimate plan only). See <a href="/help/features/article/ai-powered-change-detection">AI-Powered Change Detection</a> for details on how credits work.</p>
<p><strong>Pricing updates frequently.</strong> Verify current rates at: <a href="https://openai.com/api/pricing/">OpenAI</a>, <a href="https://ai.google.dev/pricing">Gemini</a>, <a href="https://www.anthropic.com/pricing">Anthropic</a>, <a href="https://openrouter.ai/models">OpenRouter</a></p>
<h2>Why AI Models Matter</h2>
<p>AI models enhance website monitoring by automatically summarizing changes, assigning priority scores, and distinguishing meaningful updates from noise.</p>
<p>PageCrawl.io supports four AI providers:</p>
<ul>
<li><strong>OpenAI</strong> - GPT-4.1 family, reliable and fast</li>
<li><strong>Google Gemini</strong> - Competitive pricing, good performance</li>
<li><strong>Anthropic Claude</strong> - High accuracy, premium quality</li>
<li><strong>OpenRouter</strong> - A marketplace that gives you access to 200+ AI models from different providers, all through a single account and API key</li>
</ul>
<h2>Understanding Tokens and Costs</h2>
<h3>What is a Token?</h3>
<p>A <strong>token</strong> is roughly 4 characters or about 3/4 of a word. AI providers charge based on tokens processed:</p>
<ul>
<li>"Hello world" = ~3 tokens</li>
<li>A typical paragraph = ~100 tokens</li>
<li>A blog post (1,000 words) = ~1,300 tokens</li>
<li>A full webpage = ~2,000-10,000 tokens</li>
</ul>
<h3>How PageCrawl Uses Tokens</h3>
<p>PageCrawl's AI costs are dominated by <strong>input tokens</strong> (the page content sent to AI). Output tokens are minimal because summaries are typically just 1-2 paragraphs (~100-200 tokens).</p>
<p><strong>Typical token usage per check:</strong></p>
<ul>
<li>Simple page (blog post, article): ~1,000-2,000 tokens</li>
<li>Medium page (product page, news): ~2,000-5,000 tokens</li>
<li>Large page (documentation, e-commerce): ~5,000-10,000 tokens</li>
</ul>
<p><strong>Example cost calculation (Gemini 2.5 Flash at $0.30/M input):</strong></p>
<ul>
<li>2,000 token page = $0.0006 per check (~1,667 checks per dollar)</li>
<li>5,000 token page = $0.0015 per check (~667 checks per dollar)</li>
</ul>
<p><strong>Example cost calculation (Claude Opus 4.5 at $5.00/M input):</strong></p>
<ul>
<li>2,000 token page = $0.01 per check (100 checks per dollar)</li>
<li>5,000 token page = $0.025 per check (40 checks per dollar)</li>
</ul>
<p>Since output is just a short summary (~150 tokens), output costs add less than 10% to the total. Additionally, AI only runs when a meaningful change is detected on the page. PageCrawl's advanced change detection infrastructure filters out tiny, insignificant changes before they ever reach AI, so you only spend tokens on changes that actually matter.</p>
<h2>Model Pricing Comparison (2026)</h2>
<p><em>Prices per million tokens. Most of your cost will be input tokens, as output (summaries) is minimal.</em></p>
<h3>Budget-Friendly Models</h3>
<table>
<thead>
<tr>
<th>Model</th>
<th>Provider</th>
<th>Input</th>
<th>Output</th>
<th>Best For</th>
</tr>
</thead>
<tbody>
<tr>
<td><strong>Gemini 2.5 Flash-Lite</strong></td>
<td>Google</td>
<td>$0.10/M</td>
<td>$0.40/M</td>
<td>High volume, budget option</td>
</tr>
<tr>
<td><strong>GPT-4o Mini</strong></td>
<td>OpenAI</td>
<td>$0.15/M</td>
<td>$0.60/M</td>
<td>Budget OpenAI option</td>
</tr>
<tr>
<td><strong>Gemini 2.5 Flash</strong></td>
<td>Google</td>
<td>$0.30/M</td>
<td>$2.50/M</td>
<td>Good balance of cost/quality</td>
</tr>
</tbody>
</table>
<h3>Premium Models</h3>
<table>
<thead>
<tr>
<th>Model</th>
<th>Provider</th>
<th>Input</th>
<th>Output</th>
<th>Best For</th>
</tr>
</thead>
<tbody>
<tr>
<td><strong>Claude Haiku 4.5</strong></td>
<td>Anthropic</td>
<td>$1.00/M</td>
<td>$5.00/M</td>
<td>Quality analysis</td>
</tr>
<tr>
<td><strong>Gemini 2.5 Pro</strong></td>
<td>Google</td>
<td>$1.25/M</td>
<td>$5.00/M</td>
<td>Google's best</td>
</tr>
<tr>
<td><strong>GPT-4.1</strong></td>
<td>OpenAI</td>
<td>$2.00/M</td>
<td>$8.00/M</td>
<td>Complex pages</td>
</tr>
<tr>
<td><strong>Claude Sonnet 4.5</strong></td>
<td>Anthropic</td>
<td>$3.00/M</td>
<td>$15.00/M</td>
<td>Premium accuracy</td>
</tr>
<tr>
<td><strong>Claude Opus 4.5</strong></td>
<td>Anthropic</td>
<td>$5.00/M</td>
<td>$25.00/M</td>
<td>Maximum capability</td>
</tr>
</tbody>
</table>
<p><strong>Privacy Note</strong>: Some providers may use data for training. Review each provider's data usage policy for sensitive content. See <a href="#privacy-and-data-security-considerations">Privacy section</a> for details.</p>
<h2>Recommended Models by Use Case</h2>
<p>PageCrawl.io only calls AI when a page actually changes. If you monitor 1,000 pages and only 150 change, you pay for 150 AI requests, not 1,000.</p>
<h3>Best Overall Value: GPT-4o Mini</h3>
<p><strong>Pricing</strong>: $0.15/$0.60 per million tokens (input/output)
<strong>Recommended For</strong>: Most BYOK users</p>
<p>GPT-4o Mini offers the best balance of cost and performance. It's reliable, fast, and very affordable.</p>
<h3>Cheapest Option: Gemini 2.5 Flash-Lite</h3>
<p><strong>Pricing</strong>: $0.10/$0.40 per million tokens
<strong>Recommended For</strong>: High-volume, cost-sensitive monitoring</p>
<p><strong>Note</strong>: Google Gemini's free tier was reduced significantly in 2026 (from 250-1000 requests/day to only 5-20 requests/day). For practical use, billing is recommended.</p>
<h3>Best for Critical Documents: GPT-4.1 or Claude Sonnet 4.5</h3>
<p><strong>GPT-4.1</strong>: $2.00/$8.00 per million tokens
<strong>Claude Sonnet 4.5</strong>: $3.00/$15.00 per million tokens
<strong>Recommended For</strong>: Legal documents, terms of service, compliance monitoring, and other critical content where accuracy matters most</p>
<h2>Best Models by Content Type</h2>
<table>
<thead>
<tr>
<th>Content Type</th>
<th>Budget Option</th>
<th>Recommended</th>
<th>Premium</th>
</tr>
</thead>
<tbody>
<tr>
<td>Blogs, News, Docs</td>
<td>Gemini Flash-Lite</td>
<td>GPT-4o Mini</td>
<td>-</td>
</tr>
<tr>
<td>E-commerce, Pricing</td>
<td>Gemini Flash-Lite</td>
<td>GPT-4o Mini</td>
<td>Claude Haiku 4.5</td>
</tr>
<tr>
<td>Legal, ToS, Compliance</td>
<td>Claude Haiku 4.5</td>
<td>Claude Sonnet 4.5</td>
</tr>
<tr>
<td>Competitor Monitoring</td>
<td>Gemini Flash-Lite</td>
<td>GPT-4o Mini</td>
<td>Claude Haiku 4.5</td>
</tr>
<tr>
<td>API Docs, Changelogs</td>
<td>Gemini Flash-Lite</td>
<td>GPT-4o Mini</td>
<td>-</td>
</tr>
</tbody>
</table>
<h2>Real-World Cost Examples</h2>
<p><strong>Costs can vary significantly.</strong> These are estimates only. Your actual costs depend on:</p>
<ul>
<li>Page complexity and content length</li>
<li>How often pages change</li>
<li>Deep Analysis setting (on = full page, off = changes only)</li>
<li>Max token settings</li>
</ul>
<p><strong>Token usage by page type:</strong></p>
<ul>
<li>Simple pages (blogs, docs): ~500 tokens</li>
<li>Average pages: ~2,000 tokens</li>
<li>Content-heavy pages: ~5,000-10,000 tokens</li>
<li>Complex pages (e-commerce, SPAs): 10,000-25,000+ tokens</li>
</ul>
<p><strong>Recommendation</strong>: Start with budget-friendly models like Gemini Flash-Lite and set strict monthly limits to avoid unexpected bills.</p>
<h3>Cost per 1,000 AI Requests (by token usage)</h3>
<table>
<thead>
<tr>
<th>Model</th>
<th>~500 tok</th>
<th>~2K tok</th>
<th>~5K tok</th>
<th>~10K tok</th>
</tr>
</thead>
<tbody>
<tr>
<td>Gemini Flash-Lite</td>
<td>$0.05</td>
<td>$0.21</td>
<td>$0.53</td>
<td>$1.06</td>
</tr>
<tr>
<td>GPT-4o Mini</td>
<td>$0.08</td>
<td>$0.32</td>
<td>$0.80</td>
<td>$1.59</td>
</tr>
<tr>
<td>Gemini Flash</td>
<td>$0.15</td>
<td>$0.62</td>
<td>$1.55</td>
<td>$3.10</td>
</tr>
<tr>
<td>Claude Haiku 4.5</td>
<td>$0.50</td>
<td>$2.00</td>
<td>$5.00</td>
<td>$10.00</td>
</tr>
<tr>
<td>Gemini Pro</td>
<td>$0.63</td>
<td>$2.50</td>
<td>$6.25</td>
<td>$12.50</td>
</tr>
</tbody>
</table>
<h3>Example: 500 Pages @ 15% Change Rate = 2,250 requests/month</h3>
<table>
<thead>
<tr>
<th>Model</th>
<th>Light (~500)</th>
<th>Average (~2K)</th>
<th>Heavy (~5K)</th>
<th>Very Heavy (~10K)</th>
</tr>
</thead>
<tbody>
<tr>
<td>Gemini Flash-Lite</td>
<td>$0.12</td>
<td>$0.47</td>
<td>$1.19</td>
<td>$2.39</td>
</tr>
<tr>
<td>GPT-4o Mini</td>
<td>$0.18</td>
<td>$0.72</td>
<td>$1.80</td>
<td>$3.58</td>
</tr>
<tr>
<td>Gemini Flash</td>
<td>$0.34</td>
<td>$1.40</td>
<td>$3.49</td>
<td>$6.98</td>
</tr>
<tr>
<td>Claude Haiku 4.5</td>
<td>$1.13</td>
<td>$4.50</td>
<td>$11.25</td>
<td>$22.50</td>
</tr>
</tbody>
</table>
<h3>Controlling Token Usage</h3>
<p>You can reduce token usage in PageCrawl.io settings:</p>
<ul>
<li><strong>Deep Analysis off</strong>: Only send changed text to AI (lower tokens, less context)</li>
<li><strong>Deep Analysis on</strong>: Send entire page for better understanding (higher tokens)</li>
<li><strong>Max tokens limit</strong>: Default 15K tokens per request (falls back to diff if exceeded)</li>
<li><strong>Monthly request limits</strong>: Set max AI requests per month to cap costs</li>
</ul>
<p><strong>Tip</strong>: Check your actual token usage in PageCrawl.io's AI statistics to estimate your costs accurately.</p>
<h2>OpenRouter: Access 200+ Models</h2>
<p>OpenRouter provides unified access to AI models from multiple providers through a single API key.</p>
<p><strong>Benefits</strong>: Unified billing, automatic fallbacks, access to free models (Llama, Mistral, Qwen)</p>
<p><strong>Pricing</strong>: 5.5% platform fee on top of base model costs</p>
<p><strong>Best for</strong>: Experimenting with multiple models, accessing free community models</p>
<p><strong>Recommended models</strong>: <code>openai/gpt-4o-mini</code>, <code>anthropic/claude-haiku-4-5</code>, <code>google/gemini-2.5-flash</code></p>
<h2>How to Set Up BYOK in PageCrawl.io</h2>
<h3>Step 1: Get Your API Key</h3>
<table>
<thead>
<tr>
<th>Provider</th>
<th>Get Key At</th>
</tr>
</thead>
<tbody>
<tr>
<td>OpenAI</td>
<td><a href="https://platform.openai.com">platform.openai.com</a> &gt; API Keys</td>
</tr>
<tr>
<td>Google Gemini</td>
<td><a href="https://ai.google.dev">ai.google.dev</a> &gt; Get API Key</td>
</tr>
<tr>
<td>Anthropic</td>
<td><a href="https://console.anthropic.com">console.anthropic.com</a> &gt; API Keys</td>
</tr>
<tr>
<td>OpenRouter</td>
<td><a href="https://openrouter.ai">openrouter.ai</a> &gt; Settings &gt; API Key</td>
</tr>
</tbody>
</table>
<h3>Step 2: Configure in PageCrawl.io</h3>
<ol>
<li>Go to <strong>Settings &gt; Integrations &gt; AI</strong></li>
<li>Paste your API key</li>
<li>Select model tier:<ul>
<li><strong>Save Money</strong>: Gemini Flash-Lite ($0.10/M), GPT-4o Mini ($0.15/M)</li>
<li><strong>Recommended</strong>: GPT-4o Mini, Claude Haiku 4.5</li>
<li><strong>Best Quality</strong>: GPT-4.1, Claude Sonnet 4.5, Gemini Pro</li>
</ul>
</li>
<li>Test connection and save</li>
</ol>
<h3>Step 3: Optimize with Model Overrides</h3>
<p>You can customize AI models at three levels:</p>
<ol>
<li><strong>Workspace default</strong> - applies to all pages</li>
<li><strong>Template override</strong> - applies to pages using that template</li>
<li><strong>Page override</strong> - applies to individual pages</li>
</ol>
<p><strong>Example strategy</strong>:</p>
<ul>
<li>Workspace default: Gemini Flash-Lite (cheapest at $0.10/M)</li>
<li>E-commerce template: GPT-4o Mini (best value at $0.15/M)</li>
<li>Legal template: Claude Haiku 4.5 (high accuracy)</li>
<li>Critical page: Claude Sonnet 4.5 (premium)</li>
</ul>
<h2>Tips for Optimizing Costs</h2>
<ol>
<li><strong>Start with budget models</strong> - Gemini Flash-Lite offers the lowest per-token pricing at $0.10/M input</li>
<li><strong>Use templates</strong> - group similar pages with the same model</li>
<li><strong>Check frequency doesn't affect AI costs</strong> - AI only runs when changes occur</li>
<li><strong>Monitor usage</strong> - most users see only 10-50 AI requests/day</li>
</ol>
<h2>Privacy and Data Security Considerations</h2>
<table>
<thead>
<tr>
<th>Provider</th>
<th>Data Usage</th>
<th>Best For</th>
</tr>
</thead>
<tbody>
<tr>
<td><strong>OpenAI/Anthropic</strong></td>
<td>API data not used for training</td>
<td>Confidential content, legal docs</td>
</tr>
<tr>
<td><strong>Google Gemini</strong></td>
<td>Review Google's data policies</td>
<td>General monitoring</td>
</tr>
<tr>
<td><strong>OpenRouter</strong></td>
<td>Varies by underlying model</td>
<td>Check each model's policy</td>
</tr>
</tbody>
</table>
<p>When using included AI credits, content is processed through PageCrawl's managed AI infrastructure. When using BYOK, content is sent directly to your chosen provider.</p>
<p><strong>Data protection policies</strong>: <a href="https://openai.com/policies/api-data-usage-policies">OpenAI</a>, <a href="https://www.anthropic.com/privacy">Anthropic</a>, <a href="https://cloud.google.com/terms/data-processing-addendum">Google</a></p>
<p><strong>Privacy note</strong>: Free tier models (including some OpenRouter models) may use your data for training. Use paid tiers for sensitive content.</p>
<h2>FAQ</h2>
<p><strong>Do I need BYOK to use AI?</strong> No. All plans include AI credits that work automatically. BYOK is optional for users who want unlimited usage or specific model control.</p>
<p><strong>What happens when my credits run out?</strong> Page monitoring continues normally, but AI summaries pause until credits reset next month. You can also switch to BYOK for unlimited usage.</p>
<p><strong>Can I switch between credits and BYOK?</strong> Yes, at any time in Settings &gt; Workspace &gt; Integrations &gt; AI.</p>
<p><strong>Can I switch models after starting?</strong> Yes. Changes apply immediately to new checks. Historical data remains intact.</p>
<p><strong>Do I pay for checks that don't find changes?</strong> No. AI only runs when pages actually change.</p>
<p><strong>Can I use different models for different pages?</strong> Yes, via workspace defaults, template overrides, and page-level overrides.</p>
<h2>Related Articles</h2>
<ul>
<li><a href="/help/features/article/ai-powered-change-detection">AI-Powered Change Detection and Smart Filtering</a> - Learn how AI summarization and Importance Scoring work</li>
<li><a href="/help/integrations/article/ai-byok-setup-guide">AI Integration Setup Guide (BYOK)</a> - Step-by-step guide to configure your API keys</li>
</ul>]]>
            </summary>
                                    <updated>2026-03-05T10:31:13+00:00</updated>
        </entry>
            <entry>
            <title><![CDATA[PageCrawl Browser Extension]]></title>
            <link rel="alternate" href="https://pagecrawl.io/help/features/article/browser-extension-guide" />
            <id>https://pagecrawl.io/76</id>
            <author>
                <name><![CDATA[PageCrawl.io]]></name>
            </author>
            <summary type="html">
                <![CDATA[<h1>PageCrawl Browser Extension</h1>
<p>The PageCrawl browser extension lets you instantly add any webpage to your monitoring list with just a few clicks. View recent changes, switch between workspaces, and start monitoring new pages - all without leaving your current tab.</p>
<h2>Installation</h2>
<p>The PageCrawl extension is available for:</p>
<ul>
<li><strong>Chrome</strong>: <a href="https://chromewebstore.google.com/detail/pagecrawl-website-change/ofiinglodfpodfghggakcadoloidhpla">Install from Chrome Web Store</a></li>
<li><strong>Firefox</strong>: <a href="https://addons.mozilla.org/en-US/firefox/addon/pagecrawl-web-change-monitor/">Install from Firefox Add-ons</a></li>
<li><strong>Safari</strong>: Coming soon</li>
</ul>
<div style="background: #f5f5f5; padding: 30px; border-radius: 8px; text-align: center; margin: 20px 0; border: 1px solid #e0e0e0;">
  <img src="/images/blog/browser-extension-extensions-panel.png" alt="PageCrawl in Extensions Panel" style="max-width: 300px; border-radius: 6px; box-shadow: 0 4px 12px rgba(0,0,0,0.15);">
</div>
<p><strong>Note:</strong> Click the pin icon next to PageCrawl to keep it visible in your browser toolbar for quick access.</p>
<h2>Getting Started</h2>
<h3>1. Connect Your Account</h3>
<p>After installing the extension, click the PageCrawl icon in your browser toolbar. You'll see a welcome screen prompting you to log in.</p>
<div style="background: #f5f5f5; padding: 30px; border-radius: 8px; text-align: center; margin: 20px 0; border: 1px solid #e0e0e0;">
  <img src="/images/blog/browser-extension-login.png" alt="PageCrawl Login Screen" style="max-width: 300px; border-radius: 6px; box-shadow: 0 4px 12px rgba(0,0,0,0.15);">
</div>
<ol>
<li>Click <strong>"Log In to PageCrawl"</strong></li>
<li>You'll be redirected to PageCrawl to authenticate</li>
<li>Once logged in, you'll be automatically connected</li>
</ol>
<p>If you don't have an account yet, click "Don't have an account? Sign up" to create one.</p>
<h3>2. View Recent Changes</h3>
<p>Once connected, the extension opens to your <strong>Recent Changes</strong> timeline. This shows the latest detected changes across all your monitored pages:</p>
<div style="background: #f5f5f5; padding: 30px; border-radius: 8px; text-align: center; margin: 20px 0; border: 1px solid #e0e0e0;">
  <img src="/images/blog/browser-extension-timeline.png" alt="Browser Extension Timeline" style="max-width: 300px; border-radius: 6px; box-shadow: 0 4px 12px rgba(0,0,0,0.15);">
</div>
<ul>
<li><strong>AI Summaries</strong>: If enabled, you'll see AI-generated summaries of what changed</li>
<li><strong>Text Diffs</strong>: For text-based monitoring, you'll see the actual text additions (highlighted in green) and deletions (highlighted in red)</li>
<li><strong>Visual Changes</strong>: Shows the percentage of visual difference detected</li>
<li><strong>Price/Number Changes</strong>: Shows how the value changed (e.g., "increased by 10%")</li>
</ul>
<p>Click any change to open it directly in your dashboard and see the full details.</p>
<h3>3. Start Monitoring a Page</h3>
<p>To add a new page to your monitoring:</p>
<ol>
<li>Navigate to any webpage you want to monitor</li>
<li>Click the PageCrawl extension icon</li>
<li>Click <strong>"+ Track New Page"</strong></li>
<li>Choose your monitoring type and options</li>
<li>Click <strong>"Start Monitoring"</strong></li>
</ol>
<div style="background: #f5f5f5; padding: 30px; border-radius: 8px; text-align: center; margin: 20px 0; border: 1px solid #e0e0e0;">
  <img src="/images/blog/browser-extension-track-page.png" alt="Track New Page Form" style="max-width: 300px; border-radius: 6px; box-shadow: 0 4px 12px rgba(0,0,0,0.15);">
</div>
<h2>Monitoring Types</h2>
<h3>Full Page Monitoring</h3>
<p>Best for: Blog posts, news articles, documentation pages</p>
<p>Monitors text content on the page. Choose your tracking level:</p>
<ul>
<li><strong>Everything on page</strong>: Monitors all text, including navigation and footers</li>
<li><strong>Content only</strong>: Excludes navigation, headers, and footers</li>
<li><strong>Reader mode</strong>: Focuses on the main article content only</li>
</ul>
<p><strong>Keyword Monitoring</strong>: Optionally enter keywords (comma-separated) to only be notified when specific words appear or disappear. Leave empty to be notified of all changes.</p>
<h3>Element Monitoring (Specific Area)</h3>
<p>Best for: Prices, stock status, specific data points</p>
<ol>
<li>Click <strong>"Click to Select Element"</strong></li>
<li>Hover over the page and click the element you want to monitor</li>
<li>The selector will be automatically captured</li>
<li>Confirm your selection</li>
</ol>
<p>You can also manually enter a CSS selector if you prefer.</p>
<p><strong>Track as Number</strong>: Enable this to extract numeric values from the element. This allows you to track trends and percentage changes over time.</p>
<p><strong>Keyword Monitoring</strong>: Same as Full Page - enter keywords to filter notifications.</p>
<h3>Visual Monitoring</h3>
<p>Best for: Charts, images, layouts, design changes</p>
<ol>
<li>Click <strong>"Draw Area on Page"</strong></li>
<li>Click and drag to select the area you want to monitor</li>
<li>Confirm your selection</li>
</ol>
<p>The extension will capture screenshots of this area and compare them for changes.</p>
<p><strong>Change Threshold</strong>: Set how much the area must change before you're notified:</p>
<ul>
<li>Any change (most sensitive)</li>
<li>Tiny (1%) - Very Minor (3%) - Minor (5%)</li>
<li>Moderate (10%) - Recommended for most cases</li>
<li>Significant (30%) - Very High (50%) - Extremely High (80%)</li>
</ul>
<h3>Price Monitoring</h3>
<p>Best for: Product pages, e-commerce sites</p>
<p>PageCrawl will automatically detect and track the main price on the page. This is optimized for common e-commerce platforms and product pages.</p>
<h2>Check Frequency</h2>
<p>Choose how often PageCrawl should check for changes:</p>
<ul>
<li>Options depend on your subscription plan</li>
<li>Paid plans offer more frequent checks</li>
</ul>
<h2>Right-Click Menu</h2>
<p>You can quickly access PageCrawl from any webpage using the right-click context menu:</p>
<ol>
<li>Right-click anywhere on a webpage</li>
<li>Select <strong>"Open in PageCrawl"</strong></li>
</ol>
<div style="background: #f5f5f5; padding: 30px; border-radius: 8px; text-align: center; margin: 20px 0; border: 1px solid #e0e0e0;">
  <img src="/images/blog/browser-extension-context-menu.png" alt="Right-Click Context Menu" style="max-width: 300px; border-radius: 6px; box-shadow: 0 4px 12px rgba(0,0,0,0.15);">
</div>
<p><strong>What happens next depends on whether the page is already monitored:</strong></p>
<ul>
<li>
<p><strong>If the page is already monitored</strong>: You'll be taken directly to the page's dashboard where you can view change history, adjust settings, or check the current status.</p>
</li>
<li>
<p><strong>If the page is not monitored</strong>: You'll be taken to the page creation form with the URL pre-filled, ready to set up monitoring.</p>
</li>
</ul>
<h2>Header Actions</h2>
<p>The extension header provides quick access to:</p>
<ul>
<li><strong>PageCrawl Logo</strong>: Click to open your main dashboard</li>
<li><strong>Workspace Switcher</strong>: Switch between workspaces (if you have multiple)</li>
<li><strong>Help</strong> (question mark icon): Open this guide</li>
</ul>
<h2>More Options</h2>
<p>For advanced configuration (notifications, proxies, actions, etc.), click <strong>"More options →"</strong> below the Start Monitoring button. This opens the full page creation form on PageCrawl with your current settings pre-filled.</p>]]>
            </summary>
                                    <updated>2026-03-05T10:31:12+00:00</updated>
        </entry>
            <entry>
            <title><![CDATA[Add Pages to PageCrawl from iOS Safari]]></title>
            <link rel="alternate" href="https://pagecrawl.io/help/tutorials/article/add-page-from-ios-safari" />
            <id>https://pagecrawl.io/77</id>
            <author>
                <name><![CDATA[PageCrawl.io]]></name>
            </author>
            <summary type="html">
                <![CDATA[<h1>Add Pages to PageCrawl from iOS Safari</h1>
<h3>What Is This?</h3>
<p>Add any webpage to PageCrawl.io monitoring directly from Safari's Share Sheet on your iPhone or iPad. Just tap Share, tap the shortcut, and you're done.</p>
<h3>Install the Shortcut</h3>
<p>Tap the button below on your iPhone or iPad to install the "Add to PageCrawl" shortcut:</p>
<p><a href="https://www.icloud.com/shortcuts/0a26f8166104460e8825872e5d7c3128" class="btn btn-lg button-secondary">Get the Shortcut</a></p>
<p>When prompted, tap <strong>Get Shortcut</strong> to install it.</p>
<h3>How to Use It</h3>
<ol>
<li>Open Safari and navigate to any page you want to monitor</li>
<li>Tap the <strong>Share</strong> button (square with arrow pointing up)</li>
<li>Scroll down and tap <strong>Add to PageCrawl</strong></li>
<li>PageCrawl.io opens with the URL pre-filled</li>
<li>Configure your monitoring options and save</li>
</ol>
<div style="justify-items:center; background: #f5f5f5; padding: 30px; border-radius: 8px; text-align: center; margin: 20px 0; border: 1px solid #e0e0e0;">
  <img src="/images/blog/share-add-to-pagecrawl.png" alt="Using the shortcut from Share Sheet" style="max-width: 300px; border-radius: 6px; box-shadow: 0 4px 12px rgba(0,0,0,0.15);">
</div>
<h3>Works on Mac Too</h3>
<p>This shortcut also works on macOS! In Safari on your Mac:</p>
<ol>
<li>Click the <strong>Share</strong> button in the toolbar</li>
<li>Select <strong>Shortcuts</strong> from the menu</li>
<li>Click <strong>Add to PageCrawl</strong></li>
</ol>
<p>Alternatively, for desktop browsers you can use our <a href="/bookmarklet">bookmarklet</a> — just drag it to your bookmarks bar for one-click access.</p>
<div style="justify-items:center; background: #f5f5f5; padding: 30px; border-radius: 8px; text-align: center; margin: 20px 0; border: 1px solid #e0e0e0;">
  <img src="/images/blog/mac-shortcuts.png" alt="Using the shortcut from Mac" style="max-width: 300px; border-radius: 6px; box-shadow: 0 4px 12px rgba(0,0,0,0.15);">
</div>
<h3>Android Users</h3>
<p>Android doesn't have a Shortcuts app, but you can use our <a href="/bookmarklet">bookmarklet</a> in any mobile browser. Add it to your bookmarks, then tap it when viewing a page you want to monitor.</p>
<h3>Tips</h3>
<ul>
<li><strong>Pin to top of Share Sheet</strong>: Tap "Edit Actions..." at the bottom of the Share Sheet to move "Add to PageCrawl" to your favorites for quicker access.</li>
<li><strong>Works everywhere</strong>: This shortcut works in any app that shares URLs — Safari, Chrome, Firefox, News apps, or anywhere with a Share button.</li>
<li><strong>Stay logged in</strong>: For the smoothest experience, make sure you're logged into PageCrawl.io in Safari.</li>
</ul>]]>
            </summary>
                                    <updated>2026-03-05T10:31:13+00:00</updated>
        </entry>
            <entry>
            <title><![CDATA[What is the difference between Priority Support and Standard Support?]]></title>
            <link rel="alternate" href="https://pagecrawl.io/help/subscription/article/difference-between-ultimate-and-standard-support" />
            <id>https://pagecrawl.io/78</id>
            <author>
                <name><![CDATA[PageCrawl.io]]></name>
            </author>
            <summary type="html">
                <![CDATA[<h1>What is the difference between Priority Support and Standard Support?</h1>
<p>We aim to respond to your inquiries promptly but sometimes due to increased number of support requests, Enterprise and Ultimate customer requests/emails are prioritized over Standard customers. Therefore, the response time is faster, and you may expect a 'higher level' of support in case you are not able to set up the page the way you want.</p>
<p>For technical support our response times are prioritized according to your subscription plan:</p>
<ul>
<li>Free Forever Plan: Technical support not offered</li>
<li>Standard Plan: Within 72 hours (excluding weekends)</li>
<li>Enterprise Plan: Within 24 hours (excluding weekends)</li>
<li>Ultimate Plan: Within 24 hours (excluding weekends)</li>
</ul>]]>
            </summary>
                                    <updated>2026-03-05T10:31:13+00:00</updated>
        </entry>
            <entry>
            <title><![CDATA[PageCrawl.io + n8n integration]]></title>
            <link rel="alternate" href="https://pagecrawl.io/help/integrations/article/pagecrawl-n8n-integration" />
            <id>https://pagecrawl.io/79</id>
            <author>
                <name><![CDATA[PageCrawl.io]]></name>
            </author>
            <summary type="html">
                <![CDATA[<h1>PageCrawl.io + n8n integration</h1>
<div style="background: #f5f5f5; padding: 30px; border-radius: 8px; text-align: center; margin: 20px 0; border: 1px solid #e0e0e0;">
  <img src="/images/blog/n8n-integration-overview.png" alt="PageCrawl.io connected to n8n for automated workflows" style="max-width: 100%; border-radius: 6px; box-shadow: 0 4px 12px rgba(0,0,0,0.15);">
</div>
<p>PageCrawl.io provides dedicated n8n community nodes that integrate directly into your n8n instance. With the <strong>PageCrawl Trigger</strong> and <strong>PageCrawl</strong> nodes, you can trigger workflows when changes are detected and interact with the PageCrawl.io API to manage pages, retrieve diffs, and download screenshots, all from within n8n's visual workflow editor.</p>
<h3>Why integrate PageCrawl.io with n8n?</h3>
<p>n8n is a workflow automation tool that you can self-host or run in the cloud. By connecting PageCrawl.io to n8n, you can:</p>
<ol>
<li><strong>Keep data on your infrastructure</strong>: Run workflows on your own servers, keeping sensitive change data within your network.</li>
<li><strong>Build complex workflows visually</strong>: Use n8n's visual editor to chain together multiple steps, add conditional logic, and connect to hundreds of services.</li>
<li><strong>Avoid per-task pricing</strong>: Unlike hosted automation platforms, self-hosted n8n has no limits on the number of workflow executions.</li>
<li><strong>Connect to developer tools</strong>: Integrate directly with databases, APIs, Git repositories, and internal services that hosted platforms may not support.</li>
</ol>
<h3>Available nodes</h3>
<p>PageCrawl.io provides two n8n nodes:</p>
<h4>PageCrawl Trigger</h4>
<p>The trigger node starts your workflow automatically when something happens on a monitored page. Supported events:</p>
<ul>
<li><strong>Change Detected</strong>: Fires when a monitored page's content changes.</li>
<li><strong>Error</strong>: Fires when a page check fails (timeout, blocked, etc.).</li>
</ul>
<p>You can filter triggers by workspace and by specific page, or listen for changes across all pages in a workspace. The node automatically registers and cleans up webhooks with the PageCrawl.io API.</p>
<h4>PageCrawl (Action node)</h4>
<p>The action node lets you interact with the PageCrawl.io API within your workflows. Available resources and operations:</p>
<p><strong>Page operations</strong></p>
<ul>
<li><strong>Get</strong>: Retrieve details about a monitored page including recent check history.</li>
<li><strong>Quick Create</strong>: Add a new page to monitor with just a URL (auto-detects settings).</li>
<li><strong>Create (Advanced)</strong>: Add a page with full control over elements, actions, conditions, frequency, location, device, and more.</li>
<li><strong>Update</strong>: Modify settings on an existing monitored page.</li>
<li><strong>Delete</strong>: Remove a page from monitoring.</li>
<li><strong>Run Check Now</strong>: Trigger an immediate check on a page.</li>
</ul>
<p><strong>Check operations</strong></p>
<ul>
<li><strong>Get History</strong>: Retrieve check history for a page with change diffs.</li>
<li><strong>Get Diff Image</strong>: Download a visual diff image showing what changed.</li>
<li><strong>Get Diff HTML</strong>: Get the change diff as HTML markup.</li>
<li><strong>Get Diff Markdown</strong>: Get the change diff as Markdown text.</li>
</ul>
<p><strong>Screenshot operations</strong></p>
<ul>
<li><strong>Get Screenshot</strong>: Download the latest (or previous) screenshot of a page.</li>
<li><strong>Get Screenshot Diff</strong>: Download a side-by-side visual comparison screenshot.</li>
</ul>
<h3>Setting up the integration</h3>
<h4>Step 1: Install the PageCrawl community node</h4>
<ol>
<li>Open your n8n instance and go to <strong>Settings</strong> &gt; <strong>Community Nodes</strong>.</li>
<li>Click <strong>Install a community node</strong>.</li>
<li>Enter <code>@pagecrawl/n8n-nodes-pagecrawl</code> as the package name.</li>
<li>Click <strong>Install</strong> and confirm the installation.</li>
<li>Restart n8n if prompted.</li>
</ol>
<h4>Step 2: Add your API credentials</h4>
<ol>
<li>In your <a href="https://pagecrawl.io">PageCrawl.io</a> account, go to <strong>Settings</strong> &gt; <strong>API</strong> and copy your API key.</li>
<li>In n8n, go to <strong>Credentials</strong> and create a new <strong>PageCrawl API</strong> credential.</li>
<li>Paste your API key and save.</li>
</ol>
<h4>Step 3: Create a workflow with the trigger</h4>
<ol>
<li>Create a new workflow in n8n.</li>
<li>Add the <strong>PageCrawl Trigger</strong> node.</li>
<li>Select your workspace and (optionally) a specific page to monitor.</li>
<li>Choose which events to listen for: change detected, error, or both.</li>
<li>Click <strong>Listen for Test Event</strong> to verify the connection. The node will automatically send a test event so you can see the data format.</li>
</ol>
<h4>Step 4: Add workflow actions</h4>
<p>With the trigger in place, add any n8n nodes to define what happens when a change is detected. Some examples:</p>
<ul>
<li><strong>Store changes in a database</strong> using the PostgreSQL, MySQL, or MongoDB nodes.</li>
<li><strong>Create a GitHub or GitLab issue</strong> for your team to review the change.</li>
<li><strong>Summarize the change with AI</strong> using the OpenAI or Anthropic nodes.</li>
<li><strong>Send a notification</strong> to Matrix, Mattermost, or any platform with an API.</li>
<li><strong>Trigger an incident</strong> in PagerDuty or Opsgenie for critical page changes.</li>
</ul>
<p>You can also add the <strong>PageCrawl</strong> action node mid-workflow to fetch additional data, such as downloading a diff image to attach to a notification or retrieving the full page details.</p>
<h4>Step 5: Activate</h4>
<p>Once your workflow is tested and working, activate it so it runs automatically whenever changes are detected.</p>
<h3>Example workflow ideas</h3>
<ul>
<li><strong>Compliance monitoring</strong>: When a vendor's terms of service change, use the PageCrawl node to get the diff as Markdown, store it in a database, create a Jira ticket for legal review, and notify the compliance team on Slack.</li>
<li><strong>Competitor intelligence</strong>: When a competitor updates their pricing page, get the diff HTML, summarize the key changes with OpenAI, log them in a spreadsheet, and send a summary to your sales channel.</li>
<li><strong>Visual regression tracking</strong>: When a page changes, download the screenshot diff image, attach it to a GitHub issue, and alert the design team for review.</li>
<li><strong>Uptime and integrity checks</strong>: Listen for error events, trigger a PagerDuty incident, and post an alert to your ops channel when a critical page becomes unreachable.</li>
</ul>]]>
            </summary>
                                    <updated>2026-03-05T10:31:12+00:00</updated>
        </entry>
            <entry>
            <title><![CDATA[User Access Roles and Permissions]]></title>
            <link rel="alternate" href="https://pagecrawl.io/help/account-settings/article/user-access-roles" />
            <id>https://pagecrawl.io/80</id>
            <author>
                <name><![CDATA[PageCrawl.io]]></name>
            </author>
            <summary type="html">
                <![CDATA[<h1>User Access Roles and Permissions</h1>
<p>PageCrawl uses role-based access control to manage what each team member can do. There are four roles, each with different permission levels.</p>
<h3>Available Roles</h3>
<table>
<thead>
<tr>
<th>Role</th>
<th style="text-align: center;">Manage Team</th>
<th style="text-align: center;">Manage Workspaces</th>
<th style="text-align: center;">Edit Pages</th>
<th style="text-align: center;">View Pages</th>
</tr>
</thead>
<tbody>
<tr>
<td><strong>Owner</strong></td>
<td style="text-align: center;">Yes</td>
</tr>
<tr>
<td><strong>Administrator</strong></td>
<td style="text-align: center;">Yes</td>
</tr>
<tr>
<td><strong>Standard User</strong></td>
<td style="text-align: center;">No</td>
<td style="text-align: center;">Yes</td>
</tr>
<tr>
<td><strong>Viewer</strong></td>
<td style="text-align: center;">No</td>
<td style="text-align: center;">Yes</td>
</tr>
</tbody>
</table>
<h3>Owner</h3>
<p>Each team has exactly one Owner (the account creator). The Owner has full control over all team settings, billing, and member management. Ownership cannot be transferred or removed.</p>
<h3>Administrator</h3>
<p>Administrators can manage the team on behalf of the Owner:</p>
<ul>
<li>Invite and remove team members</li>
<li>Change member roles</li>
<li>Assign workspace access to members</li>
<li>Create and delete workspaces</li>
<li>Edit all team and workspace settings (notifications, integrations, AI, etc.)</li>
<li>Full access to all workspaces</li>
</ul>
<h3>Standard User</h3>
<p>Standard Users can work within their assigned workspaces:</p>
<ul>
<li>View and edit monitored pages in assigned workspaces</li>
<li>Create new pages and tracked elements</li>
<li>Review changes and leave feedback</li>
<li>Access all monitoring features within their workspaces</li>
</ul>
<p>Standard Users cannot invite members, change roles, or access workspaces they haven't been assigned to.</p>
<h3>Viewer</h3>
<p>Viewers have read-only access to their assigned workspaces:</p>
<ul>
<li>View monitored pages and detected changes</li>
<li>Browse change history and reports</li>
<li>Cannot create, edit, or delete pages</li>
<li>Cannot modify any settings</li>
</ul>
<h3>Managing Team Members</h3>
<p>To manage roles and access:</p>
<ol>
<li>Go to <strong>Settings</strong> &gt; <strong>Team</strong> &gt; <strong>Users</strong></li>
<li>View the member list showing name, email, workspaces, and role</li>
<li>Click a member's role to change it (Owner and Administrator only)</li>
<li>Click <strong>Update</strong> in the Workspaces column to assign or revoke workspace access</li>
</ol>
<h3>Inviting New Members</h3>
<ol>
<li>Go to <strong>Settings</strong> &gt; <strong>Team</strong> &gt; <strong>Users</strong></li>
<li>Click <strong>Invite Member</strong></li>
<li>Enter their email address and select a role</li>
<li>The invite expires after 2 weeks. You can resend it if needed.</li>
</ol>
<h3>Workspace Access</h3>
<p>Members only see workspaces they've been assigned to. Administrators can assign workspace access per user. If all workspace access is removed from a user, they are removed from the team entirely.</p>
<p>This means you can have team members who only see specific projects, clients, or departments without exposure to other workspaces.</p>]]>
            </summary>
                                    <updated>2026-03-05T10:31:12+00:00</updated>
        </entry>
            <entry>
            <title><![CDATA[Advanced Configuration Options for Power Users]]></title>
            <link rel="alternate" href="https://pagecrawl.io/help/features/article/advanced-configuration" />
            <id>https://pagecrawl.io/81</id>
            <author>
                <name><![CDATA[PageCrawl.io]]></name>
            </author>
            <summary type="html">
                <![CDATA[<h1>Advanced Configuration Options for Power Users</h1>
<p>PageCrawl offers advanced configuration options for users who need fine-grained control over their monitoring setup. This guide covers the key power-user features.</p>
<h3>Power User Mode</h3>
<p>When editing a monitored page, you can enable <strong>Power User</strong> mode using the toggle in the page settings. This reveals additional settings that are hidden by default to keep the interface clean for everyday use.</p>
<p>With Power User mode enabled, you get access to:</p>
<ul>
<li><strong>Engine selection</strong> - Choose between the default browser engine, Stealth Mode (for sites that block bots), or Fast mode (optimized for static pages)</li>
<li><strong>Intelligent Reconnect</strong> - Automatically retry failed checks with a different approach</li>
<li><strong>Custom User Agent</strong> - Set a specific browser user agent string</li>
<li><strong>Custom Headers</strong> - Add custom HTTP headers to requests</li>
<li><strong>Custom JavaScript</strong> - Run JavaScript code before or after page load</li>
<li><strong>Device emulation</strong> - Emulate specific device viewports</li>
</ul>
<p>Power User settings are marked with a special icon throughout the edit form so you can easily identify them.</p>
<h3>Advanced Mode vs Simple Mode</h3>
<p>PageCrawl offers two ways to add and edit monitored pages:</p>
<p><strong>Simple Mode</strong> (default) guides you through setup step by step. It auto-detects the best settings, shows a live preview, and covers the most common use cases. Best for getting started quickly.</p>
<p><strong>Advanced Mode</strong> gives you full control over every setting in a single form. Use it when you need to:</p>
<ul>
<li>Track multiple elements on the same page simultaneously</li>
<li>Configure complex action sequences</li>
<li>Set up templates or apply existing ones</li>
<li>Fine-tune notification conditions per element</li>
<li>Work with custom selectors, thresholds, and comparison methods</li>
</ul>
<p>You can switch to Advanced Mode from the Simple Mode page by clicking the "Advanced setup" link at the bottom. If you prefer to always use Advanced Mode, check the "Always show Advanced Setup" option.</p>
<h3>Multiple Tracked Elements</h3>
<p>Each monitored page can track multiple elements simultaneously, each with its own comparison method:</p>
<table>
<thead>
<tr>
<th>Type</th>
<th>What It Tracks</th>
</tr>
</thead>
<tbody>
<tr>
<td><strong>Full Page</strong></td>
<td>Entire page text content</td>
</tr>
<tr>
<td><strong>Text</strong></td>
<td>Text content of a specific element (by CSS/XPath selector)</td>
</tr>
<tr>
<td><strong>Number</strong></td>
<td>Numeric values with configurable change thresholds</td>
</tr>
<tr>
<td><strong>Price</strong></td>
<td>Price values with currency detection</td>
</tr>
<tr>
<td><strong>Availability</strong></td>
<td>In-stock/out-of-stock status</td>
</tr>
<tr>
<td><strong>Links</strong></td>
<td>All outgoing links on the page</td>
</tr>
<tr>
<td><strong>Visual</strong></td>
<td>Visual screenshot comparison with diff percentage</td>
</tr>
<tr>
<td><strong>HTML</strong></td>
<td>Raw HTML structure of an element</td>
</tr>
<tr>
<td><strong>Boolean</strong></td>
<td>Presence or absence of an element</td>
</tr>
<tr>
<td><strong>JSON</strong></td>
<td>JSON response content with path extraction</td>
</tr>
</tbody>
</table>
<p>Each tracked element can have its own set of <a href="/help/features/article/perform-actions">actions</a> and comparison settings.</p>
<h3>Templates</h3>
<p>Templates let you save a monitoring configuration and apply it to multiple pages automatically. This is especially useful when combined with <a href="/help/features/article/page-discovery">Page Discovery</a> for auto-monitoring newly discovered pages.</p>
<p>To create a template:</p>
<ol>
<li>Go to <strong>Settings</strong> &gt; <strong>Workspace</strong> &gt; <strong>Templates</strong></li>
<li>Enter a sample URL to auto-fill settings</li>
<li>Configure tracked elements, actions, check frequency, and notifications</li>
<li>Save the template</li>
</ol>
<p>Templates can also define URL filters for page discovery, so new pages matching your criteria are automatically monitored with the template's settings.</p>
<h3>Bulk Editing</h3>
<p>Edit settings across multiple pages at once:</p>
<ol>
<li>Select pages from your page list using the checkboxes</li>
<li>Click <strong>Bulk Edit</strong> in the toolbar</li>
<li>Choose what to change: check frequency, engine, proxy, actions, notifications, tags, or folder</li>
<li>Apply changes to all selected pages</li>
</ol>
<p>Available on paid plans.</p>
<h3>AI Configuration</h3>
<p>Configure AI-powered change analysis per workspace:</p>
<ol>
<li>Go to <strong>Settings</strong> &gt; <strong>Workspace</strong> &gt; <strong>Integrations</strong> &gt; <strong>AI</strong></li>
<li>Choose your AI provider (OpenAI, Gemini, or Anthropic)</li>
<li>Select a model</li>
<li>Optionally set focus areas to guide the AI on what changes matter most</li>
</ol>
<p>Each plan includes monthly AI credits. You can also bring your own API key (BYOK) for unlimited usage. See <a href="/help/integrations/article/ai-byok-setup-guide">AI BYOK Setup</a> for details.</p>
<h3>Custom Check Scheduling</h3>
<p>Control exactly when PageCrawl checks your pages:</p>
<ol>
<li>Go to <strong>Settings</strong> &gt; <strong>Workspace</strong> &gt; <strong>Schedule</strong></li>
<li>Set active monitoring hours (e.g., business hours only)</li>
<li>Choose which days of the week to run checks</li>
<li>Set the workspace timezone</li>
</ol>
<p>This helps reduce unnecessary checks during off-hours and keeps your check quota focused on the times that matter.</p>
<h3>Global Filters</h3>
<p>Apply text filters across all pages in a workspace:</p>
<ol>
<li>Go to <strong>Settings</strong> &gt; <strong>Workspace</strong> &gt; <strong>General</strong></li>
<li>Add global ignored text patterns</li>
<li>These patterns are excluded from change detection on every page in the workspace</li>
</ol>
<p>Useful for filtering out dynamic content like timestamps, ad copy, or session IDs that appear across many pages.</p>
<h3>Proxy Configuration</h3>
<p>Choose where PageCrawl checks your pages from:</p>
<ul>
<li><strong>Default</strong> - Automatic server selection</li>
<li><strong>Custom proxy</strong> - Use your own proxy server for pages behind firewalls or geo-restrictions</li>
<li><strong>Location-specific</strong> - Select from available proxy locations (London, New York, San Francisco, Toronto, Frankfurt, Tel Aviv)</li>
<li><strong>Residential</strong> - Use residential IP addresses for pages that block datacenter IPs</li>
</ul>
<p>Configure per page or apply via bulk edit.</p>]]>
            </summary>
                                    <updated>2026-03-26T05:33:22+00:00</updated>
        </entry>
            <entry>
            <title><![CDATA[JavaScript Tracked Elements and Custom JavaScript Actions]]></title>
            <link rel="alternate" href="https://pagecrawl.io/help/features/article/javascript-tracking-and-actions" />
            <id>https://pagecrawl.io/82</id>
            <author>
                <name><![CDATA[PageCrawl.io]]></name>
            </author>
            <summary type="html">
                <![CDATA[<h1>JavaScript Tracked Elements and Custom JavaScript Actions</h1>
<p>PageCrawl lets you use JavaScript in two powerful ways: as a <strong>tracked element</strong> to extract and monitor computed values, and as a <strong>custom action</strong> to manipulate the page before monitoring. Both run JavaScript directly in the browser context with full access to the DOM.</p>
<h3>JavaScript Tracked Element</h3>
<p>
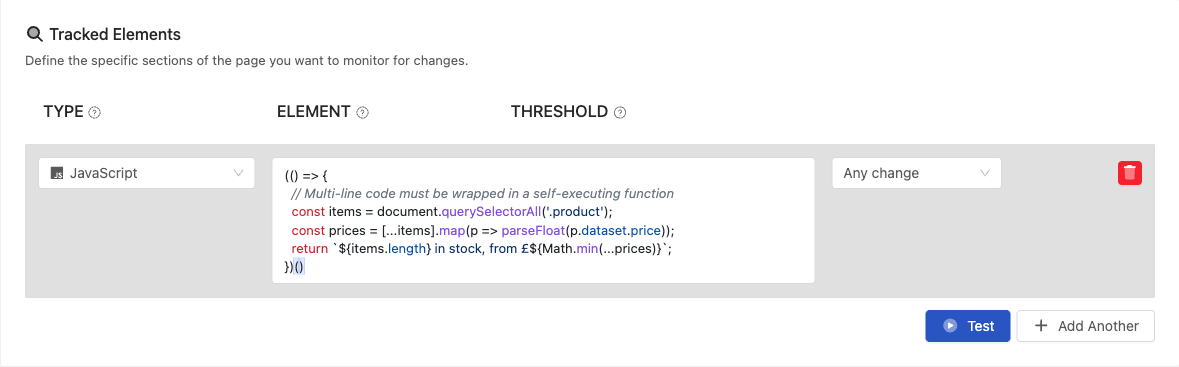
A JavaScript tracked element lets you execute JavaScript code on a page and monitor the return value for changes. This is useful when the data you want to track is not directly accessible via CSS or XPath selectors, for example computed values, data attributes, or content that requires logic to extract.</p>
<p><strong>How to set it up:</strong></p>
<ol>
<li>
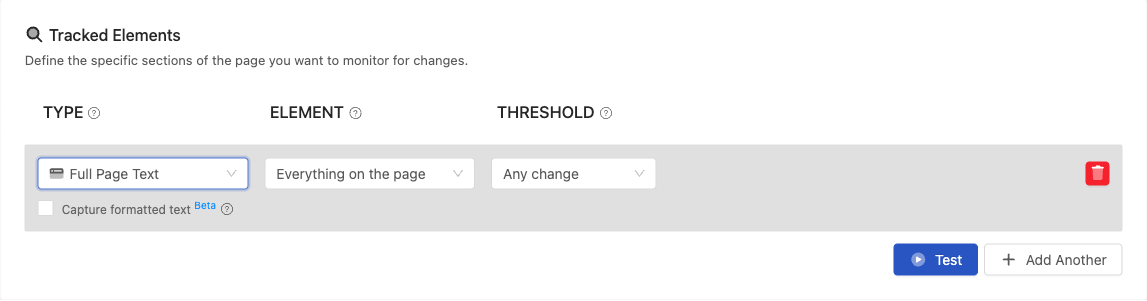
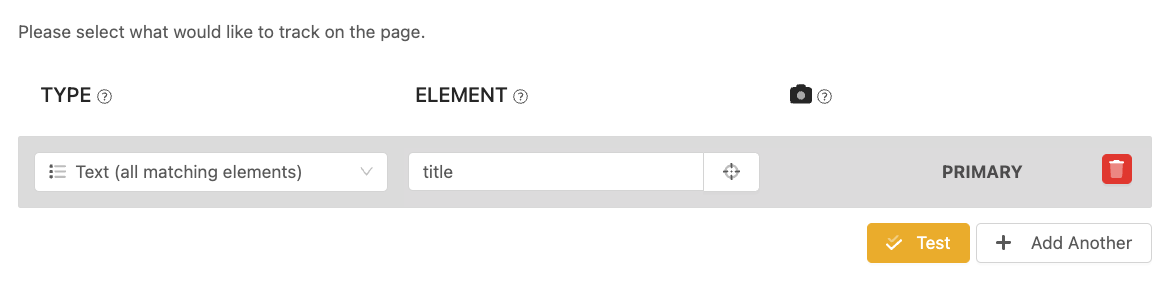
Add a new tracked element to your monitored page</li>
<li>Select <strong>JavaScript</strong> as the element type</li>
<li>Enter your JavaScript code in the code field</li>
<li>The return value of your code becomes the monitored content</li>
</ol>
<p><strong>How it works:</strong> Your JavaScript code runs directly in the browser, giving it full access to the page's DOM, window object, and all standard browser APIs. The return value is captured and compared against the previous check to detect changes.</p>
<p><strong>Examples:</strong></p>
<p>Extract the page title:</p>
<pre><code class="language-javascript">document.title</code></pre>
<p>Get text from a specific element:</p>
<pre><code class="language-javascript">document.querySelector('.status-badge').innerText</code></pre>
<p>Count the number of items in a list:</p>
<pre><code class="language-javascript">
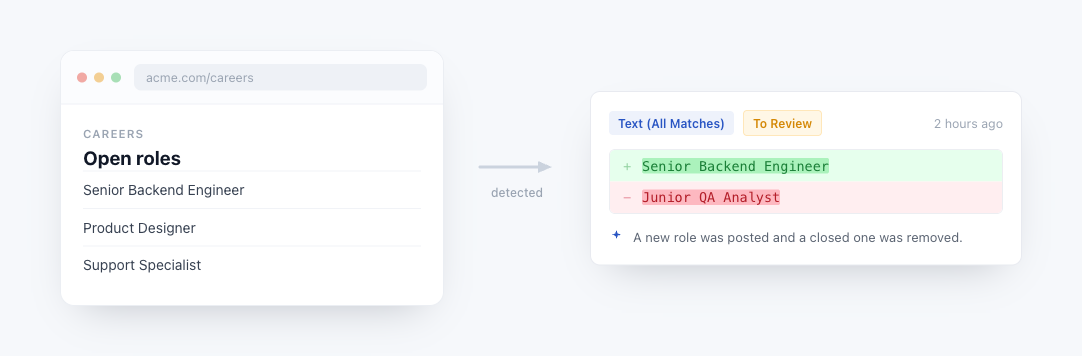
document.querySelectorAll('.job-listing').length</code></pre>
<p>Extract a data attribute:</p>
<pre><code class="language-javascript">document.querySelector('[data-version]').getAttribute('data-version')</code></pre>
<p>Combine multiple values into one:</p>
<pre><code class="language-javascript">Array.from(document.querySelectorAll('.feature-list li')).map(el =&gt; el.textContent.trim()).join(', ')</code></pre>
<p>Extract JSON-LD structured data:</p>
<pre><code class="language-javascript">JSON.parse(document.querySelector('script[type="application/ld+json"]').textContent).name</code></pre>
<p>Count words on a page:</p>
<pre><code class="language-javascript">document.body.innerText.split(/\s+/).filter(w =&gt; w.length &gt; 0).length</code></pre>
<h3>Advanced Examples</h3>
<p>For multi-line logic, wrap your code in an immediately invoked function:</p>
<p>Extract a software version number from a release page:</p>
<pre><code class="language-javascript">(() =&gt; {
  const text = document.querySelector('.release-header, [class*="version"]')?.textContent || '';
  const match = text.match(/v?(\d+\.\d+\.\d+)/);
  return match ? match[1] : 'Version not found';
})()</code></pre>
<p>Build a summary from a table:</p>
<pre><code class="language-javascript">(() =&gt; {
  const rows = document.querySelectorAll('table tbody tr');
  return Array.from(rows).map(row =&gt; {
    const cells = row.querySelectorAll('td');
    return Array.from(cells).map(c =&gt; c.textContent.trim()).join(' | ');
  }).join('\n');
})()</code></pre>
<p>Count job listings by department:</p>
<pre><code class="language-javascript">(() =&gt; {
  const jobs = document.querySelectorAll('.job-listing');
  const departments = {};
  jobs.forEach(job =&gt; {
    const dept = job.querySelector('.department')?.textContent.trim() || 'Other';
    departments[dept] = (departments[dept] || 0) + 1;
  });
  return Object.entries(departments).map(([k, v]) =&gt; `${k}: ${v}`).join('\n');
})()</code></pre>
<p>Extract all outbound links from a page:</p>
<pre><code class="language-javascript">(() =&gt; {
  const host = window.location.hostname;
  const links = Array.from(document.querySelectorAll('a[href]'))
    .map(a =&gt; a.href)
    .filter(href =&gt; href.startsWith('http') &amp;&amp; !href.includes(host));
  return [...new Set(links)].join('\n');
})()</code></pre>
<p>Monitor the number of open issues or pull requests:</p>
<pre><code class="language-javascript">(() =&gt; {
  const text = document.querySelector('[data-tab-item="issues"] .Counter, .issues-count')?.textContent.trim();
  return text ? parseInt(text.replace(/,/g, ''), 10) : 'Not found';
})()</code></pre>
<p>Extract and format event dates from a schedule page:</p>
<pre><code class="language-javascript">(() =&gt; {
  const events = document.querySelectorAll('.event-item, .schedule-row');
  return Array.from(events).map(ev =&gt; {
    const date = ev.querySelector('.date, time')?.textContent.trim();
    const title = ev.querySelector('.title, .event-name')?.textContent.trim();
    return `${date}: ${title}`;
  }).join('\n');
})()</code></pre>
<p><strong>Important notes:</strong></p>
<ul>
<li>Your code should return a value (string, number, or any value that can be converted to text)</li>
<li>If the return value is <code>null</code> or <code>undefined</code>, an empty string is stored</li>
<li>Errors in your code will cause the check to fail for that element</li>
<li>JavaScript tracked elements require a real browser engine (not compatible with Fast mode)</li>
</ul>
<h3>Custom JavaScript Actions</h3>
<p>Custom JavaScript actions let you run JavaScript code on the page as part of the action sequence, before the tracked elements are extracted. Use them for complex interactions that other action types (click, type, wait) cannot handle.</p>
<p><strong>How to set it up:</strong></p>
<ol>
<li>Open the page settings and go to the <strong>Actions</strong> section</li>
<li>Add a new action and select <strong>Custom JavaScript</strong></li>
<li>Enter your JavaScript code</li>
<li>The code runs during the check, before element extraction</li>
</ol>
<p><strong>How it works:</strong> The JavaScript runs in the browser context, similar to tracked elements. The key difference is that the return value is ignored. JavaScript actions are used for their side effects: modifying the DOM, triggering events, or setting up the page state needed for accurate monitoring.
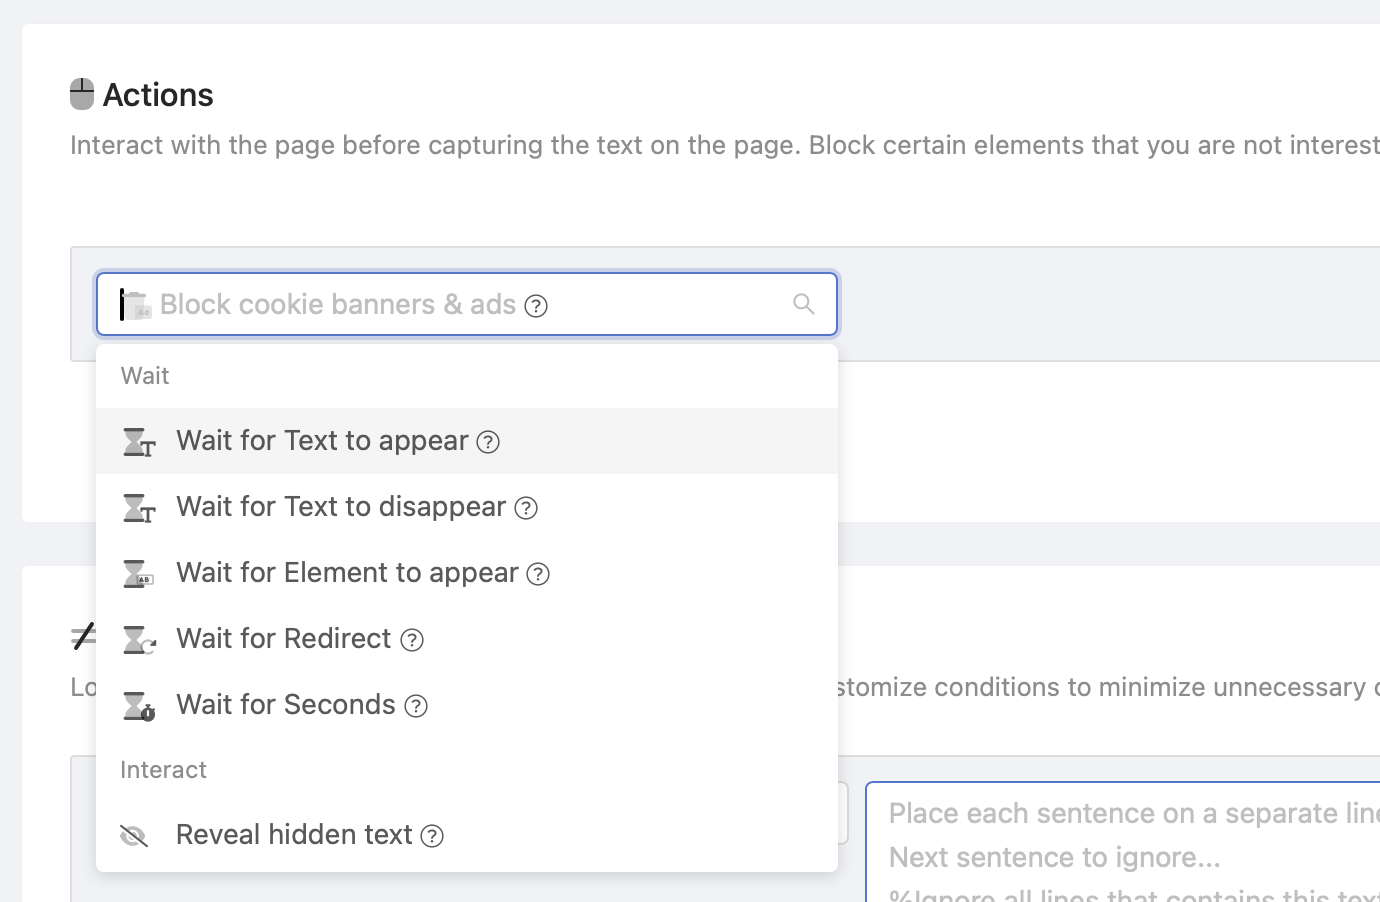
</p>
<p><strong>When to use JavaScript actions:</strong> PageCrawl has built-in actions for common tasks like clicking elements, typing text, scrolling, waiting, removing elements, and selecting dropdown options. Use JavaScript actions when you need to do something the built-in actions cannot handle, such as setting browser storage, dispatching custom events, modifying element properties, or running multi-step DOM manipulation.
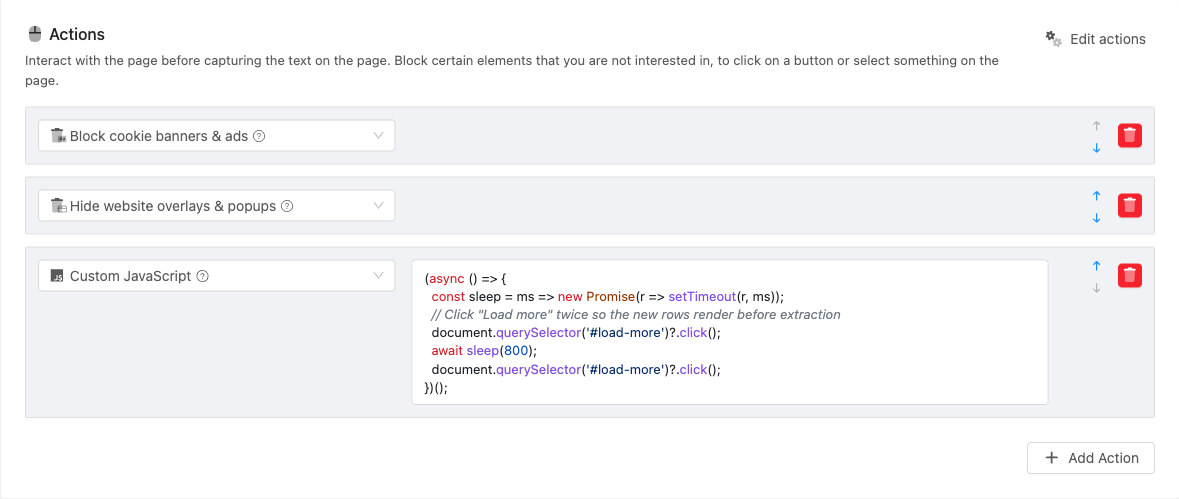
</p>
<p><strong>Examples:</strong></p>
<p>Set localStorage or sessionStorage to change page behavior:</p>
<pre><code class="language-javascript">localStorage.setItem('region', 'us-east')</code></pre>
<p>Set a cookie to bypass a language selector or A/B test:</p>
<pre><code class="language-javascript">document.cookie = 'lang=en; path=/; max-age=86400'</code></pre>
<p>Replace dynamic content (session IDs, timestamps, random tokens) with static text to reduce false positives:</p>
<pre><code class="language-javascript">document.querySelectorAll('[data-session-id], .csrf-token, .nonce').forEach(el =&gt; el.textContent = '[REDACTED]')</code></pre>
<p>Trigger a framework event that a regular click action does not fire (e.g., React, Vue, Angular):</p>
<pre><code class="language-javascript">(() =&gt; {
  const input = document.querySelector('#search-input');
  const nativeInputValueSetter = Object.getOwnPropertyDescriptor(window.HTMLInputElement.prototype, 'value').set;
  nativeInputValueSetter.call(input, 'monitoring keywords');
  input.dispatchEvent(new Event('input', { bubbles: true }));
})()</code></pre>
<p>Toggle a checkbox and dispatch both change and click events to satisfy form validation:</p>
<pre><code class="language-javascript">(() =&gt; {
  const checkbox = document.querySelector('#agree-terms');
  checkbox.checked = true;
  checkbox.dispatchEvent(new Event('change', { bubbles: true }));
  checkbox.dispatchEvent(new Event('click', { bubbles: true }));
})()</code></pre>
<p>Switch a page to a specific view mode by modifying URL parameters without a full reload:</p>
<pre><code class="language-javascript">(() =&gt; {
  const url = new URL(window.location);
  url.searchParams.set('view', 'list');
  url.searchParams.set('per_page', '100');
  window.history.replaceState({}, '', url);
  window.dispatchEvent(new PopStateEvent('popstate'));
})()</code></pre>
<p>
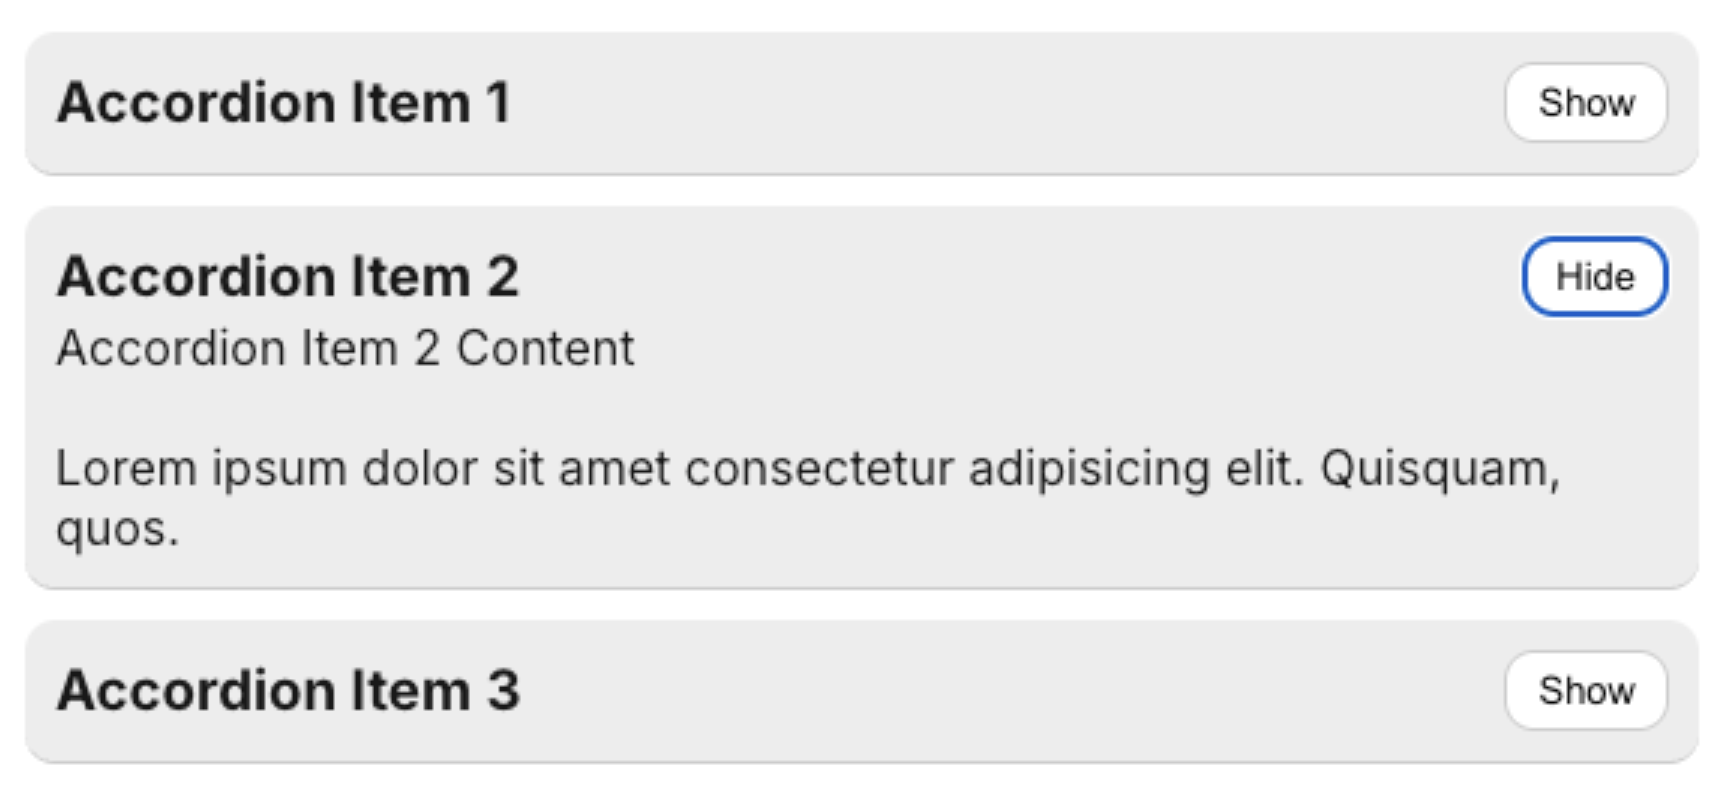
Expand all collapsed sections at once on a FAQ or documentation page:</p>
<pre><code class="language-javascript">document.querySelectorAll('details:not([open])').forEach(el =&gt; el.setAttribute('open', ''))</code></pre>
<p>Remove inline styles that hide content behind a paywall or login wall:</p>
<pre><code class="language-javascript">(() =&gt; {
  document.querySelectorAll('.article-body, .content-area').forEach(el =&gt; {
    el.style.maxHeight = 'none';
    el.style.overflow = 'visible';
    el.classList.remove('truncated', 'blurred', 'paywall');
  });
  document.querySelectorAll('.paywall-overlay, .signup-gate').forEach(el =&gt; el.remove());
})()</code></pre>
<p><strong>Important notes:</strong></p>
<ul>
<li>Errors in JavaScript actions are silently ignored (the check continues)</li>
<li>Actions run after the page has loaded but before elements are extracted</li>
<li>You can chain multiple JavaScript actions with other action types (click, wait, type)</li>
<li>JavaScript actions require a real browser engine (not compatible with Fast mode)</li>
</ul>
<h3>Difference Between JavaScript Elements and Actions</h3>
<table>
<thead>
<tr>
<th></th>
<th>JavaScript Tracked Element</th>
<th>Custom JavaScript Action</th>
</tr>
</thead>
<tbody>
<tr>
<td><strong>Purpose</strong></td>
<td>Extract and monitor a value</td>
<td>Manipulate the page before extraction</td>
</tr>
<tr>
<td><strong>Return value</strong></td>
<td>Captured and tracked for changes</td>
<td>Ignored</td>
</tr>
<tr>
<td><strong>Error handling</strong></td>
<td>Check fails if code errors</td>
<td>Errors silently ignored, check continues</td>
</tr>
<tr>
<td><strong>When it runs</strong></td>
<td>During element extraction</td>
<td>Before element extraction (in action sequence)</td>
</tr>
<tr>
<td><strong>Use case</strong></td>
<td>"Get me this computed value"</td>
<td>"Set up the page so I can monitor it correctly"</td>
</tr>
</tbody>
</table>
<h3>Common Patterns</h3>
<p><strong>Extract then monitor:</strong> Use a JavaScript action to set up the page (e.g., click "Load more"), then use a regular Text or Full Page tracked element to capture the content. This is often simpler than writing a JavaScript tracked element.</p>
<p><strong>Normalize before compare:</strong> Use a JavaScript action to replace dynamic content (timestamps, session IDs, random values) with static placeholders, then track the normalized page content. This reduces false positives without needing global filters.</p>
<p><strong>Complex extraction:</strong> When the value you want to monitor requires logic (math, filtering, combining multiple elements), use a JavaScript tracked element instead of trying to target it with CSS selectors.</p>
<h3>What JavaScript Has Access To</h3>
<p>Your code runs in the browser page context with full access to:</p>
<ul>
<li><strong>DOM API</strong> - <code>document.querySelector()</code>, <code>document.body</code>, <code>document.title</code>, etc.</li>
<li><strong>Window object</strong> - <code>window.location</code>, <code>window.innerWidth</code>, <code>window.scrollTo()</code>, etc.</li>
<li><strong>Standard JavaScript</strong> - String methods, Array methods, Math, JSON, RegExp, etc.</li>
<li><strong>Browser APIs</strong> - <code>localStorage</code>, <code>sessionStorage</code>, <code>fetch()</code>, etc.</li>
<li><strong>Page state</strong> - Any JavaScript variables or functions defined by the page itself</li>
</ul>
<p>Your code does not have access to Node.js APIs or the file system.</p>]]>
            </summary>
                                    <updated>2026-03-26T05:33:22+00:00</updated>
        </entry>
            <entry>
            <title><![CDATA[Monitoring Multiple Elements on a Page]]></title>
            <link rel="alternate" href="https://pagecrawl.io/help/features/article/monitoring-multiple-elements-on-page" />
            <id>https://pagecrawl.io/83</id>
            <author>
                <name><![CDATA[PageCrawl.io]]></name>
            </author>
            <summary type="html">
                <![CDATA[<h1>Monitoring Multiple Elements on a Page</h1>
<p>PageCrawl lets you track multiple parts of the same page independently. Each tracked element gets its own comparison method, selector, label, and threshold, so you can monitor different sections of a page with the settings that make the most sense for each one.</p>
<h3>Why Track Multiple Elements</h3>
<p>Different parts of a page often change in different ways. For example, on a product page you might want to:</p>
<ul>
<li>Track the <strong>price</strong> using the Price element type so you are alerted when it goes up or down</li>
<li>Track the <strong>stock status</strong> using the Availability element type so you know when an item is back in stock</li>
<li>Track the <strong>product description</strong> as text so you catch content updates</li>
</ul>
<p>Each of these uses a dedicated element type designed for that kind of data, giving you more precise alerts and fewer false positives than tracking the entire page as a single unit.</p>
<h3>Supported Element Types</h3>
<p>Each tracked element can use one of these comparison types:</p>
<table>
<thead>
<tr>
<th>Type</th>
<th>Description</th>
</tr>
</thead>
<tbody>
<tr>
<td><strong>Full Page</strong></td>
<td>Tracks the entire visible page content</td>
</tr>
<tr>
<td><strong>Text</strong></td>
<td>Extracts and compares text content from a CSS/XPath selector</td>
</tr>
<tr>
<td><strong>Number</strong></td>
<td>Extracts a numeric value for threshold-based comparison</td>
</tr>
<tr>
<td><strong>Price</strong></td>
<td>Specialized number extraction that handles currency symbols and formatting</td>
</tr>
<tr>
<td><strong>Availability</strong></td>
<td>Detects in-stock/out-of-stock status from common patterns</td>
</tr>
<tr>
<td><strong>Visual</strong></td>
<td>Compares screenshots of a specific element for visual changes</td>
</tr>
<tr>
<td><strong>HTML</strong></td>
<td>Compares the raw HTML of a selected element</td>
</tr>
<tr>
<td><strong>Boolean</strong></td>
<td>Checks whether an element exists or is visible on the page</td>
</tr>
<tr>
<td><strong>Links</strong></td>
<td>Extracts and compares all links within a selected area</td>
</tr>
<tr>
<td><strong>JavaScript</strong></td>
<td>Evaluates a custom JavaScript expression and tracks the return value</td>
</tr>
<tr>
<td><strong>Text (All Matches)</strong></td>
<td>Extracts text from all elements matching a selector</td>
</tr>
<tr>
<td><strong>Text (All Matches Sorted)</strong></td>
<td>Same as above, but sorted alphabetically for order-independent comparison</td>
</tr>
<tr>
<td><strong>HTML (All Matches)</strong></td>
<td>Extracts HTML from all elements matching a selector</td>
</tr>
</tbody>
</table>
<h3>How to Add Multiple Elements</h3>
<ol>
<li>Open the page you want to monitor and click <strong>Edit</strong></li>
<li>Switch to <strong>Advanced Mode</strong> using the toggle at the top of the editor</li>
<li>You will see your current tracked element listed</li>
<li>Click <strong>Add Element</strong> to add another tracked element</li>
<li>Configure each element with its own selector, type, label, and threshold</li>
<li>Save your changes</li>
</ol>
<h3>Simple vs Advanced Mode</h3>
<ul>
<li><strong>Simple Mode</strong> tracks a single element on the page. This is the default for new monitors and is the easiest way to get started.</li>
<li><strong>Advanced Mode</strong> unlocks the ability to track multiple elements. Switch to Advanced Mode using the toggle in the page editor.</li>
</ul>
<p>Once you add more than one tracked element, the monitor stays in Advanced Mode. To return to Simple Mode, remove the extra elements first so only one remains.</p>
<h3>Per-Element Settings</h3>
<p>Each tracked element has its own independent settings:</p>
<ul>
<li><strong>Label</strong> - A descriptive name for the element (e.g., "Product Price", "Stock Status")</li>
<li><strong>Selector</strong> - A CSS selector or XPath expression that identifies the element on the page</li>
<li><strong>Type</strong> - The comparison method to use (text, number, visual, etc.)</li>
<li><strong>Threshold</strong> - How much the value needs to change before triggering a notification</li>
<li><strong>Include hidden text</strong> - Whether to include text from elements hidden via CSS</li>
</ul>
<h3>Click-to-Select</h3>
<p>You do not need to write CSS selectors or XPath expressions manually. Use the visual selector tool to click on elements directly on the page. PageCrawl generates the appropriate selector for you automatically.</p>
<h3>Use Cases</h3>
<p><strong>Product page monitoring</strong> - Use the Price element type for the product price, the Availability element type for stock status, and a Text element for the product description. Each triggers its own alert so you know exactly what changed.</p>
<p><strong>Content sections and sidebar tracking</strong> - Monitor the main article content as text and the sidebar navigation as HTML. Catch content updates without being distracted by layout changes.</p>
<p><strong>Multi-section compliance monitoring</strong> - Track terms of service, privacy policy sections, and legal disclaimers as separate elements on the same page. Each section triggers its own alert when updated.</p>
<h3>Related Articles</h3>
<ul>
<li><a href="/help/features/article/advanced-configuration">Advanced Configuration</a></li>
<li><a href="/help/features/article/available-tracked-monitoring-types">Available Tracked Types</a></li>
<li><a href="/help/features/article/perform-actions">Perform Actions</a></li>
</ul>]]>
            </summary>
                                    <updated>2026-03-05T10:31:12+00:00</updated>
        </entry>
            <entry>
            <title><![CDATA[Perform Actions: Automate Browser Interactions Before Monitoring]]></title>
            <link rel="alternate" href="https://pagecrawl.io/help/features/article/perform-actions" />
            <id>https://pagecrawl.io/84</id>
            <author>
                <name><![CDATA[PageCrawl.io]]></name>
            </author>
            <summary type="html">
                <![CDATA[<h1>Perform Actions: Automate Browser Interactions Before Monitoring</h1>
<p>Actions are tasks that PageCrawl executes in the browser before taking a page snapshot. They let you automate interactions like dismissing cookie banners, clicking tabs, logging in, scrolling to load content, or waiting for dynamic elements to appear.</p>
<p>Actions are configured per tracked element and execute in order from top to bottom.</p>
<h3>Where to Configure Actions</h3>
<p>Open any monitored page and click <strong>Edit</strong>. In the page configuration form, find the <strong>Actions</strong> section. Click <strong>Add Action</strong> to add a new action, then select the action type from the dropdown.</p>
<h3>Available Actions</h3>
<h4>Error Handling</h4>
<table>
<thead>
<tr>
<th>Action</th>
<th>What It Does</th>
</tr>
</thead>
<tbody>
<tr>
<td><strong>Mark as failed</strong></td>
<td>Mark the check as failed when conditions are met (page inaccessible, contains specific text, etc.)</td>
</tr>
</tbody>
</table>
<h4>Block and Hide</h4>
<table>
<thead>
<tr>
<th>Action</th>
<th>What It Does</th>
</tr>
</thead>
<tbody>
<tr>
<td><strong>Remove cookies</strong></td>
<td>Automatically hide cookie consent banners</td>
</tr>
<tr>
<td><strong>Remove overlays</strong></td>
<td>Hide website overlays and popups</td>
</tr>
<tr>
<td><strong>Remove dates</strong></td>
<td>Replace dates with "[DATE REMOVED]" to prevent false positives</td>
</tr>
<tr>
<td><strong>Remove element</strong></td>
<td>Remove a specific element by CSS or XPath selector</td>
</tr>
<tr>
<td><strong>Remove text</strong></td>
<td>Remove elements containing specific text</td>
</tr>
</tbody>
</table>
<h4>Wait</h4>
<table>
<thead>
<tr>
<th>Action</th>
<th>What It Does</th>
</tr>
</thead>
<tbody>
<tr>
<td><strong>Wait for text</strong></td>
<td>Wait up to 15 seconds for specific text to appear on the page</td>
</tr>
<tr>
<td><strong>Wait for text to disappear</strong></td>
<td>Wait up to 15 seconds for specific text to disappear</td>
</tr>
<tr>
<td><strong>Wait for element</strong></td>
<td>Wait for an element (by XPath or CSS selector) to appear</td>
</tr>
<tr>
<td><strong>Wait for redirect</strong></td>
<td>Wait for the page to redirect to a new URL</td>
</tr>
<tr>
<td><strong>Wait</strong></td>
<td>Pause for a specified number of seconds</td>
</tr>
</tbody>
</table>
<h4>Interact</h4>
<table>
<thead>
<tr>
<th>Action</th>
<th>What It Does</th>
</tr>
</thead>
<tbody>
<tr>
<td><strong>Click button</strong></td>
<td>Click a button element</td>
</tr>
<tr>
<td><strong>Click element</strong></td>
<td>Click any element by selector</td>
</tr>
<tr>
<td><strong>Click at coordinates</strong></td>
<td>Click at specific X/Y pixel coordinates</td>
</tr>
<tr>
<td><strong>Hover</strong></td>
<td>Hover over an element</td>
</tr>
<tr>
<td><strong>Type text</strong></td>
<td>Type text into an input field</td>
</tr>
<tr>
<td><strong>Select option</strong></td>
<td>Select an option from a dropdown</td>
</tr>
<tr>
<td><strong>Submit form</strong></td>
<td>Submit a form</td>
</tr>
<tr>
<td><strong>Scroll to bottom</strong></td>
<td>Scroll the page to the bottom (useful for lazy-loaded content)</td>
</tr>
<tr>
<td><strong>Go back</strong></td>
<td>Navigate back in browser history</td>
</tr>
<tr>
<td><strong>Show hidden elements</strong></td>
<td>Force hidden elements to be visible</td>
</tr>
</tbody>
</table>
<h4>Advanced</h4>
<table>
<thead>
<tr>
<th>Action</th>
<th>What It Does</th>
</tr>
</thead>
<tbody>
<tr>
<td><strong>Disable JavaScript</strong></td>
<td>Disable JavaScript before the page loads</td>
</tr>
<tr>
<td><strong>Set cookie</strong></td>
<td>Set or manage browser cookies</td>
</tr>
<tr>
<td><strong>Execute JavaScript</strong></td>
<td>Run custom JavaScript code on the page</td>
</tr>
<tr>
<td><strong>Handle CAPTCHA</strong></td>
<td>Interact with CAPTCHA challenges</td>
</tr>
</tbody>
</table>
<h3>Common Use Cases</h3>
<p><strong>Dismiss cookie banners</strong>: Add a "Remove cookies" action to automatically hide consent popups that can trigger false change notifications.</p>
<p><strong>Load lazy content</strong>: Add "Scroll to bottom" followed by "Wait" (2-3 seconds) to load content that only appears when scrolling.</p>
<p><strong>Navigate to a tab or section</strong>: Add a "Click element" action with the CSS selector of the tab you want to monitor.</p>
<p><strong>Login to a page</strong>: Add "Type text" actions for username and password fields, followed by "Click button" to submit the login form.</p>
<p><strong>Wait for dynamic content</strong>: Add "Wait for text" with the text that appears after the page finishes loading (e.g., "Showing results").</p>]]>
            </summary>
                                    <updated>2026-03-05T10:31:12+00:00</updated>
        </entry>
            <entry>
            <title><![CDATA[Review Board: Organize and Track Page Changes]]></title>
            <link rel="alternate" href="https://pagecrawl.io/help/features/article/review-board" />
            <id>https://pagecrawl.io/85</id>
            <author>
                <name><![CDATA[PageCrawl.io]]></name>
            </author>
            <summary type="html">
                <![CDATA[<h1>Review Board: Organize and Track Page Changes</h1>
<p>The Review Board is a Kanban-style board that helps you organize and track detected changes across your monitored pages. Instead of reviewing changes one by one, you can drag and drop change cards between customizable lanes to manage your review workflow.</p>
<h3>Accessing the Review Board</h3>
<p>Navigate to the <strong>Review</strong> tab in the main sidebar to open the board.</p>
<h3>How It Works</h3>
<p>Each time PageCrawl detects a change on one of your monitored pages, a card appears on the board. Cards show:</p>
<ul>
<li>Page name and URL</li>
<li>Time since the change was detected</li>
<li>Visual difference percentage</li>
<li>AI priority score and importance tag (if AI is enabled)</li>
</ul>
<p>Click any card to view the full change details, timeline, and AI summary.</p>
<h3>Customizing Lanes</h3>
<p>By default, the board includes three lanes: <strong>To Review</strong>, <strong>Reviewed</strong>, and <strong>Flagged</strong>. You can customize these to match your workflow:</p>
<ol>
<li>Click the <strong>+</strong> button to add a new lane</li>
<li>Give the lane a name and pick a color</li>
<li>Drag lanes to reorder them</li>
<li>Click the lane header to edit or delete it</li>
</ol>
<p>Common lane setups:</p>
<ul>
<li><strong>New / In Review / Done</strong> - Simple three-stage workflow</li>
<li><strong>New / Important / Needs Action / Archived</strong> - Priority-based workflow</li>
<li><strong>New / Design Team / Dev Team / Resolved</strong> - Team-based workflow</li>
</ul>
<h3>Filtering and Sorting</h3>
<p>Use the toolbar at the top of the board to filter changes:</p>
<ul>
<li><strong>Folders</strong> - Show changes from a specific folder</li>
<li><strong>Tags</strong> - Filter by label</li>
<li><strong>Date range</strong> - Show changes from the last 7, 30, or 90 days, or a custom range</li>
<li><strong>Sort</strong> - Order cards by most recent, oldest, or priority score</li>
</ul>
<h3>Feedback Auto-Review</h3>
<p>When enabled, giving thumbs-up or thumbs-down feedback on a change notification automatically moves the card to your "Reviewed" lane. Enable this from the gear icon menu on the board.</p>
<p>You can configure which lane cards move to after positive or negative feedback.</p>]]>
            </summary>
                                    <updated>2026-03-05T10:31:12+00:00</updated>
        </entry>
            <entry>
            <title><![CDATA[Sitemap Monitoring: Automatically Detect New Pages on Any Website]]></title>
            <link rel="alternate" href="https://pagecrawl.io/help/features/article/sitemap-monitoring" />
            <id>https://pagecrawl.io/86</id>
            <author>
                <name><![CDATA[PageCrawl.io]]></name>
            </author>
            <summary type="html">
                <![CDATA[<h1>Sitemap Monitoring: Automatically Detect New Pages on Any Website</h1>
<p>Most websites maintain an XML sitemap listing every page on the site. They do this for SEO: a sitemap tells Google, Bing, and other search engines exactly which URLs exist, when each one was last modified, and how often it changes. Without a sitemap, search engines have to discover pages by crawling links one by one, which is slow and often misses freshly published or deeply nested content. Because Google rewards indexable content, almost every CMS (WordPress, Shopify, Squarespace, Wix, etc.) generates and publishes a sitemap automatically.</p>
<p>For change monitoring, that same sitemap is a goldmine - it is the website's own up-to-date list of every page that matters, maintained by the site itself. PageCrawl can monitor these sitemaps to detect new pages, removed URLs, and structural changes automatically.</p>
<p>PageCrawl supports two distinct ways to monitor a sitemap, and you should pick the one that fits your goal:</p>
<ul>
<li><strong><a href="/help/features/article/page-discovery">Page Discovery (Scan a Website)</a></strong> — turns each new URL into its own tracked page with full change history, screenshots, content alerts, and AI summaries. Best for deep monitoring of individual pages.</li>
<li><strong><a href="/help/features/article/feed-tracking-mode">Feed tracking mode</a></strong> — treats the sitemap URL as a single tracked element and emits item-level alerts when URLs are added or removed. Best for lightweight new-URL alerts when you do not need per-page content tracking.</li>
</ul>
<p>Most teams pick one or the other for a given site depending on whether they need deep per-page tracking or just new-URL alerts.</p>
<h3>Approach 1: Page Discovery (Scan a Website)</h3>
<p>This is the heavy-duty approach. Each new URL discovered in the sitemap becomes its own tracked page in your workspace, with full change history, screenshots, content alerts, and AI summaries.</p>
<h4>How it works</h4>
<ol>
<li>PageCrawl downloads the website's XML sitemap on your configured schedule</li>
<li>New URLs are compared against the previous scan</li>
<li>Newly discovered pages are matched against your filters</li>
<li>You receive a notification listing the new pages</li>
<li>Optionally, matched pages are auto-monitored for content changes</li>
</ol>
<h4>Setting it up</h4>
<ol>
<li>Click <strong>Track New Page</strong> and select <strong>Scan a Website</strong></li>
<li>Enter the website URL (e.g., <code>competitor.com</code>)</li>
<li>PageCrawl automatically detects the sitemap</li>
<li>Set your check frequency and add filters</li>
<li>Enable notifications and optionally enable auto-monitoring</li>
</ol>
<h4>Filtering discovered pages</h4>
<p>Large websites may add many pages between checks. Filters help you focus on what matters:</p>
<ul>
<li><strong>URL filters</strong> - Match by path patterns (e.g., <code>/products/</code>, <code>/blog/2026/*</code>)</li>
<li><strong>Exclude filters</strong> - Skip irrelevant sections (e.g., <code>/products/accessories/</code>)</li>
<li><strong>Title/content filters</strong> - Match against page title or body text after fetching</li>
</ul>
<p>Exclude filters always take priority over include filters. You can combine multiple filter types.</p>
<h4>Auto-monitoring</h4>
<p>When auto-monitoring is enabled, pages matching your filters are automatically added to your monitoring workspace. For example:</p>
<ol>
<li>A competitor publishes a new product page on Monday</li>
<li>Sitemap monitoring discovers the URL the same day</li>
<li>From Tuesday onward, PageCrawl tracks that page for price and content changes</li>
</ol>
<p>No manual setup required. Combined with <a href="/help/features/article/organized-page-monitoring">templates</a>, auto-monitored pages inherit your preferred check frequency, notification channels, and tracking settings.</p>
<h4>Beyond sitemaps</h4>
<p>Not all websites have complete sitemaps. PageCrawl supplements sitemap monitoring with additional discovery methods:</p>
<ul>
<li><strong>Base URL Link Discovery</strong> - Extracts all links from a specific page</li>
<li><strong>Deep Scan</strong> - Follows links multiple levels deep with JavaScript rendering</li>
<li><strong>Automatic Mode</strong> - Runs all discovery methods together and deduplicates results</li>
</ul>
<p>See <a href="/help/features/article/page-discovery">Page Discovery</a> for full details on all discovery methods.</p>
<h4>Plan limits</h4>
<p>Sitemap monitoring via Page Discovery is available on all plans:</p>
<table>
<thead>
<tr>
<th>Plan</th>
<th>Pages per Website</th>
</tr>
</thead>
<tbody>
<tr>
<td>Free</td>
<td>Up to 2,000</td>
</tr>
<tr>
<td>Standard</td>
<td>Up to 20,000</td>
</tr>
<tr>
<td>Enterprise</td>
<td>Up to 100,000</td>
</tr>
</tbody>
</table>
<p>All plans include filters, notifications, and auto-monitoring.</p>
<h3>Approach 2: Feed Tracking Mode</h3>
<p>This is the lightweight approach. Instead of creating one tracked page per URL, the entire sitemap becomes a single tracked element. You get an alert when URLs are added or removed, but PageCrawl does not fetch or track the content of each page.</p>
<h4>How it works</h4>
<ol>
<li>PageCrawl fetches the sitemap XML on your configured schedule</li>
<li>The XML is parsed into a list of items - one per <code>&lt;url&gt;</code> entry</li>
<li>Each item is identified by its <code>&lt;loc&gt;</code> URL (the stable key)</li>
<li>The new list is compared against the previous check using the keys</li>
<li>You receive a notification listing the URLs that were added or removed</li>
</ol>
<p>There is only one Change record in your workspace - the sitemap monitor itself - regardless of how many URLs the sitemap contains.</p>
<h4>Setting it up</h4>
<ol>
<li>Click <strong>Track New Page</strong></li>
<li>Paste the sitemap URL directly (e.g., <code>competitor.com/sitemap.xml</code>)</li>
<li>PageCrawl auto-detects it as a sitemap and switches to Feed mode</li>
<li>Confirm the preview shows the URLs you expect</li>
<li>Adjust the <strong>Track first N items</strong> cap if needed</li>
<li>Choose your notification channels and save</li>
</ol>
<h4>The item limit</h4>
<p>Feeds are capped at a per-plan number of items so a 50,000-URL sitemap does not produce 50,000-item JSON blobs on every check:</p>
<table>
<thead>
<tr>
<th>Plan</th>
<th>Maximum Items Per Feed</th>
</tr>
</thead>
<tbody>
<tr>
<td>Free</td>
<td>10</td>
</tr>
<tr>
<td>Standard</td>
<td>100</td>
</tr>
<tr>
<td>Enterprise</td>
<td>1,000</td>
</tr>
<tr>
<td>Ultimate</td>
<td>10,000</td>
</tr>
</tbody>
</table>
<p>Items are returned in document order. For RSS and Atom feeds this is fine because the newest items are conventionally at the top, but <strong>sitemaps do not guarantee that</strong>. If your sitemap has more URLs than your plan cap, the UI shows a notice and suggests either raising the cap or using Page Discovery instead, which has no per-feed cap (it uses your monitor quota).</p>
<p>For sites with both a sitemap and an RSS or Atom feed, the RSS/Atom feed is usually a better choice for Feed mode because new content is guaranteed to appear at the top. Try <code>/feed</code>, <code>/rss</code>, or <code>/atom.xml</code> on the site.</p>
<h4>When to choose Feed mode</h4>
<ul>
<li>You only need new-URL alerts, not per-page change tracking</li>
<li>The site has a small or medium sitemap that fits inside your plan's item cap</li>
<li>You do not want each URL consuming a monitor slot from your plan</li>
</ul>
<p>For fully-fledged monitoring with per-page change history, screenshots, content alerts, AI summaries, and proper handling of large sitemaps, use <strong><a href="/help/features/article/page-discovery">Page Discovery (Scan a Website)</a></strong> instead. Feed mode is intentionally minimal - it is a fast way to get new-URL notifications without the overhead of tracking each page, but it cannot replace Page Discovery for serious change monitoring.</p>
<h4>Sitemap vs RSS coverage (important)</h4>
<p>If you are choosing between monitoring a site's sitemap and its RSS or Atom feed, the two are not equivalent:</p>
<ul>
<li><strong>A sitemap lists every indexable URL on the site.</strong> A WordPress blog with 500 posts will have all 500 in <code>sitemap.xml</code>. New posts appear there as soon as the CMS regenerates the sitemap.</li>
<li><strong>An RSS or Atom feed is typically a rolling window of the most recent 10 to 20 posts.</strong> Older entries fall off the end as new ones arrive. The feed is designed for "what is new", not "what exists".</li>
</ul>
<p>For tracking new content, both work - the RSS feed is usually more reliable because new posts are guaranteed to appear at the top, but you cannot use the RSS feed to discover the site's full back catalog. Use the sitemap when you need complete URL coverage and the RSS feed when you only care about new content.</p>
<h3>Related Articles</h3>
<ul>
<li><a href="/help/features/article/feed-tracking-mode">Feed tracking mode</a> - lightweight alternative that treats the sitemap as a single tracked feed instead of auto-creating per-page monitors</li>
<li><a href="/help/features/article/page-discovery">Page Discovery</a> - other discovery methods (URL Scanning, Deep Crawl, Automatic Mode)</li>
<li><a href="/help/features/article/organized-page-monitoring">Organized page monitoring</a> - templates and folders for keeping auto-monitored pages tidy</li>
</ul>]]>
            </summary>
                                    <updated>2026-04-11T09:04:56+00:00</updated>
        </entry>
            <entry>
            <title><![CDATA[Web Archiving with WACZ: Preserve Full Page Snapshots]]></title>
            <link rel="alternate" href="https://pagecrawl.io/help/features/article/web-archiving-wacz" />
            <id>https://pagecrawl.io/87</id>
            <author>
                <name><![CDATA[PageCrawl.io]]></name>
            </author>
            <summary type="html">
                <![CDATA[<h1>Web Archiving with WACZ: Preserve Full Page Snapshots</h1>
<p>PageCrawl can automatically create a full web archive of your monitored pages every time a change is detected. Archives capture the complete page (HTML, CSS, images, scripts) so you can replay it exactly as it appeared at that moment.</p>
<p>Archives are saved in the WACZ (Web Archive Collection Zipped) format, an open standard for web archiving used by libraries, governments, and legal teams worldwide.</p>
<p><em>Available on Ultimate plan.</em></p>
<h3>How It Works</h3>
<ol>
<li>PageCrawl detects a change on a monitored page</li>
<li>A full WACZ archive is created capturing the complete page state</li>
<li>The archive is stored securely in the cloud</li>
<li>You can replay the archived page at any time from the change history</li>
</ol>
<p>If WACZ generation fails (e.g., due to complex page structure), PageCrawl falls back to creating a self-contained HTML archive instead.</p>
<h3>How Archives Differ from Screenshots</h3>
<p>PageCrawl offers both screenshots and web archives, but they serve different purposes:</p>
<table>
<thead>
<tr>
<th></th>
<th>Screenshot</th>
<th>Web Archive (WACZ)</th>
</tr>
</thead>
<tbody>
<tr>
<td><strong>What it captures</strong></td>
<td>A flat image of the visible page</td>
<td>The complete page: HTML, CSS, JavaScript, images, fonts</td>
</tr>
<tr>
<td><strong>Interactivity</strong></td>
<td>None (static image)</td>
<td>Fully interactive: scroll, click links, hover over elements</td>
</tr>
<tr>
<td><strong>Content below the fold</strong></td>
<td>Only if full-page screenshot is enabled</td>
<td>Always included, the entire page is preserved</td>
</tr>
<tr>
<td><strong>Dynamic content</strong></td>
<td>Shows one visual state</td>
<td>Preserves interactive elements, dropdowns, tabs</td>
</tr>
<tr>
<td><strong>File size</strong></td>
<td>Small (typically under 1 MB)</td>
<td>Larger (includes all page assets)</td>
</tr>
<tr>
<td><strong>Best for</strong></td>
<td>Quick visual reference, visual diff comparison</td>
<td>Legal evidence, compliance records, full preservation</td>
</tr>
</tbody>
</table>
<p>Screenshots are great for a quick visual snapshot and for visual change detection (highlighting pixel differences). Web archives go further by preserving the entire page so you can interact with it later exactly as it appeared.</p>
<h3>How PageCrawl Archives Differ from Archive.org</h3>
<p>The Internet Archive (archive.org) and PageCrawl both preserve web pages, but they work very differently:</p>
<p><strong>Archive.org (Wayback Machine):</strong></p>
<ul>
<li>Public, community-driven project that crawls the open web</li>
<li>Snapshots are taken on their own schedule (often weeks or months apart)</li>
<li>No control over when or how often pages are archived</li>
<li>Pages behind logins, paywalls, or bot protection are usually not captured</li>
<li>Anyone can view the archived pages</li>
<li>No change detection or notifications</li>
</ul>
<p><strong>PageCrawl Web Archiving:</strong></p>
<ul>
<li>Private to your account, stored securely in the cloud</li>
<li>Archives are created automatically every time a change is detected</li>
<li>You control the check frequency (every 5 minutes to daily)</li>
<li>Works with pages behind logins using <a href="/help/features/article/perform-actions">browser actions</a> (click, type, wait)</li>
<li>Works with pages behind bot protection</li>
<li>Archives are paired with change detection, so you know exactly what changed and when</li>
<li>Download WACZ files for offline storage or legal use</li>
</ul>
<p>In short, archive.org is best for general public web preservation. PageCrawl archiving is designed for active monitoring where you need precise, private, frequent snapshots tied to detected changes.</p>
<h3>Viewing Archives</h3>
<p>To view an archived page:</p>
<ol>
<li>Open a monitored page and go to its change history</li>
<li>Click on any check that has an archive (indicated by an archive icon)</li>
<li>The archive viewer opens, showing the page exactly as it appeared</li>
<li>Use the previous/next arrows to browse between archived versions</li>
</ol>
<p>The viewer uses ReplayWeb.page to render WACZ archives interactively in your browser. You can scroll, click links, and interact with the page as if you were browsing it live at that point in time.</p>
<h3>Downloading Archives</h3>
<p>You can download any archive file directly:</p>
<ol>
<li>Open the archive viewer for the check you want</li>
<li>Click the download button to save the WACZ file</li>
<li>Open it with any WACZ-compatible viewer (ReplayWeb.page, Webrecorder, etc.)</li>
</ol>
<p>Downloaded archives can be used for legal evidence, compliance records, or offline browsing.</p>
<h3>Use Cases</h3>
<ul>
<li><strong>Legal and compliance</strong> - Preserve evidence of website content at specific dates for disputes, contracts, or regulatory compliance</li>
<li><strong>Competitive intelligence</strong> - Keep a historical record of competitor pages, pricing, and product offerings</li>
<li><strong>Content auditing</strong> - Track how your own website evolves over time with complete snapshots</li>
<li><strong>Journalism</strong> - Archive source pages to preserve evidence that may be modified or removed</li>
</ul>
<h3>Enabling Archives</h3>
<p>Archives are enabled at the workspace level. Contact support or check your workspace settings to enable archiving for your monitored pages.</p>]]>
            </summary>
                                    <updated>2026-03-26T05:33:22+00:00</updated>
        </entry>
            <entry>
            <title><![CDATA[Workspaces: Organize Monitoring by Project or Team]]></title>
            <link rel="alternate" href="https://pagecrawl.io/help/features/article/workspaces" />
            <id>https://pagecrawl.io/88</id>
            <author>
                <name><![CDATA[PageCrawl.io]]></name>
            </author>
            <summary type="html">
                <![CDATA[<h1>Workspaces: Organize Monitoring by Project or Team</h1>
<p>Workspaces let you organize your monitored pages into separate environments, each with its own settings, notifications, and team member access. Use workspaces to separate monitoring by project, client, department, or any other grouping that makes sense for your workflow.</p>
<h3>What Each Workspace Gets</h3>
<p>Every workspace has independent settings for:</p>
<ul>
<li><strong>Monitored pages</strong> - Each workspace contains its own set of tracked pages</li>
<li><strong>Notification preferences</strong> - Separate email frequency, Slack/Discord/Teams/Telegram channels</li>
<li><strong>AI configuration</strong> - Different AI provider, model, and focus areas per workspace</li>
<li><strong>Check scheduling</strong> - Custom active hours and days for monitoring</li>
<li><strong>Timezone</strong> - Each workspace can use a different timezone</li>
<li><strong>Labels and tags</strong> - Workspace-specific labels for organizing pages</li>
<li><strong>Templates</strong> - Page discovery templates tied to each workspace</li>
</ul>
<h3>Creating a Workspace</h3>
<ol>
<li>Go to <strong>Settings</strong> &gt; <strong>Team</strong> &gt; <strong>Workspaces</strong></li>
<li>Click <strong>Add New Workspace</strong></li>
<li>Enter a name for the workspace</li>
<li>Configure the workspace settings</li>
</ol>
<h3>Switching Between Workspaces</h3>
<p>Use the workspace selector dropdown in the sidebar to switch between your workspaces. Each workspace shows its own set of pages, changes, and settings.</p>
<h3>Managing Access</h3>
<p>Administrators can control which team members have access to each workspace:</p>
<ol>
<li>Go to <strong>Settings</strong> &gt; <strong>Team</strong> &gt; <strong>Workspaces</strong></li>
<li>Find the workspace in the list</li>
<li>Click <strong>Update</strong> in the Access column</li>
<li>Add or remove team members</li>
</ol>
<p>Members only see workspaces they've been assigned to. This lets you give client-facing teams access to client workspaces without exposing internal monitoring.</p>
<p>See <a href="/help/account-settings/article/user-access-roles">User Roles &amp; Permissions</a> for details on what each role can do.</p>
<h3>Common Setups</h3>
<p><strong>By client</strong>: One workspace per client, each with its own notification channels and team access.</p>
<p><strong>By department</strong>: Marketing monitors competitor pages, Legal monitors compliance pages, Product monitors feature pages, each in their own workspace.</p>
<p><strong>By priority</strong>: A "Critical" workspace with immediate notifications and frequent checks, and a "Background" workspace with weekly reports and less frequent checks.</p>
<p><strong>By region</strong>: Separate workspaces for different geographic regions, each with region-specific proxy settings and timezones.</p>]]>
            </summary>
                                    <updated>2026-03-05T10:31:12+00:00</updated>
        </entry>
            <entry>
            <title><![CDATA[Save Screenshots to Dropbox]]></title>
            <link rel="alternate" href="https://pagecrawl.io/help/integrations/article/dropbox-screenshot-sync" />
            <id>https://pagecrawl.io/89</id>
            <author>
                <name><![CDATA[PageCrawl.io]]></name>
            </author>
            <summary type="html">
                <![CDATA[<h1>Save Screenshots to Dropbox</h1>
<p>PageCrawl can automatically save page screenshots to your Dropbox whenever a change is detected. This gives you a visual archive of every change, stored in your own cloud storage for easy access and sharing.</p>
<h3>How It Works</h3>
<p>When a change is detected on a monitored page and screenshots are enabled, PageCrawl uploads the screenshot to your chosen Dropbox folder. Files are organized by page name and timestamp:</p>
<pre><code>{your-folder}/{page-name}/{datetime}.jpg</code></pre>
<p>This makes it easy to browse through the history of visual changes for any monitored page.</p>
<h3>Setting Up Dropbox Sync</h3>
<ol>
<li>Go to <strong><a href="/app/settings/workspace/integrations">Settings &gt; Workspace &gt; Integrations</a></strong></li>
<li>Click <strong>Authenticate with Dropbox</strong></li>
<li>Authorize PageCrawl in the Dropbox OAuth window that opens</li>
<li>Select a folder in your Dropbox where screenshots should be stored</li>
</ol>
<p>Once connected, screenshots will be uploaded automatically whenever a change is detected on any of your monitored pages that have screenshots enabled.</p>
<h3>Managing the Connection</h3>
<p>After connecting your Dropbox account, you can:</p>
<ul>
<li><strong>View account info</strong> - See which Dropbox account is connected</li>
<li><strong>Change folder</strong> - Select a different folder for screenshot storage</li>
<li><strong>Revoke access</strong> - Disconnect your Dropbox account to stop automatic uploads</li>
</ul>
<h3>Troubleshooting</h3>
<p>If your Dropbox access token expires, the connection is automatically disabled and you will receive a notification. Simply reconnect your Dropbox account at <strong>Settings &gt; Workspace &gt; Integrations</strong> to restore screenshot syncing.</p>
<h3>Availability</h3>
<p>Dropbox screenshot sync is available on all plans.</p>]]>
            </summary>
                                    <updated>2026-03-05T10:31:12+00:00</updated>
        </entry>
            <entry>
            <title><![CDATA[AI Assistants (MCP Server)]]></title>
            <link rel="alternate" href="https://pagecrawl.io/help/integrations/article/mcp-server-ai-tools" />
            <id>https://pagecrawl.io/90</id>
            <author>
                <name><![CDATA[PageCrawl.io]]></name>
            </author>
            <summary type="html">
                <![CDATA[<h1>AI Assistants (MCP Server)</h1>
<p>PageCrawl includes a built-in MCP (Model Context Protocol) server that lets AI assistants manage your page monitors. You can add monitors, check history, trigger checks, and more, all through natural conversation with tools like Claude or ChatGPT.</p>
<p>MCP is an open protocol that standardizes how AI tools connect to external services. Once connected, your AI assistant can directly interact with your PageCrawl account without you needing to use the web interface or API manually.</p>
<p><em>Available on all plans. Free plan users have read-only access (list monitors, view history, check diffs). Paid plans (Standard and above) have full access including creating monitors, triggering checks, and managing tags.</em></p>
<h3>What You Can Do</h3>
<p>The MCP server provides the following tools that your AI assistant can use:</p>
<table>
<thead>
<tr>
<th>Tool</th>
<th>What It Does</th>
</tr>
</thead>
<tbody>
<tr>
<td><strong>Add page monitor</strong></td>
<td>Create a new monitor with URL, tracking mode, frequency, and notifications</td>
</tr>
<tr>
<td><strong>List monitors</strong></td>
<td>Search and view monitors across all workspaces by URL, domain, or name</td>
</tr>
<tr>
<td><strong>Get monitor details</strong></td>
<td>See full configuration of a specific monitor including tracked elements and latest values. Supports batch requests</td>
</tr>
<tr>
<td><strong>Get monitor history</strong></td>
<td>Retrieve historical checks and detected changes with AI summaries. Supports batch requests</td>
</tr>
<tr>
<td><strong>Get latest values</strong></td>
<td>Quickly retrieve just the current values for one or more monitors (e.g., current price). Supports batch requests</td>
</tr>
<tr>
<td><strong>Get check diff</strong></td>
<td>View the actual text differences detected in a specific check</td>
</tr>
<tr>
<td><strong>Trigger check</strong></td>
<td>Trigger a one-off check on a monitor</td>
</tr>
<tr>
<td><strong>Manage tags</strong></td>
<td>List workspace tags, or add and remove tags from monitors</td>
</tr>
<tr>
<td><strong>Mark changes seen</strong></td>
<td>Mark detected changes as reviewed on one or all monitors</td>
</tr>
<tr>
<td><strong>List templates</strong></td>
<td>View available templates that can be applied when creating monitors</td>
</tr>
<tr>
<td><strong>List workspaces</strong></td>
<td>View all your teams and workspaces with their IDs</td>
</tr>
<tr>
<td><strong>Update monitor defaults</strong></td>
<td>View or update default settings for new monitors created via MCP</td>
</tr>
</tbody>
</table>
<h3>Supported Element Types</h3>
<p>When creating monitors through MCP, you can track the following element types:</p>
<ul>
<li><strong>Full Page</strong> - Entire page text content (no selector needed)</li>
<li><strong>Text</strong> - Text content of a specific element (CSS selector required)</li>
<li><strong>Number</strong> - Numeric values with change thresholds</li>
<li><strong>Price</strong> - Price values with currency detection</li>
<li><strong>HTML</strong> - Raw HTML structure of an element</li>
<li><strong>JavaScript</strong> - Execute JavaScript and track the result</li>
<li><strong>File Hash</strong> - Monitor file changes by checksum (no selector needed)</li>
<li><strong>PDF</strong> - Track changes in PDF documents (no selector needed)</li>
</ul>
<h3>Setting Up with Claude (Web &amp; Desktop)</h3>
<ol>
<li>Open <a href="https://claude.ai">claude.ai</a> or Claude Desktop and go to <strong>Settings</strong></li>
<li>Navigate to the <strong>Connectors</strong> section in the left sidebar</li>
<li>Click <strong>Add custom connector</strong> at the bottom of the page</li>
<li>Enter a name (e.g. "PageCrawl") and set the URL to: <code>https://pagecrawl.io/mcp</code></li>
<li>Click <strong>Add</strong>. You will be redirected to PageCrawl to authorize access</li>
<li>Log in (if not already) and click <strong>Approve</strong></li>
<li>PageCrawl tools are now available in your conversations</li>
</ol>
<p><img src="/images/help/claude-connectors-settings.png" alt="Connectors page showing PageCrawl configured" /></p>
<p><img src="/images/help/claude-add-connector-dialog.png" alt="Add custom connector dialog with PageCrawl name and MCP server URL" /></p>
<h3>Setting Up with Claude Code</h3>
<p>Add the following to your <code>.mcp.json</code> file (in your project root or <code>~/.claude/</code>):</p>
<pre><code class="language-json">{
  "mcpServers": {
    "pagecrawl": {
      "url": "https://pagecrawl.io/mcp"
    }
  }
}</code></pre>
<p>When Claude Code first tries to use PageCrawl tools, it will open a browser window for you to authorize the connection via OAuth.</p>
<h3>Setting Up with ChatGPT</h3>
<p>Works with ChatGPT on web, desktop, and mobile. Requires a ChatGPT Plus, Pro, Team, Enterprise, or Edu plan.</p>
<ol>
<li>Go to <a href="https://chatgpt.com">chatgpt.com</a> (or open the ChatGPT desktop app)</li>
<li>Navigate to <strong>Settings</strong> &gt; <strong>Connectors</strong> &gt; <strong>Create</strong></li>
<li>Enter a name (e.g. "PageCrawl"), a short description, and set the URL to: <code>https://pagecrawl.io/mcp</code></li>
<li>Click <strong>Create</strong>. You will be redirected to PageCrawl to authorize access</li>
<li>Log in and click <strong>Approve</strong></li>
<li>To use in a conversation, click the <strong>+</strong> button near the message input, select <strong>More</strong>, and enable PageCrawl</li>
</ol>
<h3>Setting Up with Other MCP Clients (OAuth)</h3>
<p>Any MCP-compatible client that supports OAuth can connect to PageCrawl. The server details:</p>
<ul>
<li><strong>URL:</strong> <code>https://pagecrawl.io/mcp</code></li>
<li><strong>Authentication:</strong> OAuth 2.0 (automatic via MCP protocol)</li>
<li><strong>Protocol:</strong> MCP over HTTP with JSON-RPC 2.0</li>
<li><strong>OAuth Discovery:</strong> <code>https://pagecrawl.io/.well-known/oauth-authorization-server</code></li>
</ul>
<p>The client will handle the OAuth flow automatically. No manual token setup is required.</p>
<h3>Setting Up with API Token (OpenClaw, Cursor, Cline, Windsurf, and others)</h3>
<p>For MCP clients that do not support OAuth, you can connect using a personal API token instead. This works with OpenClaw, Cursor, Cline, Windsurf, VS Code, Claude Code, and any other MCP client that supports custom headers.</p>
<p><strong>Step 1:</strong> Generate an API token in PageCrawl:</p>
<ol>
<li>Go to <strong>Settings</strong> &gt; <strong>API</strong></li>
<li>Click <strong>Create Token</strong></li>
<li>Give it a name (e.g. "OpenClaw") and click <strong>Create</strong></li>
<li>Copy the token. It will only be shown once.</li>
</ol>
<p><strong>Step 2:</strong> Add the following configuration to your MCP client. The JSON format below works with Cursor (<code>.cursor/mcp.json</code>), Cline, Windsurf (<code>.vscode/mcp.json</code>), Claude Code (<code>.mcp.json</code>), and most other clients:</p>
<pre><code class="language-json">{
  "mcpServers": {
    "pagecrawl": {
      "url": "https://pagecrawl.io/mcp",
      "headers": {
        "Authorization": "Bearer YOUR_TOKEN_HERE"
      }
    }
  }
}</code></pre>
<p>For <strong>OpenClaw</strong>, use the CLI:</p>
<pre><code>openclaw mcp set pagecrawl \
  --transport streamable-http \
  --url https://pagecrawl.io/mcp \
  --header "Authorization: Bearer YOUR_TOKEN_HERE"</code></pre>
<p>For <strong>Cursor</strong>, you can also add via <strong>Settings</strong> &gt; <strong>MCP Servers</strong> &gt; <strong>Add</strong> &gt; <strong>Streamable HTTP</strong> and enter the URL and authorization header there.</p>
<p><strong>Note:</strong> API tokens require a paid plan. Treat your token like a password. You can revoke tokens at any time from <strong>Settings</strong> &gt; <strong>API</strong>.</p>
<h3>Example Conversations</h3>
<p>Once connected, you can interact with PageCrawl naturally:</p>
<p><strong>Adding monitors:</strong></p>
<blockquote>
<p>"Monitor example.com/pricing every hour and track the full page text"</p>
</blockquote>
<blockquote>
<p>"Set up price tracking for these 3 product pages: [url1], [url2], [url3]. Check every 15 minutes and notify me on Slack when prices drop."</p>
</blockquote>
<p><strong>Checking current values:</strong></p>
<blockquote>
<p>"What's the current price on my Amazon product monitor?"</p>
</blockquote>
<blockquote>
<p>"Compare the prices across all my competitor monitors right now"</p>
</blockquote>
<p><strong>Reviewing changes:</strong></p>
<blockquote>
<p>"Show me all monitors that changed in the last 24 hours with a summary of what changed"</p>
</blockquote>
<blockquote>
<p>"Show me the diff for the terms of service page. What exactly was added or removed?"</p>
</blockquote>
<p><strong>Analysis and reporting:</strong></p>
<blockquote>
<p>"Which of my monitors have had the most changes this month? Are there any patterns?"</p>
</blockquote>
<blockquote>
<p>"Give me a weekly summary: how many changes were detected across all monitors, which ones had price drops, and which ones had errors?"</p>
</blockquote>
<p><strong>Batch operations:</strong></p>
<blockquote>
<p>"Tag all monitors tracking amazon.com with 'competitor' and 'ecommerce'"</p>
</blockquote>
<blockquote>
<p>"Check the latest values for all monitors tagged 'pricing' and tell me which products are currently out of stock"</p>
</blockquote>
<p><strong>Troubleshooting:</strong></p>
<blockquote>
<p>"Are any of my monitors failing? Show me the ones with errors and what the issue is"</p>
</blockquote>
<blockquote>
<p>"The pricing page monitor hasn't detected changes in weeks. Trigger a fresh check and show me what it finds"</p>
</blockquote>
<p><strong>Setting up workflows:</strong></p>
<blockquote>
<p>"Create a monitor for each of these 5 competitor pricing pages. Use the 'competitor-tracking' template and tag them all as 'q2-research'"</p>
</blockquote>
<blockquote>
<p>"Monitor the SEC EDGAR page for new filings from Tesla. Use content-only mode so it ignores the navigation, check every 30 minutes"</p>
</blockquote>
<h3>Working with Workspaces</h3>
<p>All tools automatically search across every workspace you have access to. You do not need to know which workspace a monitor is in to find or interact with it.</p>
<ul>
<li>Use <strong>List monitors</strong> with the <code>search</code> parameter to find monitors by URL, domain, or name</li>
<li>Use <strong>List monitors</strong> with <code>workspace_id</code> to filter results to a specific workspace</li>
<li>Use <strong>List workspaces</strong> to see all your teams and workspaces with their IDs</li>
<li><strong>Add page monitor</strong> only requires a <code>workspace_id</code> if you have more than one workspace</li>
</ul>
<h3>Limits and Quotas</h3>
<p>MCP operations respect your plan's limits:</p>
<ul>
<li><strong>Monitor creation</strong> counts toward your page monitor quota</li>
<li><strong>Triggered checks</strong> are rate limited and placed in a deprioritized queue, so checks may take a while to complete. This is designed for occasional, manual use only (one or two checks at a time). It does not support programmatic or automated triggering - requests that exceed rate limits will be rejected with an error. Instead, configure the check frequency on each monitor and use scheduling settings to run checks at specific times.</li>
<li>If you exceed your monitor limit, new monitors are created in a disabled state</li>
<li>If you exceed your check limit, manual check triggers will be rejected</li>
</ul>
<p>See <a href="/help/subscription/article/is-there-limit-of-checks-in-standard-plan">Check Limits</a> and <a href="/help/subscription/article/is-there-limit-how-many-websites-i-can-add-to-monitor">Website Limits</a> for details on plan quotas.</p>]]>
            </summary>
                                    <updated>2026-04-14T06:20:28+00:00</updated>
        </entry>
            <entry>
            <title><![CDATA[Webhook Integration: Send Change Data to Any External Service]]></title>
            <link rel="alternate" href="https://pagecrawl.io/help/integrations/article/webhook-integration" />
            <id>https://pagecrawl.io/91</id>
            <author>
                <name><![CDATA[PageCrawl.io]]></name>
            </author>
            <summary type="html">
                <![CDATA[<h1>Webhook Integration: Send Change Data to Any External Service</h1>
<p>Webhooks allow PageCrawl to send HTTP POST requests to any external URL whenever a page change is detected or an error occurs. Use webhooks to connect PageCrawl with custom applications, automation platforms, databases, or any service that accepts HTTP requests.</p>
<h3>Setting Up a Webhook</h3>
<ol>
<li>Go to <strong>Settings</strong> &gt; <strong>Workspace</strong> &gt; <strong>Integrations</strong></li>
<li>Select the <strong>Webhooks</strong> tab</li>
<li>Click <strong>Add Webhook</strong></li>
<li>Enter your target URL and configure the options below</li>
<li>Click <strong>Save</strong></li>
</ol>
<h3>Configuration Options</h3>
<p><strong>Target URL</strong>: The HTTP endpoint that will receive the POST request.</p>
<p><strong>Event Triggers</strong>: Choose which events fire the webhook:</p>
<ul>
<li><strong>Change detected</strong> - Fires when page content changes</li>
<li><strong>Error</strong> - Fires when a check fails (timeout, blocked, 404, etc.)</li>
<li>Or both</li>
</ul>
<p><strong>Page Filter</strong>: Optionally limit the webhook to a specific monitored page. If not set, the webhook fires for all pages in the workspace.</p>
<p><strong>Active/Inactive Toggle</strong>: Disable a webhook without deleting it.</p>
<h3>Payload Fields</h3>
<p>By default, webhooks send all available fields. You can customize the payload by selecting only the fields you need:</p>
<table>
<thead>
<tr>
<th>Category</th>
<th>Fields</th>
</tr>
</thead>
<tbody>
<tr>
<td><strong>Basic</strong></td>
<td>id, title, status, changed_at, visual_diff, difference, human_difference, short_summary</td>
</tr>
<tr>
<td><strong>Differences</strong></td>
<td>markdown_difference, html_difference</td>
</tr>
<tr>
<td><strong>Images</strong></td>
<td>text_difference_image, page_screenshot_image</td>
</tr>
<tr>
<td><strong>Page Info</strong></td>
<td>page metadata, page_elements array</td>
</tr>
<tr>
<td><strong>Content</strong></td>
<td>contents, original (for extracted values)</td>
</tr>
<tr>
<td><strong>Comparison</strong></td>
<td>previous_check data</td>
</tr>
<tr>
<td><strong>JSON</strong></td>
<td>json, json_patch</td>
</tr>
<tr>
<td><strong>AI</strong></td>
<td>ai_summary, ai_priority_score</td>
</tr>
</tbody>
</table>
<h3>Testing Webhooks</h3>
<p>After saving a webhook, click the <strong>Test</strong> button to send a sample payload to your endpoint. This verifies the connection works before relying on it for real notifications.</p>
<h3>Example Payload</h3>
<pre><code class="language-json">{
  "id": 12345,
  "title": "Product Page - Example.com",
  "status": "change_detected",
  "changed_at": "2026-01-15T10:30:00Z",
  "visual_diff": 12.5,
  "difference": 3,
  "human_difference": "3 lines changed",
  "short_summary": "Price updated from $99 to $89",
  "ai_summary": "The product price was reduced by 10%.",
  "ai_priority_score": 85
}</code></pre>
<h3>Use Cases</h3>
<ul>
<li><strong>Custom dashboards</strong> - Feed change data into your own monitoring dashboard</li>
<li><strong>Database logging</strong> - Store all detected changes in your own database</li>
<li><strong>Automation workflows</strong> - Trigger actions in tools like n8n, Make, or custom scripts</li>
<li><strong>Alerting systems</strong> - Forward high-priority changes to PagerDuty, Opsgenie, or similar tools</li>
</ul>
<h3>Notes</h3>
<ul>
<li>Webhooks send data as HTTP POST with a JSON body</li>
<li>If you need Slack, Discord, or Teams notifications, use the dedicated integrations instead, as they format messages correctly for those platforms</li>
<li>Webhooks are available on paid plans</li>
</ul>]]>
            </summary>
                                    <updated>2026-03-05T10:31:12+00:00</updated>
        </entry>
            <entry>
            <title><![CDATA[Email Notifications for Website Change Detection]]></title>
            <link rel="alternate" href="https://pagecrawl.io/help/notifications/article/email-notifications" />
            <id>https://pagecrawl.io/92</id>
            <author>
                <name><![CDATA[PageCrawl.io]]></name>
            </author>
            <summary type="html">
                <![CDATA[<h1>Email Notifications for Website Change Detection</h1>
<p>Email is the default notification channel in PageCrawl. It is enabled on all plans and requires no additional setup. As soon as you add a page to monitor, you will receive email notifications whenever changes are detected.</p>
<h3>What's Included in Email Notifications</h3>
<p>Every change notification email includes:</p>
<ul>
<li><strong>AI summary</strong> - A plain-language explanation of what changed on the page</li>
<li><strong>Priority score</strong> - An importance score from 0 to 100 so you can quickly assess relevance</li>
<li><strong>Text diff with highlighting</strong> - Changed content is highlighted so you can see exactly what was added, removed, or modified</li>
<li><strong>Keyword matches</strong> - If you have keyword rules configured, matching keywords are highlighted in the notification</li>
</ul>
<h3>Email Attachments</h3>
<p>Email notifications can include several attachments to give you a complete picture of the change:</p>
<ul>
<li><strong>Screenshot</strong> - A full-page screenshot of the page at the time of the change (enabled by default)</li>
<li><strong>Visual diff screenshot</strong> - A side-by-side or overlay comparison showing visual differences</li>
<li><strong>Text diff image</strong> - A rendered image of the text diff for easy sharing</li>
<li><strong>Text file</strong> - A plain text file containing the diff content</li>
</ul>
<p>You can configure which attachments are included at <strong>Settings &gt; Workspace &gt; Notifications</strong>.</p>
<h3>Additional Recipients</h3>
<p>On paid plans, you can add additional recipients to your change notifications:</p>
<ul>
<li><strong>CC</strong> - Add email addresses to receive a copy of every notification</li>
<li><strong>BCC</strong> - Add email addresses to receive a blind copy</li>
</ul>
<p>This is useful for keeping team members, clients, or stakeholders informed without requiring them to have a PageCrawl account.</p>
<h3>Notification Frequency</h3>
<p>You can choose how often you receive email notifications:</p>
<table>
<thead>
<tr>
<th>Frequency</th>
<th>Description</th>
</tr>
</thead>
<tbody>
<tr>
<td><strong>Immediate</strong></td>
<td>Get an email as soon as a change is detected</td>
</tr>
<tr>
<td><strong>Daily</strong></td>
<td>Receive a daily digest summarizing all changes from the past 24 hours</td>
</tr>
<tr>
<td><strong>Daily (weekdays)</strong></td>
<td>Same as daily, but only Monday through Friday</td>
</tr>
<tr>
<td><strong>Weekly</strong></td>
<td>Receive a weekly digest summarizing all changes from the past 7 days</td>
</tr>
<tr>
<td><strong>Monthly</strong></td>
<td>Receive a monthly digest summarizing all changes from the past 30 days</td>
</tr>
</tbody>
</table>
<p>Digest reports include AI summaries for each change, making it easy to review multiple updates without feeling overwhelmed.</p>
<h3>Diff Display Options</h3>
<p>You can customize how text differences are displayed in your email notifications:</p>
<ul>
<li><strong>Highlight mode</strong> - Choose between highlighting by lines, by words, or both</li>
<li><strong>Content filter</strong> - Show everything, changed content only, added content only, or removed content only</li>
</ul>
<p>These options let you focus on the type of changes that matter most to you.</p>
<h3>Domain-Based Grouping</h3>
<p>When you are monitoring 5 or more pages on the same domain, PageCrawl automatically groups notifications by domain. This keeps your inbox organized and makes it easier to review related changes together.</p>
<h3>AI Feedback</h3>
<p>Each email notification includes feedback links that let you mark a change as <strong>Important</strong> or <strong>Noise</strong>. PageCrawl's AI learns from your feedback and uses it to improve future importance scoring, so over time you receive fewer irrelevant notifications.</p>
<h3>Other Supported Notification Channels</h3>
<p>PageCrawl supports several other notification channels to suit your preferences:</p>
<ul>
<li><a href="/help/notifications/article/send-slack-notification-when-changes-detected">Slack notifications</a></li>
<li><a href="/help/integrations/article/track-website-changes-integrate-with-discord-notifications">Discord notifications</a></li>
<li><a href="/help/integrations/article/send-microsoft-teams-notification-when-changes-detected">Microsoft Teams notifications</a></li>
<li><a href="/help/integrations/article/track-website-changes-integrate-with-telegram-notifications">Telegram notifications</a></li>
<li><a href="/help/integrations/article/webhook-integration">Webhook integration</a></li>
<li><a href="/help/integrations/article/pagecrawl-zapier-integration">Zapier integration</a></li>
</ul>]]>
            </summary>
                                    <updated>2026-03-05T10:31:12+00:00</updated>
        </entry>
            <entry>
            <title><![CDATA[Notification Conditions and Filters]]></title>
            <link rel="alternate" href="https://pagecrawl.io/help/notifications/article/notification-conditions" />
            <id>https://pagecrawl.io/93</id>
            <author>
                <name><![CDATA[PageCrawl.io]]></name>
            </author>
            <summary type="html">
                <![CDATA[<h1>Notification Conditions and Filters</h1>
<p>Conditions and Filters let you control which changes trigger notifications on a per-page basis. Instead of receiving a notification for every detected change, you can define rules so that only meaningful changes are reported.</p>
<p>When adding a page, the simple setup mode offers common conditions directly for price, number, and selected area tracking (such as price thresholds, percentage change alerts, and keyword monitoring). For the full set of conditions described below, click "More options" to switch to Advanced Mode. When editing an existing page, toggle <strong>Advanced Mode</strong> on. In both cases, you will find the <strong>Conditions &amp; Filters</strong> section.</p>
<h3>How to Enable Conditions</h3>
<p>In the page editor, switch to Advanced Mode (click "More options" when adding a new page, or toggle "Advanced Mode" when editing an existing page). Look for the <strong>Conditions &amp; Filters</strong> section with the description: "Looking for specific changes or alerts for certain keywords? Customize conditions to minimize unnecessary change alerts."</p>
<p>Toggle the switch on to enable conditions. Once enabled, you can add one or more conditions by clicking the <strong>Add Condition</strong> button.</p>
<h3>AND / OR Logic</h3>
<p>When you have multiple conditions, you can choose how they are evaluated using the <strong>Match all conditions</strong> toggle:</p>
<ul>
<li><strong>On (AND)</strong> - All conditions must be met for the notification to trigger</li>
<li><strong>Off (OR)</strong> - Any single condition being met will trigger the notification</li>
</ul>
<p>This lets you build precise rules. For example, with AND logic you could require that a specific keyword appeared AND a price dropped below a threshold.</p>
<h3>Always Record Change Detections</h3>
<p>By default, when conditions are not met, the change detection is not recorded and no notification is sent. This means the next check compares against the last version that did meet conditions.</p>
<p>Enable <strong>Always record change detections</strong> to record every change regardless of whether conditions are met, but only send notifications when conditions match. This is particularly useful with one-directional conditions like "Keyword appeared" or "Keyword disappeared", where skipping unmatched detections could cause the condition to never trigger again.</p>
<h3>Most Common Condition</h3>
<h4>Keyword Appeared or Disappeared</h4>
<p>The most commonly used condition. It triggers a notification only when a specific keyword is added to or removed from the page.</p>
<p>Enter one or more keywords (each keyword is a separate tag). The condition is met when any of the specified keywords appear in newly added text or disappear from removed text.</p>
<p><strong>Match mode options</strong> control how keywords are compared against the page text:</p>
<table>
<thead>
<tr>
<th>Match Mode</th>
<th>Case Sensitive</th>
<th>Whole Word</th>
<th>Example: keyword "assist"</th>
</tr>
</thead>
<tbody>
<tr>
<td><strong>Match any text</strong> (default)</td>
<td>No</td>
<td>No</td>
<td>Matches "assist", "Assist", "assistance", "ASSISTANT"</td>
</tr>
<tr>
<td><strong>Match any text (case sensitive)</strong></td>
<td>Yes</td>
<td>No</td>
<td>Matches "assist", "assistance" but not "Assist"</td>
</tr>
<tr>
<td><strong>Match exact words only</strong></td>
<td>No</td>
<td>Yes</td>
<td>Matches "assist", "ASSIST" but not "assistance"</td>
</tr>
<tr>
<td><strong>Match exact words (case sensitive)</strong></td>
<td>Yes</td>
<td>Yes</td>
<td>Matches only "assist" exactly</td>
</tr>
</tbody>
</table>
<h3>Filters</h3>
<p>Filters remove noise by excluding certain types of changes from triggering notifications.</p>
<h4>Ignore Text</h4>
<p>Exclude specific words, sentences, or patterns from change detection. Place each entry on a separate line. This is useful for text that changes frequently but is not relevant, like timestamps, cookie banners, or dynamic counters.</p>
<p><strong>Supported patterns:</strong></p>
<ul>
<li><strong>Exact text</strong> - Enter the exact text to ignore (e.g., <code>This website uses cookies</code>)</li>
<li><strong>Wildcard (%)</strong> - Use <code>%</code> to match any text within a line. For example, <code>%Published at%</code> will ignore any line containing "Published at", such as "Published at: 2024-12-24 by John"</li>
<li><strong>Regular expressions</strong> - Wrap patterns in forward slashes for regex matching (e.g., <code>/custom-regex-pattern-\d+/</code>). Requires a paid plan.</li>
</ul>
<p>Note: If the ignored text line is replaced with a new line that is not in the filter, the change detection will still trigger.</p>
<h4>Ignore Numbers</h4>
<p>Prevents any numeric changes on the page from triggering change detections. Useful when pages contain counters, view counts, or other dynamic numbers that are not relevant to you.</p>
<h3>Text Conditions</h3>
<p>These conditions let you control notifications based on specific text content. They are available for text-based tracked elements (not visual elements).</p>
<h4>Keyword Appeared</h4>
<p>Triggers when a keyword is added to the page. Unlike "Keyword appeared or disappeared", this will <strong>not</strong> notify you when a keyword is removed.</p>
<p><strong>Important:</strong> If "Always record change detections" is not enabled, using this condition alone can cause missed detections. When the keyword is not found, no change is recorded, so the comparison baseline never updates. We recommend using "Keyword appeared or disappeared" instead, or enabling "Always record change detections".</p>
<h4>Keyword Disappeared</h4>
<p>Triggers when a keyword is removed from the page. The condition compares the current check with the previous one and fires if the keyword was present before but is now gone.</p>
<p>The same warning about "Always record change detections" applies here.</p>
<h4>Exact Match</h4>
<p>Available for individual tracked elements (not full page monitors). The condition is met when the element's text matches the specified value exactly.</p>
<h4>Doesn't Match</h4>
<p>Available for individual tracked elements (not full page monitors). The condition is met when the element's text does not match the specified value exactly.</p>
<h4>Text Exists</h4>
<p>The condition is met when the tracked element's text contains any of the specified keywords. Best used in combination with other conditions, for example: "the page must always contain the text 'Welcome' AND a keyword appeared." If you only need to know when text is added or removed, use "Keyword appeared or disappeared" instead.</p>
<h4>Text Doesn't Exist</h4>
<p>The condition is met when the tracked element's text does not contain any of the specified keywords. Useful for combined conditions like "the page does not contain 'Website failed to load' AND a change was detected." If you only need to know when text is added or removed, use "Keyword appeared or disappeared" instead.</p>
<h3>Number and Price Conditions</h3>
<p>These conditions are only available for "Number" and "Price detect" tracked elements. They allow you to set thresholds and track numeric changes with precision.</p>
<h4>Comparison Conditions</h4>
<table>
<thead>
<tr>
<th>Condition</th>
<th>Description</th>
<th>Example</th>
</tr>
</thead>
<tbody>
<tr>
<td><strong>Greater than</strong></td>
<td>Triggers when the number exceeds the specified value</td>
<td>Value is 150, triggers when number &gt; 150</td>
</tr>
<tr>
<td><strong>Greater than or equals</strong></td>
<td>Triggers when the number is at or above the specified value</td>
<td>Value is 150, triggers when number &gt;= 150</td>
</tr>
<tr>
<td><strong>Less than</strong></td>
<td>Triggers when the number drops below the specified value</td>
<td>Value is 50, triggers when number &lt; 50</td>
</tr>
<tr>
<td><strong>Less than or equals</strong></td>
<td>Triggers when the number is at or below the specified value</td>
<td>Value is 50, triggers when number &lt;= 50</td>
</tr>
</tbody>
</table>
<h4>Change-Based Conditions</h4>
<p>These conditions compare the current value against the previous value to detect significant changes.</p>
<table>
<thead>
<tr>
<th>Condition</th>
<th>Description</th>
<th>Example</th>
</tr>
</thead>
<tbody>
<tr>
<td><strong>Increased or Decreased by at least x percent</strong></td>
<td>Triggers when the number changes in either direction by at least x%.</td>
<td>Value is 10, x is 20%. Triggers when value becomes 12+ or 8 or less.</td>
</tr>
<tr>
<td><strong>Increased or Decreased by at least x</strong></td>
<td>Triggers when the number changes in either direction by at least x (absolute).</td>
<td>Value is 10, x is 5. Triggers when value becomes 15+ or 5 or less.</td>
</tr>
<tr>
<td><strong>Increased by at least x percent</strong></td>
<td>Triggers only when the number goes up by at least x%.</td>
<td>Value is 10, x is 20%. Triggers when value becomes 12 or more.</td>
</tr>
<tr>
<td><strong>Increased by at least x</strong></td>
<td>Triggers only when the number goes up by at least x (absolute).</td>
<td>Value is 10, x is 5. Triggers when value becomes 15 or more.</td>
</tr>
<tr>
<td><strong>Decreased by at least x percent</strong></td>
<td>Triggers only when the number goes down by at least x%.</td>
<td>Value is 10, x is 20%. Triggers when value becomes 8 or less.</td>
</tr>
<tr>
<td><strong>Decreased by at least x</strong></td>
<td>Triggers only when the number goes down by at least x (absolute).</td>
<td>Value is 10, x is 5. Triggers when value becomes 5 or less.</td>
</tr>
</tbody>
</table>
<h3>Practical Examples</h3>
<p><strong>Price drop alert:</strong> Monitor a product price with a "Number" tracked element. Add a "Less than" condition with your target price. You will only be notified when the price falls below your threshold.</p>
<p><strong>Stock availability:</strong> Monitor an "In Stock" label with a "Keyword appeared or disappeared" condition. Set the keyword to "Out of Stock" to get notified the moment availability changes.</p>
<p><strong>Ignore cookie banners:</strong> Add an "Ignore text" filter with entries like <code>This website uses cookies</code> and <code>Accept all cookies</code> to prevent cookie consent changes from triggering notifications.</p>
<p><strong>Significant price changes only:</strong> Use "Increased or Decreased by at least x percent" with a value of 10 to only be notified when a price changes by 10% or more, filtering out minor fluctuations.</p>
<p><strong>Combined conditions:</strong> Monitor a product page with AND logic: "Keyword appeared" for "Sale" combined with "Less than" 100 on the price element. You will only be notified when the product goes on sale AND the price drops below 100.</p>]]>
            </summary>
                                    <updated>2026-03-05T10:31:13+00:00</updated>
        </entry>
            <entry>
            <title><![CDATA[Web Push Notifications for Instant Website Change Alerts]]></title>
            <link rel="alternate" href="https://pagecrawl.io/help/notifications/article/web-push-notifications" />
            <id>https://pagecrawl.io/94</id>
            <author>
                <name><![CDATA[PageCrawl.io]]></name>
            </author>
            <summary type="html">
                <![CDATA[<h1>Web Push Notifications for Instant Website Change Alerts</h1>
<p>Web push notifications deliver instant alerts directly to your browser when PageCrawl detects a change on your monitored pages. No extra apps, no browser extensions, and no webhook configuration needed.</p>
<h3>How It Works</h3>
<p>When a monitored page changes, PageCrawl sends a native browser notification to all your subscribed devices. You'll see the notification even when PageCrawl.io isn't open in your browser.</p>
<p>If AI summarization is enabled for the page, the notification includes a brief summary explaining what changed, so you can decide at a glance whether to investigate.</p>
<h3>Setting Up Push Notifications</h3>
<ol>
<li>Go to <strong>Settings</strong> &gt; <strong>Personal</strong> &gt; <strong>Account Settings</strong></li>
<li>Click <strong>Enable Push Notifications</strong></li>
<li>Accept the browser permission prompt</li>
</ol>
<p>That's it. Notifications start immediately.</p>
<h3>Managing Devices</h3>
<p>You can subscribe on multiple devices (desktop, laptop, phone, tablet). Each device receives notifications independently. To manage your subscribed devices:</p>
<ol>
<li>Go to <strong>Settings</strong> &gt; <strong>Personal</strong> &gt; <strong>Account Settings</strong></li>
<li>View your subscribed devices under <strong>Push Notifications</strong></li>
<li>Remove old devices or send a test notification to verify the setup</li>
</ol>
<h3>Supported Browsers</h3>
<table>
<thead>
<tr>
<th>Browser</th>
<th>Desktop</th>
<th>Mobile</th>
</tr>
</thead>
<tbody>
<tr>
<td>Chrome</td>
<td>Yes</td>
<td>Yes (Android)</td>
</tr>
<tr>
<td>Firefox</td>
<td>Yes</td>
<td>Yes (Android)</td>
</tr>
<tr>
<td>Edge</td>
<td>Yes</td>
<td>-</td>
</tr>
<tr>
<td>Safari 16+</td>
<td>Yes (macOS)</td>
<td>Yes (iOS)</td>
</tr>
</tbody>
</table>
<h3>Push Notifications vs. Other Channels</h3>
<table>
<thead>
<tr>
<th>Channel</th>
<th>Setup</th>
<th>Speed</th>
<th>Best For</th>
</tr>
</thead>
<tbody>
<tr>
<td><strong>Web Push</strong></td>
<td>None</td>
<td>Instant</td>
<td>Personal monitoring, time-sensitive changes</td>
</tr>
<tr>
<td><strong>Email</strong></td>
<td>None</td>
<td>Minutes</td>
<td>Searchable archive, batch review</td>
</tr>
<tr>
<td><strong>Slack</strong></td>
<td>Webhook URL</td>
<td>Instant</td>
<td>Team collaboration</td>
</tr>
<tr>
<td><strong>Discord</strong></td>
<td>Webhook URL</td>
<td>Instant</td>
<td>Community monitoring</td>
</tr>
<tr>
<td><strong>Teams</strong></td>
<td>Webhook URL</td>
<td>Instant</td>
<td>Enterprise environments</td>
</tr>
<tr>
<td><strong>Telegram</strong></td>
<td>Bot token</td>
<td>Instant</td>
<td>Mobile-first users</td>
</tr>
</tbody>
</table>
<h3>Combining Channels</h3>
<p>You can use push notifications alongside other channels. A common setup:</p>
<ul>
<li><strong>Push</strong> for urgent, time-sensitive alerts (price drops, restocks)</li>
<li><strong>Email</strong> for a searchable archive of all changes</li>
<li><strong>Slack/Teams</strong> for changes that need team discussion</li>
</ul>
<p>Configure different notification channels per page in the page settings.</p>]]>
            </summary>
                                    <updated>2026-03-05T10:31:13+00:00</updated>
        </entry>
            <entry>
            <title><![CDATA[Compare Product Prices Across Multiple Retailers]]></title>
            <link rel="alternate" href="https://pagecrawl.io/help/features/article/product-comparison" />
            <id>https://pagecrawl.io/95</id>
            <author>
                <name><![CDATA[PageCrawl.io]]></name>
            </author>
            <summary type="html">
                <![CDATA[<h1>Compare Product Prices Across Multiple Retailers</h1>
<p>PageCrawl can automatically group monitors that track the same product on different websites, giving you a real-time view of how prices compare across retailers. When the competitive landscape shifts, you can get alerts and export comparison spreadsheets.</p>
<h3>What You Can Do</h3>
<table>
<thead>
<tr>
<th>Capability</th>
<th>Description</th>
</tr>
</thead>
<tbody>
<tr>
<td><strong>Side-by-side pricing</strong></td>
<td>See all retailer prices for a product in one place via the Matched Pages panel</td>
</tr>
<tr>
<td><strong>Comparison alerts</strong></td>
<td>Get notified when a price becomes the cheapest, most expensive, or when the spread exceeds a threshold</td>
</tr>
<tr>
<td><strong>Cross-retailer export</strong></td>
<td>Download a spreadsheet with one row per product and columns per retailer</td>
</tr>
<tr>
<td><strong>Smart suggestions</strong></td>
<td>When linking monitors, PageCrawl suggests the most relevant candidates</td>
</tr>
<tr>
<td><strong>Automatic grouping</strong></td>
<td>Monitors are grouped automatically when product identifiers match</td>
</tr>
<tr>
<td><strong>Reference labels</strong></td>
<td>Manually group monitors using labels with a shared prefix</td>
</tr>
<tr>
<td><strong>Google Sheets integration</strong></td>
<td>Include comparison data and label-based columns in automated Google Sheets exports</td>
</tr>
</tbody>
</table>
<h3>How Products Are Grouped</h3>
<p>PageCrawl uses multiple signals to determine whether two monitors on different websites track the same product. When a match is found, the monitors are placed into a comparison group automatically.</p>
<p>Matching happens after each page check and when labels are updated. If the same product is listed on five different retailer websites and each monitor is set up with price tracking, PageCrawl will link all five into a single group.</p>
<p>You can also group monitors manually from the comparison panel on any monitor's detail page, or by applying reference labels (covered below).</p>
<p>Each comparison group can contain up to 20 monitors.</p>
<h3>The Matched Pages Panel</h3>
<p>When a monitor belongs to a comparison group, its detail page shows a <strong>Matched Pages</strong> panel. This panel displays:</p>
<ul>
<li>The name and domain of each grouped monitor</li>
<li>The current tracked value (typically a price) for each</li>
<li>Quick navigation links to each compared monitor</li>
</ul>
<p>From this panel you can:</p>
<ol>
<li><strong>Add monitors</strong> - Search for other monitors to add to the group</li>
<li><strong>Remove monitors</strong> - Detach a specific monitor from the group</li>
<li><strong>View suggestions</strong> - See PageCrawl's recommended matches based on product signals</li>
</ol>
<h3>Smart Suggestions</h3>
<p>When adding monitors to a comparison group, PageCrawl ranks candidates by relevance. Suggestions consider multiple factors including product identifiers, reference labels, folder grouping, domain similarity, and name overlap.</p>
<p>If the product comparison feature is enabled, suggestions are enhanced with stronger signals from product identifiers and reference labels. Without the feature enabled, suggestions still work but rely on name and structural similarity only.</p>
<p>You can also type in the search box to filter across all monitors in your workspace.</p>
<h3>Comparison Alerts</h3>
<p>Comparison alerts notify you when a monitor's price changes its competitive position within the group. There are three alert types:</p>
<table>
<thead>
<tr>
<th>Alert Type</th>
<th>When It Fires</th>
<th>Configuration</th>
</tr>
</thead>
<tbody>
<tr>
<td><strong>Cheapest</strong></td>
<td>This monitor's price is the lowest in the group</td>
<td>No additional configuration needed</td>
</tr>
<tr>
<td><strong>Most Expensive</strong></td>
<td>This monitor's price is the highest in the group</td>
<td>No additional configuration needed</td>
</tr>
<tr>
<td><strong>Price Spread</strong></td>
<td>The gap between the lowest and highest price in the group exceeds a percentage</td>
<td>Set the spread threshold percentage</td>
</tr>
</tbody>
</table>
<h4>How Alerts Work</h4>
<p>Alerts are <strong>transition-based</strong>. You receive a notification when the state changes (e.g., a monitor becomes the cheapest), but not on every subsequent check where it remains the cheapest. When the condition clears, the alert resets and can fire again later.</p>
<p>For example, if Monitor A is tracking a laptop at $999 and becomes the cheapest in a group of five retailers:</p>
<ol>
<li>You receive a notification: "Laptop X is now the cheapest at $999 (range: $999 - $1,299)"</li>
<li>On subsequent checks, as long as Monitor A remains the cheapest, no new notification is sent</li>
<li>If another retailer drops to $949, Monitor A is no longer the cheapest and the alert clears</li>
<li>If Monitor A drops to $929 and becomes cheapest again, you receive a new notification</li>
</ol>
<p>Price Spread alerts work similarly. If you set a 20% threshold and the spread increases from 15% to 25%, you receive a notification. The alert clears when the spread drops below 20%.</p>
<h4>Setting Up Comparison Alerts</h4>
<ol>
<li>Open the monitor's settings (edit page)</li>
<li>Scroll to <strong>Alert Rules</strong></li>
<li>Add a new rule and select one of the comparison alert types</li>
<li>For Price Spread, enter the percentage threshold (e.g., 25 for a 25% spread)</li>
<li>Save your changes</li>
</ol>
<p>Comparison alerts are evaluated after every page check, using the most recent values from all group members. Alerts are delivered through your configured notification channels (email, Slack, Discord, Teams, Telegram, webhooks).</p>
<h3>Cross-Retailer Export</h3>
<p>Export a comparison spreadsheet to analyze all your grouped products and their prices in a single file.</p>
<h4>How to Export</h4>
<ol>
<li>Select the pages you want to include from your page list</li>
<li>Click <strong>Export</strong> from the bulk actions toolbar</li>
<li>Choose <strong>Comparison</strong> as the export type</li>
<li>Download the XLSX spreadsheet</li>
</ol>
<h4>What the Export Contains</h4>
<table>
<thead>
<tr>
<th>Column</th>
<th>Description</th>
</tr>
</thead>
<tbody>
<tr>
<td><strong>Product</strong></td>
<td>Product name from page metadata, or monitor name as fallback</td>
</tr>
<tr>
<td><strong>GTIN</strong></td>
<td>Global Trade Item Number if detected</td>
</tr>
<tr>
<td><strong>SKU</strong></td>
<td>Stock Keeping Unit if detected</td>
</tr>
<tr>
<td><strong>Brand</strong></td>
<td>Product brand if detected</td>
</tr>
<tr>
<td><strong>[retailer domain]</strong></td>
<td>One column per unique retailer domain, containing the current tracked value</td>
</tr>
</tbody>
</table>
<p>Each row represents one comparison group. If a group has members on amazon.com, bestbuy.com, and walmart.com, the spreadsheet will have three retailer columns.</p>
<p>If the same retailer domain appears more than once in a group (e.g., two product variants on the same site), the column headers are disambiguated with the monitor name.</p>
<p>Only monitors that belong to a comparison group are included in the export. Ungrouped monitors are excluded.</p>
<h3>Reference Labels</h3>
<p>Reference labels provide a way to manually group monitors using a label prefix. This is useful when automatic matching is not sufficient, or when you want to define your own product identifiers.</p>
<h4>How Reference Labels Work</h4>
<p>Apply a label with a specific prefix to monitors that track the same product. For example:</p>
<table>
<thead>
<tr>
<th>Monitor</th>
<th>Label</th>
</tr>
</thead>
<tbody>
<tr>
<td>Laptop X on Amazon</td>
<td><code>ref:LAPTOP-X-2024</code></td>
</tr>
<tr>
<td>Laptop X on Best Buy</td>
<td><code>ref:LAPTOP-X-2024</code></td>
</tr>
<tr>
<td>Laptop X on Walmart</td>
<td><code>ref:LAPTOP-X-2024</code></td>
</tr>
</tbody>
</table>
<p>All three monitors share the label <code>ref:LAPTOP-X-2024</code>, so PageCrawl groups them together.</p>
<p>The default prefix is <code>ref</code>, but you can change it in your workspace settings.</p>
<h4>Applying Reference Labels</h4>
<p>You can apply reference labels in several ways:</p>
<ul>
<li><strong>Single page</strong>: Edit the page and add a label in the format <code>prefix:value</code></li>
<li><strong>Bulk edit</strong>: Select multiple pages, click <strong>Bulk Edit</strong>, and apply the label to all at once</li>
<li><strong>API</strong>: Use the tag management API to programmatically assign labels</li>
</ul>
<p>When a reference label is added or changed, PageCrawl automatically re-evaluates comparison groups.</p>
<h3>Tag Prefix Columns</h3>
<p>Tag prefix columns turn label prefixes into structured data columns available in exports and Google Sheets integrations.</p>
<h4>Configuration</h4>
<ol>
<li>Go to <strong>Settings &gt; Workspace &gt; Tag Prefix Columns</strong></li>
<li>Add the prefixes you want as columns (e.g., <code>sku</code>, <code>brand</code>, <code>ref</code>)</li>
<li>Optionally change the <strong>Comparison Prefix</strong> (the prefix used for product grouping)</li>
<li>Save</li>
</ol>
<table>
<thead>
<tr>
<th>Setting</th>
<th>Description</th>
</tr>
</thead>
<tbody>
<tr>
<td><strong>Prefix Columns</strong></td>
<td>List of prefixes to expose as export/Google Sheets columns (max 10)</td>
</tr>
<tr>
<td><strong>Comparison Prefix</strong></td>
<td>The prefix used for product comparison grouping (default: <code>ref</code>)</td>
</tr>
</tbody>
</table>
<h4>Using Tag Prefix Columns in Exports</h4>
<p>Once configured, tag prefix columns appear as available columns in your Excel and Google Sheets export settings alongside the built-in columns (name, URL, current value, etc.).</p>
<p>For example, if you configure prefixes <code>sku</code> and <code>brand</code>:</p>
<ul>
<li>A monitor with labels <code>sku:WGT-500</code> and <code>brand:Acme</code> will show <code>WGT-500</code> in the SKU column and <code>Acme</code> in the Brand column</li>
<li>Columns appear as <code>tag_sku</code> and <code>tag_brand</code> in column configuration</li>
</ul>
<h4>Changing the Comparison Prefix</h4>
<p>When you change the comparison prefix (e.g., from <code>ref</code> to <code>group</code>), PageCrawl automatically re-evaluates groups for monitors that have labels with the new prefix. Existing groups built from product identifiers are not affected.</p>
<p>Note: Prefix names must be lowercase alphanumeric characters or underscores, with a maximum length of 50 characters.</p>
<h3>Discovered Pages and Product Matching</h3>
<p>When <a href="/help/features/article/page-discovery">Page Discovery</a> finds new pages and product comparison is enabled, PageCrawl checks whether the discovered page matches an existing monitored product. If a match is found, the discovered page shows the matched product's name and domain, helping you decide whether to add it to monitoring.</p>
<p>This is particularly useful for automatically finding the same product on newly discovered retailer pages.</p>
<h3>Best Practices</h3>
<h4>Start with Price Tracking</h4>
<p>Product comparison works best with monitors using <strong>price</strong> or <strong>number</strong> tracking modes, since these produce numeric values that can be compared. Full-page text monitors will appear in groups but cannot generate comparison alerts.</p>
<h4>Use Consistent Reference Labels</h4>
<p>If you manage a large catalog, establish a naming convention for reference labels. Using the same internal product ID across all retailers (e.g., <code>ref:INTERNAL-SKU-001</code>) ensures consistent grouping.</p>
<h4>Combine Automatic and Manual Grouping</h4>
<p>Let automatic matching handle the initial grouping, then review and adjust using reference labels for any products that were not matched correctly. Automatic and manual matching work together and complement each other.</p>
<h4>Set Up Alerts Selectively</h4>
<p>Rather than adding comparison alerts to every monitor, focus on the products where competitive pricing matters most. This keeps your notifications actionable and avoids alert fatigue.</p>
<h4>Use Cross-Retailer Export for Reporting</h4>
<p>Schedule regular exports to track pricing trends over time. Combined with Google Sheets integration, you can build dashboards that update automatically.</p>
<h3>Limits</h3>
<table>
<thead>
<tr>
<th>Limit</th>
<th>Value</th>
</tr>
</thead>
<tbody>
<tr>
<td><strong>Max group size</strong></td>
<td>20 monitors per comparison group</td>
</tr>
<tr>
<td><strong>Max prefix columns</strong></td>
<td>10 per workspace</td>
</tr>
<tr>
<td><strong>Prefix name length</strong></td>
<td>50 characters</td>
</tr>
</tbody>
</table>
<h3>Requirements</h3>
<p>Product comparison is available as a team-level add-on. Contact support or your account manager to enable it for your account.</p>
<h3>Related Articles</h3>
<ul>
<li><a href="/help/features/article/bulk-edit-pages">Bulk Edit</a> - Export and manage multiple pages at once</li>
<li><a href="/help/features/article/organized-page-monitoring">Labels, Folders &amp; Workspaces</a> - Organize your monitored pages</li>
<li><a href="/help/features/article/page-discovery">Page Discovery</a> - Automatically discover new pages to track</li>
<li><a href="/help/features/article/ai-powered-change-detection">AI Change Detection</a> - AI-powered summaries and importance scoring</li>
<li><a href="/help/features/article/advanced-configuration">Advanced Configuration</a> - Templates, tracked elements, and power user settings</li>
</ul>]]>
            </summary>
                                    <updated>2026-03-26T05:33:22+00:00</updated>
        </entry>
            <entry>
            <title><![CDATA[Premium Residential Proxies]]></title>
            <link rel="alternate" href="https://pagecrawl.io/help/features/article/residential-proxies" />
            <id>https://pagecrawl.io/96</id>
            <author>
                <name><![CDATA[PageCrawl.io]]></name>
            </author>
            <summary type="html">
                <![CDATA[<h1>Premium Residential Proxies</h1>
<p>Premium residential proxies let you monitor websites that block standard datacenter IP addresses. They use real residential internet connections from 200+ countries, making your monitoring checks appear as regular user traffic.</p>
<h3>When Do You Need Residential Proxies?</h3>
<p>Most websites work fine with the datacenter proxies already included in every PageCrawl plan. You only need residential proxies if:</p>
<ul>
<li>A website actively blocks datacenter IPs (you see 403 errors, timeouts, or blank pages after retries)</li>
<li>You need to see content as it appears in a specific country, state, or city</li>
<li>The site uses advanced bot detection that datacenter proxies cannot bypass</li>
</ul>
<p><strong>Before purchasing, try these free alternatives:</strong></p>
<ol>
<li><strong>Enable Stealth engine</strong> in your monitor settings. Stealth mode uses advanced techniques to bypass bot detection and works on most protected websites</li>
<li><strong>Reduce your check frequency</strong>. Many blocks are triggered by frequent requests. Switching from every 15 minutes to hourly or daily often resolves the issue</li>
<li><strong>Switch proxy location</strong> in your monitor settings (e.g., try London instead of New York)</li>
<li><a href="https://pagecrawl.io/contact-us">Contact support</a> for help diagnosing the issue</li>
</ol>
<h3>How Residential Proxy Bandwidth Works</h3>
<p>Residential proxies are priced at <strong>$10/GB</strong> of data transferred. Every page check consumes bandwidth based on the page size:</p>
<table>
<thead>
<tr>
<th>Page Type</th>
<th>Approximate Size Per Check</th>
</tr>
</thead>
<tbody>
<tr>
<td>Simple text page (blog, news article)</td>
<td>~0.5 MB</td>
</tr>
<tr>
<td>Standard e-commerce or listing page</td>
<td>~2 MB</td>
</tr>
<tr>
<td>Heavy page with images and scripts</td>
<td>~5 MB</td>
</tr>
</tbody>
</table>
<p><strong>Bandwidth never expires.</strong> You can purchase 1 GB today and use it over months.</p>
<h3>Cost Impact of Check Frequency</h3>
<p>Check frequency has a large impact on bandwidth consumption. The same 10 pages can cost very different amounts depending on how often you check:</p>
<table>
<thead>
<tr>
<th>Frequency</th>
<th>10 Pages Monthly Cost</th>
</tr>
</thead>
<tbody>
<tr>
<td>Daily</td>
<td>~$10 (0.6 GB)</td>
</tr>
<tr>
<td>Hourly</td>
<td>~$150 (14.4 GB)</td>
</tr>
<tr>
<td>Every 15 minutes</td>
<td>~$570 (57.6 GB)</td>
</tr>
</tbody>
</table>
<p>For most monitoring use cases, daily or hourly checks are sufficient. Only use high-frequency residential proxy checks when near real-time monitoring is essential.</p>
<h3>How to Set Up</h3>
<ol>
<li>Go to <strong>Settings &gt; Residential Proxies</strong> in your account</li>
<li>Purchase bandwidth (minimum 1 GB)</li>
<li>Open any monitor and change the <strong>Proxy Location</strong> to <strong>Premium Residential</strong></li>
<li>Select a target country for geo-targeted monitoring</li>
<li>Save and trigger a check to verify it works</li>
</ol>
<h3>Geo-Targeting</h3>
<p>When using residential proxies, you must select a target country from 200+ supported countries. This is useful for monitoring localized pricing, regional content, or geo-restricted pages.</p>
<h3>Monitoring Your Usage</h3>
<ul>
<li>View your bandwidth balance and daily usage in <strong>Settings &gt; Residential Proxies</strong></li>
<li>Usage statistics update every 15 minutes</li>
<li>When your bandwidth reaches zero, monitors using residential proxies automatically fall back to datacenter proxies (your monitoring does not stop)</li>
</ul>
<h3>Availability</h3>
<p>Premium residential proxy bandwidth is available on <strong>Enterprise</strong> and <strong>Ultimate</strong> plans. <a href="https://pagecrawl.io/contact-us">Contact us</a> if you have questions about upgrading.</p>
<h3>Related</h3>
<ul>
<li><a href="/help/features/article/custom-proxies">Using Custom Proxies</a> for using your own proxy servers</li>
<li><a href="/residential-proxies">Cost Calculator</a> for estimating your monthly bandwidth needs</li>
<li><a href="/help/features/article/bulk-edit-pages">Bulk Edit</a> for applying proxy settings to multiple pages</li>
</ul>]]>
            </summary>
                                    <updated>2026-03-31T08:36:40+00:00</updated>
        </entry>
            <entry>
            <title><![CDATA[Feed Tracking Mode: Structured Monitoring for RSS, Atom, and Sitemaps]]></title>
            <link rel="alternate" href="https://pagecrawl.io/help/features/article/feed-tracking-mode" />
            <id>https://pagecrawl.io/97</id>
            <author>
                <name><![CDATA[PageCrawl.io]]></name>
            </author>
            <summary type="html">
                <![CDATA[<h1>Feed Tracking Mode: Structured Monitoring for RSS, Atom, and Sitemaps</h1>
<p>Feed tracking mode treats an RSS feed, Atom feed, or XML sitemap as a list of individual items rather than a single blob of text. Instead of "the page changed", you get "2 new posts added: [titles and links]". This matches how you actually want to consume a feed: item by item.</p>
<h3>When to Use Feed Tracking Mode</h3>
<p>Pick Feed mode when the URL you are monitoring is a structured list that updates over time:</p>
<ul>
<li><strong>RSS and Atom feeds</strong> (<code>/feed</code>, <code>/rss.xml</code>, <code>/atom.xml</code>, <code>/feeds/posts/default</code>, <code>/index.xml</code>)</li>
<li><strong>XML sitemaps</strong> (<code>/sitemap.xml</code>, <code>/sitemap_index.xml</code>)</li>
<li><strong>GitHub release and commit Atom feeds</strong> (<code>github.com/owner/repo/releases.atom</code>)</li>
<li><strong>Reddit subreddit feeds</strong> (<code>reddit.com/r/subreddit/.rss</code>)</li>
<li><strong>Podcast feeds</strong></li>
<li><strong>Inventory grids and card-based HTML pages</strong> (detected via DOM pattern matching)</li>
</ul>
<p>PageCrawl auto-detects the feed format when you paste the URL and switches to Feed mode automatically. You can also pick it manually from the tracking mode selector.</p>
<h3>What You Get With Feed Mode</h3>
<p>Compared to Full Page text tracking, Feed mode gives you:</p>
<table>
<thead>
<tr>
<th>Feature</th>
<th>Full Page Text</th>
<th>Feed Mode</th>
</tr>
</thead>
<tbody>
<tr>
<td>Compares raw content</td>
<td>Yes</td>
<td>No (parses items)</td>
</tr>
<tr>
<td>Reports which items changed</td>
<td>No</td>
<td>Yes, with titles and links</td>
</tr>
<tr>
<td>Ignores reordering</td>
<td>No (false alerts)</td>
<td>Yes</td>
</tr>
<tr>
<td>Deduplicates by stable key</td>
<td>No</td>
<td>Yes (guid, id, link)</td>
</tr>
<tr>
<td>Caps item count</td>
<td>No</td>
<td>Yes (configurable limit)</td>
</tr>
<tr>
<td>Runs without a browser</td>
<td>Only if page is plain text</td>
<td>Yes, for XML feeds</td>
</tr>
<tr>
<td>Handles "No exact matches" fallbacks</td>
<td>No</td>
<td>Yes</td>
</tr>
</tbody>
</table>
<p>The end result: fewer false alerts, clearer notifications, and lower monitoring cost per check.</p>
<h3>Supported Formats</h3>
<p>Feed tracking mode parses:</p>
<ul>
<li><strong>RSS 2.0</strong> including <code>&lt;guid&gt;</code>, <code>&lt;enclosure&gt;</code>, <code>&lt;media:content&gt;</code>, and <code>&lt;content:encoded&gt;</code></li>
<li><strong>RSS 1.0 / RDF</strong> including <code>rdf:about</code> identifiers</li>
<li><strong>Atom 1.0</strong> including <code>&lt;link rel="alternate"&gt;</code> and <code>&lt;media:thumbnail&gt;</code></li>
<li><strong>XML Sitemap</strong> (<code>&lt;urlset&gt;</code>) and sitemap index (<code>&lt;sitemapindex&gt;</code>)</li>
<li><strong>JSON Feed</strong> (<code>jsonfeed.org/version/1</code>)</li>
<li><strong>Generic repeating XML</strong> when an XML file has a list-like structure</li>
</ul>
<p>For HTML pages like product grids, inventory lists, or news listings, Feed mode falls back to DOM pattern detection, which identifies repeated card-like elements on the page and tracks them as items.</p>
<h3>How Detection Works</h3>
<p>When you paste a URL into Track New Page, PageCrawl performs a content-based check:</p>
<ol>
<li>Fetches the URL</li>
<li>Looks at the content type and first few bytes of the body</li>
<li>If it looks like XML, parses it with a namespace-aware XML parser</li>
<li>Identifies the feed format (RSS / Atom / Sitemap / etc.) by root element</li>
<li>Returns the detected format to the interface, which auto-switches to Feed mode</li>
</ol>
<p>If the detection cannot classify the URL as an XML feed, the tracking mode stays at Full Page and you can switch to Feed manually if you want to use DOM pattern detection on an HTML page.</p>
<h3>Item Limit</h3>
<p>Every feed tracking element has a <strong>Track first N items</strong> cap. The default is 10 for new monitors. You can raise it up to your plan's maximum.</p>
<p>The limit exists for three reasons:</p>
<ol>
<li><strong>Avoid noise from variable-count pages.</strong> Some pages show a different number of items between checks (inventory pages, infinite-scroll feeds). Capping at a fixed count prevents fluctuations from triggering false change alerts.</li>
<li><strong>Keep storage manageable.</strong> A sitemap with 50,000 URLs would create a 50,000-item JSON blob per check. The cap prevents this.</li>
<li><strong>Focus on fresh content.</strong> Most of the time you care about the newest items. Tracking the first 10-20 entries is almost always enough.</li>
</ol>
<h3>How "First N" Is Decided</h3>
<p>For RSS and Atom feeds, "first N" means the first N items in document order, which is the convention these formats use to put the newest items at the top. Reading position 0 through N-1 gives you the N most recent posts.</p>
<p>XML sitemaps are different. There is no convention requiring sitemaps to list new URLs first. New pages can appear anywhere in the file, including appended at the bottom. To handle this, PageCrawl sorts sitemap entries by their <code>&lt;lastmod&gt;</code> date (newest first) before applying the cap, so the most recently modified URLs always win.</p>
<p>For sitemaps that do not include <code>&lt;lastmod&gt;</code> on every URL, the dated entries are sorted first and the dateless entries fall to the bottom of the sort in their original document order. If you need to track every page on a very large sitemap regardless of modification date, use <a href="/help/features/article/page-discovery">Page Discovery</a> instead - it auto-monitors new pages as they appear without depending on the position-based cap.</p>
<table>
<thead>
<tr>
<th>Plan</th>
<th>Maximum Items Per Feed</th>
</tr>
</thead>
<tbody>
<tr>
<td>Free</td>
<td>10</td>
</tr>
<tr>
<td>Standard</td>
<td>100</td>
</tr>
<tr>
<td>Enterprise</td>
<td>1,000</td>
</tr>
<tr>
<td>Ultimate</td>
<td>10,000</td>
</tr>
</tbody>
</table>
<p>The default is 10 across all plans. You can raise it from the tracking mode panel any time after the monitor is created.</p>
<h3>What Triggers a Change Alert</h3>
<p>By default, Feed mode notifies you when items are <strong>added</strong> to the feed. You can also opt into:</p>
<ul>
<li><strong>Items removed</strong> – something disappeared from the feed</li>
<li><strong>Content changed</strong> – an item's title or body was edited after publication</li>
<li><strong>Price changed</strong> – an item's price updated (for product feeds)</li>
<li><strong>Order changed</strong> – items were reordered (off by default since most feeds reorder as new items arrive)</li>
</ul>
<p>Each item is identified by a stable key in this order: GUID → link → title. That means content changes on the same item are correctly recognized as updates, not as a new item.</p>
<h3>Monitoring Frequency</h3>
<p>Feed mode runs via a lightweight HTTP fetch without a browser, so you can check feeds frequently without burning through plan limits:</p>
<table>
<thead>
<tr>
<th>Feed Type</th>
<th>Recommended Frequency</th>
</tr>
</thead>
<tbody>
<tr>
<td>Security advisories</td>
<td>Every 15 minutes</td>
</tr>
<tr>
<td>News and competitor blogs</td>
<td>Every 30 to 60 minutes</td>
</tr>
<tr>
<td>GitHub release feeds</td>
<td>Every 1 to 2 hours</td>
</tr>
<tr>
<td>Podcast feeds</td>
<td>Every 6 to 12 hours</td>
</tr>
<tr>
<td>Sitemaps for large sites</td>
<td>Every 1 to 4 hours</td>
</tr>
<tr>
<td>Low-volume blogs</td>
<td>Daily</td>
</tr>
</tbody>
</table>
<p>Note: if you raise the frequency below 30 minutes on a browser-only feed (an HTML inventory page rather than an XML feed), PageCrawl will use the browser engine for reliability.</p>
<h3>Common Examples</h3>
<p><strong>GitHub release feed:</strong></p>
<pre><code>https://github.com/owner/repo/releases.atom</code></pre>
<p><strong>WordPress blog:</strong></p>
<pre><code>https://example.com/feed/</code></pre>
<p><strong>Reddit subreddit:</strong></p>
<pre><code>https://www.reddit.com/r/webdev/.rss</code></pre>
<p><strong>Site sitemap:</strong></p>
<pre><code>https://example.com/sitemap.xml</code></pre>
<p>For each of these, paste the URL into Track New Page. PageCrawl detects the format, switches to Feed mode, and shows the first 10 items as a preview before you save.</p>
<h3>Related Articles</h3>
<ul>
<li><a href="/blog/monitor-rss-feeds">Monitor RSS feeds and get alerts for new content</a> – broader guide comparing RSS monitoring approaches</li>
<li><a href="/help/features/article/sitemap-monitoring">Sitemap monitoring</a> – automatically discover new pages across a website</li>
<li><a href="/help/features/article/api-webhooks-for-custom-integrations">Webhook integrations</a> – route feed alerts to Slack, Discord, or custom automations</li>
<li><a href="/help/reduce-false-positives/article/reduce-false-positives-monitoring-website-for-changes">Reduce false positives</a> – tune your monitors for cleaner alerts</li>
</ul>]]>
            </summary>
                                    <updated>2026-04-11T09:04:56+00:00</updated>
        </entry>
            <entry>
            <title><![CDATA[Thumbs Up and Thumbs Down: Giving Feedback on Detected Changes]]></title>
            <link rel="alternate" href="https://pagecrawl.io/help/features/article/thumbs-up-thumbs-down-feedback" />
            <id>https://pagecrawl.io/98</id>
            <author>
                <name><![CDATA[PageCrawl.io]]></name>
            </author>
            <summary type="html">
                <![CDATA[<h1>Thumbs Up and Thumbs Down: Giving Feedback on Detected Changes</h1>
<p>Every time PageCrawl detects a change, you can give quick feedback with the thumbs up and thumbs down buttons. This feedback helps you organize your review workflow and tells PageCrawl which changes are useful and which ones are noise.</p>
<h3>Where to Find the Buttons</h3>
<p>The feedback buttons appear in several places:</p>
<ul>
<li><strong>Page view</strong>, next to each detected change in the timeline</li>
<li><strong>Review Board</strong>, when opening a change card</li>
<li><strong>Email notifications</strong>, as quick-action buttons at the bottom of each change email</li>
<li><strong>Slack, Discord, Microsoft Teams, and Telegram notifications</strong>, as inline action buttons next to each detected change</li>
<li><strong>Browser extension</strong>, when reviewing changes on the go</li>
</ul>
<p>You can give feedback directly from any of the notification channels above, no login required. You are taken to a short confirmation page that records the feedback, then returned to the change (or a simple confirmation screen if you are not signed in).</p>
<h3>What Happens When You Press Thumbs Up</h3>
<p>Pressing thumbs up flags the change as <strong>important</strong> or useful. This tells PageCrawl:</p>
<ul>
<li>The change is the kind of update you want to be notified about</li>
<li>Similar changes on this page should continue to be surfaced</li>
<li>The change has been reviewed, so it is marked as seen automatically</li>
</ul>
<p>If your workspace has <strong>feedback auto-review</strong> enabled, the change card also moves from "To Review" to your chosen destination lane on the Review Board (for example, a "Reviewed" or "Important" lane). You can configure which lane thumbs-up feedback moves cards to from the Review Board settings.</p>
<h3>What Happens When You Press Thumbs Down</h3>
<p>Pressing thumbs down flags the change as <strong>noise</strong> or irrelevant. This does several things:</p>
<ol>
<li><strong>The change is marked as seen</strong> so it no longer counts as unread</li>
<li><strong>PageCrawl learns from the feedback</strong> and may automatically filter similar irrelevant changes on the same page in the future</li>
<li><strong>You may be offered a suggested action</strong> to prevent this type of change from triggering alerts again. Depending on what changed, you might see:<ul>
<li><strong>"Ignore numbers"</strong> if the change was only numeric (view counts, stock tiers, price variants that do not matter to you)</li>
<li><strong>"Remove dates"</strong> if the change was a date or timestamp update</li>
<li><strong>"Ignore this text"</strong> if a specific phrase repeatedly appears in the diff</li>
</ul>
</li>
<li><strong>The card moves to your configured "noise" lane</strong> on the Review Board, if feedback auto-review is enabled</li>
</ol>
<p>You can accept or dismiss the suggested action. Accepting it applies the filter so similar changes are automatically filtered on future checks.</p>
<h4>Inverse Pattern Warning</h4>
<p>If you press thumbs down on a change involving <strong>state-toggle text</strong> (for example, "in stock" to "out of stock", "available" to "unavailable", "open" to "closed"), PageCrawl shows a warning. This is because telling the system to ignore a change in one direction could cause it to also ignore the reverse change, which is often something you actually want to be alerted about. Read the warning carefully before confirming.</p>
<h3>When Should You Press Thumbs Up?</h3>
<p>Press thumbs up when:</p>
<ul>
<li>The detected change is exactly the kind of update you set up this monitor for</li>
<li>You want to confirm that a pricing, availability, or content change was correctly caught</li>
<li>You want to keep a record of meaningful changes in your "Important" or "Reviewed" lane</li>
<li>You want to train PageCrawl to continue surfacing this type of change</li>
</ul>
<p>Examples:</p>
<ul>
<li>A competitor dropped their price from $49 to $39</li>
<li>A job listing you were tracking has been posted</li>
<li>A terms-of-service page added a new clause</li>
<li>A product page switched from "Out of stock" to "In stock"</li>
</ul>
<h3>When Should You Press Thumbs Down?</h3>
<p>Press thumbs down when:</p>
<ul>
<li>The change is not relevant to your monitoring goal</li>
<li>The detected text is noise, like a timestamp, view counter, random tagline, or rotating banner</li>
<li>The same type of irrelevant change keeps triggering alerts</li>
<li>You want to train PageCrawl to filter out similar changes on future checks</li>
</ul>
<p>Examples:</p>
<ul>
<li>The page says "Last updated 3 minutes ago" and that timestamp keeps changing</li>
<li>A "Users online: 1,234" counter triggered the alert</li>
<li>A rotating testimonial or hero image caption changed</li>
<li>A footer copyright year was updated</li>
<li>A "Trending now" section showed a different product</li>
</ul>
<p>Press thumbs down even if the change is minor. Over time, consistent feedback makes your monitors much quieter and more precise.</p>
<h3>When Should You Not Press Either?</h3>
<p>If a change is neutral (neither clearly useful nor clearly noise), you can leave it without feedback and simply mark it as reviewed. Feedback is not mandatory. Only use it when you have a clear opinion, because consistent signals produce better filtering than mixed ones.</p>
<h3>Clearing Feedback</h3>
<p>If you change your mind, reopen the change and press the same button again to clear the flag, or press the opposite button to overwrite the previous feedback. Clearing feedback does not automatically remove any filters that were added as a result of it. Those filters are managed separately under the page's actions and ignore rules.</p>
<h3>Tips for Better Results</h3>
<ul>
<li><strong>Be consistent.</strong> The more feedback you give, the faster PageCrawl learns what you care about.</li>
<li><strong>Accept suggested actions when they look right.</strong> A single "Ignore numbers" or "Remove dates" action can eliminate most repeat false positives on a page.</li>
<li><strong>Configure auto-review lanes</strong> on the Review Board so feedback also organizes your workflow, not just your filtering.</li>
<li><strong>Use feedback from notification channels</strong> (email, Slack, Discord, Teams, Telegram) when you are away from the app. They work with no login required.</li>
<li><strong>Review your filters periodically.</strong> Feedback-driven filters live alongside the page's other actions and ignore rules, and can be edited or removed any time.</li>
</ul>
<h3>Related</h3>
<ul>
<li><a href="/help/features/article/review-board">Review Board</a> for organizing changes into lanes based on feedback</li>
<li><a href="/help/reduce-false-positives/article/reduce-false-positives-monitoring-website-for-changes">Reducing False Positives</a> for a complete guide to quieter monitors</li>
<li><a href="/help/features/article/ai-powered-change-detection">AI-Powered Change Detection</a> for how AI priority scores work alongside your feedback</li>
</ul>]]>
            </summary>
                                    <updated>2026-04-16T09:45:39+00:00</updated>
        </entry>
    </feed>
